

Last Updated on March 16, 2026 by Indoor Plant Nook
Root pruning is one of the most powerful — and potentially dangerous — techniques in bonsai care. Done correctly, it invigorates your tree, encourages a refined nebari (surface root structure), and keeps your bonsai thriving in a small container for decades. Done incorrectly, or without proper aftercare, it opens the door to a cascade of root problems that can weaken or even kill your tree.
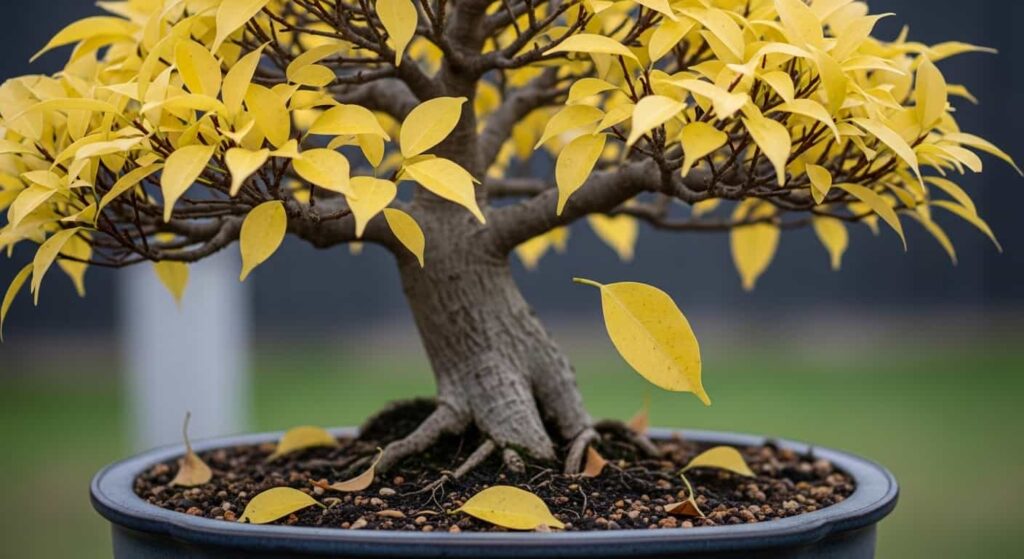
If your bonsai has shown signs of stress after a recent root pruning session — yellowing leaves, wilting, stunted growth, or an unpleasant smell from the soil — you are not alone. Root problems after pruning are among the most frequently reported issues by bonsai enthusiasts at every skill level.
This complete guide covers everything you need to know: why root problems occur after pruning, how to identify each type of problem, step-by-step treatment methods, and how to prevent these issues from coming back.
Why Root Pruning Can Cause Problems
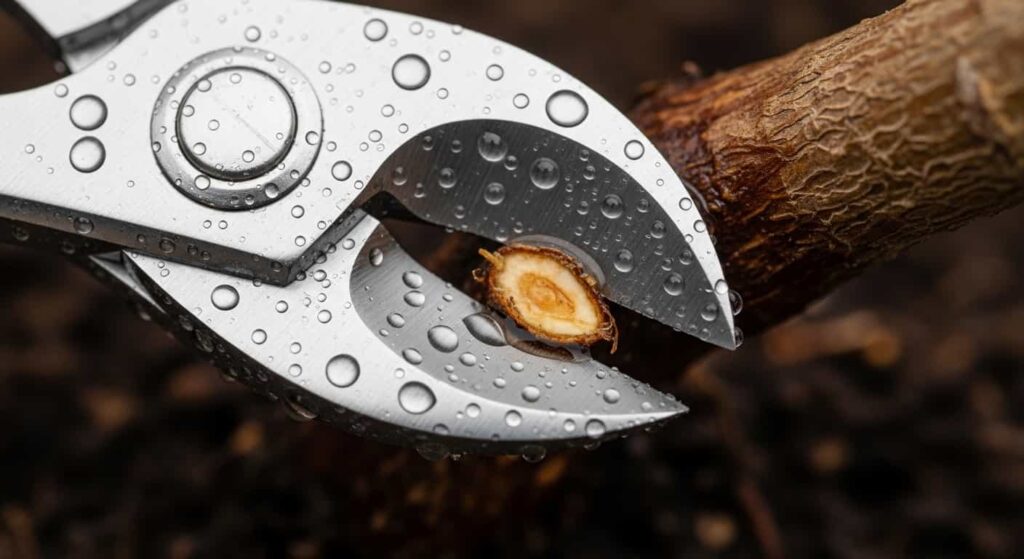
Root pruning creates open wounds on living tissue. Every cut exposes the vascular system of the tree to the external environment — including bacteria, fungi, pests, and fluctuating moisture levels. Under optimal conditions, the tree heals quickly, calluses form, and new feeder roots develop within weeks. Under suboptimal conditions, however, those wounds become entry points for disease.
There are several reasons why root problems develop after pruning:
Too much was removed at once. The general guideline for most species is to remove no more than one-third of the root mass in a single session. Removing more than this deprives the canopy of water and nutrients before new roots can compensate.
Poor tool hygiene. Unsterilized scissors or root hooks carry fungal spores and bacteria from one plant to another — or from contaminated soil to fresh wounds.
Wrong timing. Pruning roots during summer heat stress, mid-winter dormancy, or active flowering drains resources the tree needs for healing.
Incorrect aftercare. Overwatering freshly pruned roots is the single most common cause of post-pruning root rot. Without a full root system to take up water, the excess sits in the soil and creates the anaerobic conditions that pathogens love.
Poor drainage in the pot. Even a well-done root prune can lead to problems if the pot lacks adequate drainage holes or the soil mix retains too much moisture.
Common Bonsai Root Problems After Pruning
1. Root Rot (Pythium, Phytophthora, Fusarium)
Root rot is the most serious and common post-pruning problem. It is caused by water mold pathogens or fungi that thrive in wet, oxygen-deprived soil. Freshly pruned roots are especially vulnerable because their cut surfaces are exposed before calluses form.
2. Root Die-Back
Root die-back refers to the progressive death of root tissue from the tip inward. It can be caused by pathogens, physical damage during pruning, freezing, or severe drought immediately after repotting.
3. Root Dehydration
Counterintuitively, roots can dry out even when the tree is watered. If too much root mass is removed, the remaining roots may not be able to absorb water efficiently enough to keep pace with transpiration from the leaves and branches.
4. Root Infection by Soil Pests
Vine weevil larvae, fungus gnat larvae, and springtails can exploit freshly disturbed soil and damaged root tissue. Larvae in particular chew through feeder roots, compounding the damage from pruning.
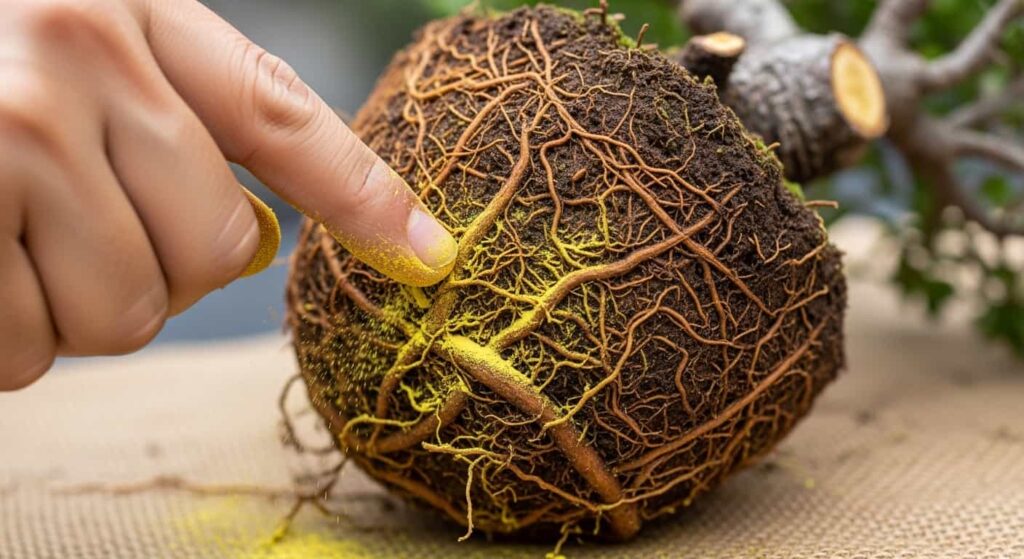
5. Girdling or Circling Roots (Pre-existing)
Root pruning sometimes exposes pre-existing girdling roots — roots that wrap around the base of the trunk or cross other roots. If these are cut or disturbed without being properly addressed, they can cause long-term structural problems.
6. Root Collar Rot
The root collar (the flare where the trunk meets the roots) is particularly susceptible to fungal infections when it is kept moist after repotting. Burying the root collar too deep in the new soil mix compounds this risk.
Signs Your Bonsai Has Root Problems
Catching root problems early dramatically improves recovery outcomes. Watch for these symptoms in the weeks following root pruning:
Above-ground symptoms:
- Leaves are yellowing or dropping prematurely
- Wilting that does not recover after watering
- New growth that looks weak, pale, or stunted
- Branch tips are dying back progressively
- Bark appearing dry, shrunken, or discolored near the base
Below-ground symptoms (check carefully):
- Black, brown, or mushy roots (healthy roots are firm and white to tan)
- Foul, sulfurous, or sour smell from the soil
- Soil that stays wet far longer than normal
- Visible white mold threads (mycelium) on roots or soil surface
- Roots that pull away from the soil easily due to decay
If you notice any combination of these signs within two to six weeks of root pruning, act immediately rather than waiting to see if the tree recovers on its own.
Root Rot After Pruning
Root rot deserves its own dedicated section because it is both the most common and the most mismanaged of all post-pruning root problems.
How Root Rot Develops
When you prune roots, the remaining root system is temporarily unable to take up as much water as before. If you continue watering at the same frequency, water accumulates in the lower layers of the pot. This displaces oxygen from the soil pores, creating anaerobic conditions. Anaerobic environments are the ideal breeding ground for Pythium, Phytophthora, and Fusarium — the three most common root rot pathogens in bonsai.
Within days to weeks, these pathogens colonize the cut root surfaces and begin spreading through healthy root tissue. The tree loses its ability to take up water and nutrients even as its canopy continues to transpire, resulting in what looks like drought stress, despite the soil being wet.
Diagnosing Root Rot
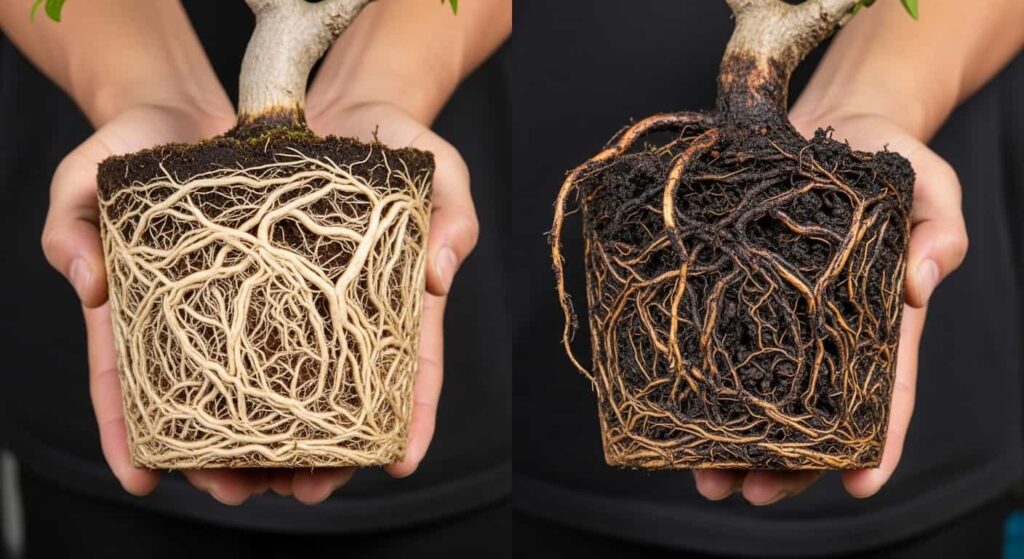
Carefully unpot the tree and examine the roots. Healthy roots are firm, white to light tan, and slightly springy. Rotten roots are dark brown to black, soft or mushy, and may release a foul odor when pressed or broken.
Note how far the rot has progressed. If it is limited to the tips of secondary roots, recovery is likely. If it has reached primary roots or the root collar, the situation is serious but not necessarily hopeless.
Treating Root Rot Step by Step
Step 1: Unpot and assess. Remove the tree from its pot and gently shake away as much old soil as possible without further damaging roots.
Step 2: Remove all affected tissue. Using sharp, sterilized scissors (wipe blades with isopropyl alcohol between cuts), remove every root that is black, brown, or mushy. Cut back to clean white tissue. If in doubt, cut further.
Step 3: Apply a fungicide. Dust cut surfaces with powdered sulfur or cinnamon (a natural antifungal), or apply a diluted systemic fungicide such as thiophanate-methyl or fosetyl-aluminum according to label instructions. Allow roots to air dry briefly — 10 to 15 minutes — before repotting.
Step 4: Repot into fresh, well-draining soil. Do not reuse contaminated soil. Use an inorganic-heavy mix (see the section on soil below).
Step 5: Adjust watering. Water sparingly for the first two to four weeks, allowing the top layer of soil to approach dryness between waterings.
Step 6: Reduce canopy load. If root loss was significant, remove up to one-third of the canopy by pruning branches. This reduces transpiration demand and gives the diminished root system a fighting chance to recover.
Root Damage and Die-Back
Physical root damage during pruning — crushing, tearing, or bruising — creates entry points for pathogens even if the cut itself is clean. Die-back typically progresses from the wound site toward the trunk over a period of days to weeks.
Preventing Root Die-Back
- Always use sharp, clean tools. Dull scissors crush tissue; sharp scissors cut cleanly.
- Avoid pulling or ripping roots. Cut them deliberately.
- Treat all cut surfaces immediately with wound sealant, sulfur powder, or cut paste formulated for bonsai.
- Never let exposed roots dry out in open air for extended periods during repotting.
Treating Die-Back
If you identify die-back in progress — visible as a darkening line moving from a cut root toward the trunk — unpot the tree immediately and trace the die-back to its extent. Cut cleanly beyond the darkened zone, treat with fungicide, and repot as described above.
Repotting Shock vs. Root Problems
It is important to distinguish between normal repotting shock and genuine root problems, as the management is quite different.
Repotting shock is a normal physiological response to the stress of root pruning and environmental change. Symptoms include temporary leaf drop, reduced new growth, and slight wilting. The tree looks unhappy but is not deteriorating. Most healthy trees recover from repotting shock within four to eight weeks without any special intervention beyond appropriate watering and protection from harsh conditions.
Root problems, by contrast, are progressive. The tree does not stabilize — it continues to decline. Leaves continue to yellow and drop. Branches begin to die back sequentially. The soil may smell sour. If you check the roots, they show signs of decay.
The key diagnostic question is: Is the tree stable or is it getting worse? If conditions are stable or improving after two weeks, it is likely a repotting shock. If conditions are deteriorating, you are dealing with a root problem that requires active intervention.
How to Treat Bonsai Root Problems After Pruning
General Treatment Protocol
Regardless of the specific root problem, the following framework applies to most post-pruning root issue treatments:
1. Isolate the tree. Move the affected bonsai away from other plants to prevent the spread of any pathogens or pests.
2. Examine the root system. Unpot carefully. Assess the extent and nature of the problem before deciding on treatment.
3. Prune away all dead or diseased tissue. Be thorough. Leaving any diseased tissue behind creates a reservoir for re-infection.
4. Sterilize tools between every cut. Use 70% isopropyl alcohol or a 10% bleach solution.
5. Treat wounds. Apply antifungal powder, cut paste, or wound sealant to all cut surfaces.
6. Repot into fresh, sterile, well-draining media. Do not reuse contaminated soil or a pot.
7. Manage aftercare carefully. Water judiciously, provide indirect light initially, and avoid fertilizing until new growth appears.
8. Monitor closely. Check roots again in four to six weeks if symptoms persist.
Advanced Treatment: Hydrogen Peroxide Drench
A diluted hydrogen peroxide drench (3% food-grade hydrogen peroxide mixed 1:4 with water) can be used to oxygenate the root zone and kill anaerobic pathogens. Water the tree with this solution once, then return to normal filtered water. This is a useful rescue technique for mild to moderate root rot cases.
Mycorrhizal Inoculants
After treating root problems and repotting into fresh media, introducing mycorrhizal fungi to the root zone can accelerate recovery. These beneficial fungi form symbiotic relationships with bonsai roots, dramatically improving water and nutrient uptake. Apply mycorrhizal powder directly to cut root surfaces before repotting.
Best Soil Mix to Prevent Root Problems
Soil is your most powerful tool for preventing root problems after pruning. The ideal bonsai soil mix after root pruning is fast-draining, coarse, and primarily inorganic.
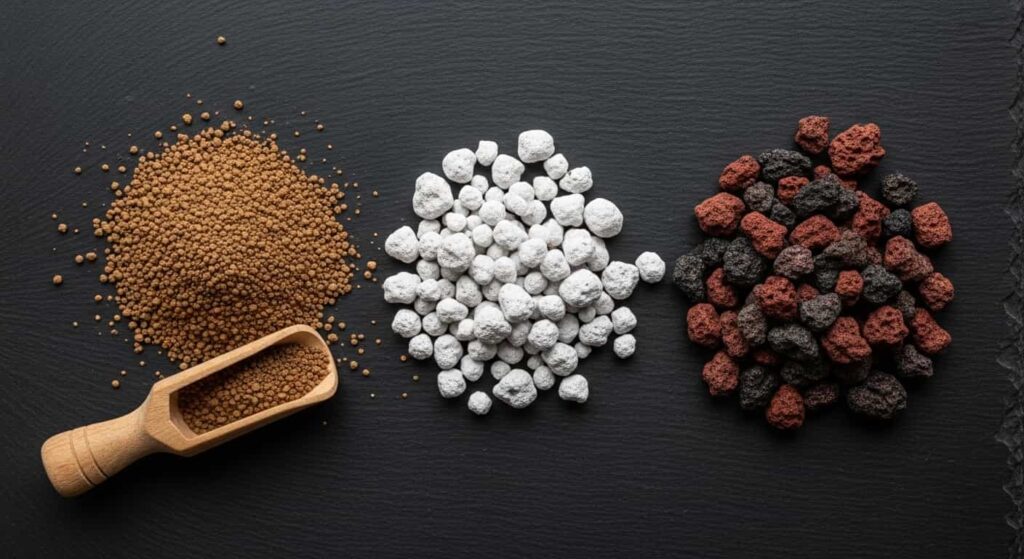
Recommended Post-Pruning Soil Components
| Component | Proportion | Function |
|---|---|---|
| Akadama | 30–40% | Water retention, root support |
| Pumice | 30–40% | Drainage, aeration |
| Lava rock (kiryu) | 20–30% | Drainage, aeration, mineral nutrients |
Avoid peat-based mixes, heavy organic composts, or any soil that stays wet for more than two days after watering. These create exactly the conditions that encourage root rot.
For tropical species that prefer slightly more moisture retention (ficus, fukien tea, jade), you can increase akadama to 50% and reduce lava rock accordingly.
Watering After Root Pruning
Watering correctly after root pruning is probably the single most impactful thing you can do to prevent root problems.
Reduce frequency, not volume. When you water, water thoroughly until it flows from the drainage holes. But wait longer between waterings than you normally would. Stick a chopstick or wooden skewer 2–3 cm into the soil — water only when it comes out nearly dry.
Never let the tree sit in standing water. Ensure drainage holes are clear and the pot is not sitting in a saucer full of water.
Mist the foliage. To compensate for the reduced water uptake capacity of a pruned root system, lightly misting the leaves two to three times daily reduces transpiration stress without adding water to an already-stressed root zone.
Use room-temperature water. Cold water can shock stressed root tissue and slow recovery.
Fertilizing After Root Pruning
Do not fertilize immediately after root pruning. Freshly cut roots cannot efficiently absorb fertilizer, and high-nitrogen salts in the soil can chemically burn exposed tissue, creating additional entry points for pathogens.
Wait for active new growth. The first flush of new leaves or shoots is your signal that the root system has recovered enough to begin fertilizing again.
Start light. Begin with a half-strength, balanced liquid fertilizer (equal N-P-K ratios). After two to three feedings with no adverse reaction, you can return to your normal fertilizing schedule.
Avoid high-nitrogen formulas initially. Once the tree is actively recovering, a slightly higher phosphorus formulation (such as 10-20-10) supports root development specifically.
Species-Specific Root Pruning Considerations
Different species have different tolerances for root pruning and different recovery requirements. Understanding your species is essential.
Junipers (Juniperus spp.)
Junipers are moderately tolerant of root pruning but strongly dislike wet feet. After pruning, use an extremely free-draining mix and water very conservatively. Junipers do not respond well to emergency re-pruning — get it right the first time.
Japanese Maple (Acer palmatum)
Maples have fine, fibrous root systems and recover relatively quickly from root pruning, especially when done in early spring just as buds begin to swell. They are, however, susceptible to root rot in heavy soils.
Ficus (Ficus spp.)
Ficus are among the most forgiving bonsai species for root work. They can tolerate aggressive root pruning and recover quickly, especially in warm conditions. Keep them warm (above 15°C/59°F) after repotting.
Pines (Pinus spp.)
Pines are highly dependent on mycorrhizal fungi and are sensitive to root pruning if done at the wrong time. Always prune pine roots in early spring and retain as much of the existing soil and mycorrhizal network as possible. Introducing fresh mycorrhizal inoculant at repotting is particularly important for pines.
Chinese Elm (Ulmus parvifolia)
Chinese elms are highly adaptable and tolerate root pruning well year-round in temperate climates. They recover quickly and can withstand fairly aggressive root reduction.
Trident Maple (Acer buergerianum)
Trident maples have vigorous root systems and respond excellently to root pruning, particularly in early spring. They are less susceptible to post-pruning root rot than many other species.
When to Call It a Lost Cause
Sometimes, despite best efforts, a bonsai cannot be saved after severe root problems. Knowing when to stop investing resources — and what to do instead — is an important part of bonsai practice.
Signs the tree may be beyond recovery:
- All primary and secondary roots are completely black and mushy, with no white tissue remaining
- The trunk is soft, discolored, or hollow at the base
- No new growth has appeared for six or more weeks despite appropriate aftercare
- The bark is peeling away from the live wood over large areas
What to do:
Before giving up entirely, consider air-layering any healthy upper branches to preserve the genetics and styling of the tree in a new plant. Even a dead or dying bonsai can yield viable material for new projects.
If the trunk base itself is healthy but all roots are lost, some species — particularly ficus, elm, and willow — can be encouraged to regenerate roots from the trunk base using high-humidity propagation techniques such as rooting in moss or a humidity chamber.
Prevention Checklist
Use this checklist every time you perform root pruning:
- [ ] Prune roots only during the appropriate season for your species
- [ ] Remove no more than one-third of the root mass in a single session
- [ ] Sterilize all tools before and during root work
- [ ] Use sharp, clean cutting tools only — no tearing or ripping
- [ ] Treat all cut surfaces with antifungal powder or cut paste immediately
- [ ] Repot into fresh, well-draining, inorganic-dominant soil
- [ ] Ensure the new pot has adequate drainage holes
- [ ] Do not reuse old, potentially contaminated soil
- [ ] Water sparingly for the first four to six weeks after repotting
- [ ] Place the tree in a sheltered location with indirect light during recovery
- [ ] Do not fertilize until new growth appears
- [ ] Check roots again in four to six weeks if any symptoms arise
- [ ] Keep records of pruning dates, soil mixes, and recovery progress
FAQs
How long does it take for bonsai roots to recover after pruning?
Most healthy bonsai begin showing signs of recovery — new growth, firmer leaves, improved color — within three to six weeks of root pruning, assuming proper aftercare. Full root system recovery typically takes one complete growing season.
Can I root-prune and branch-prune at the same time?
As a general rule, avoid heavy branch pruning at the same time as root pruning. Both procedures stress the tree simultaneously. If you must do both, keep branch pruning minimal — remove only dead, crossing, or clearly problematic growth.
Should I use rooting hormone after root pruning?
Rooting hormone (auxin-based products such as indole-3-butyric acid) can be applied to cut root surfaces to encourage faster regeneration of new feeder roots. It is not mandatory but can be beneficial, especially for slower-growing or older trees.
My bonsai smells bad after repotting. What does that mean?
A sour or sulfurous smell from the soil after repotting is a strong indicator of anaerobic conditions, which usually means the soil is staying too wet. It may also indicate root rot is already underway. Unpot and inspect the roots promptly.
Is it normal for a bonsai to drop leaves after root pruning?
Some leaf drop is a normal stress response and does not necessarily indicate root problems. If the remaining leaves and new growth look healthy, this is likely just repotting shock. If leaf drop continues and is accompanied by wilting, yellowing, or dieback, investigate root health.
Can I use tap water after root pruning?
Tap water is generally fine, but in areas with heavily chlorinated or fluoridated water, leaving tap water in an open container overnight allows much of the chlorine to dissipate before use. Avoid softened water, which contains sodium salts that can damage roots.
How often should I repot my bonsai to avoid root problems building up?
For most deciduous species, repotting every two to three years is standard. For conifers and slower-growing species, every three to five years. The best indicator is not a calendar date but the rate at which the root mass fills the pot — when you can no longer push a finger into the soil near the edge of the pot, it is time.
Conclusion
Root problems after pruning are preventable in the vast majority of cases. The keys are proper technique, correct timing, appropriate aftercare, and early detection of problems when they do arise. Bonsai cultivation rewards attentiveness — the grower who checks their trees regularly, adjusts watering to the tree’s actual needs, and takes action at the first sign of trouble will rarely lose a tree to post-pruning root issues.
Understanding the biology behind what happens when you cut roots — the wound response, the vulnerability to pathogens, the temporary disruption to water uptake — transforms root pruning from a risky procedure into a controlled, confident practice. With the guidance in this article, you have everything you need to prune roots safely, treat problems effectively, and grow healthier, more beautiful bonsai for years to come.