

Last Updated on March 6, 2026 by Indoor Plant Nook
Quick Win: TL;DR
- What it is: Submerging your bonsai’s root ball in water to clean, untangle, and trim the roots.
- Why do it: This technique prevents delicate feeder roots from drying out, reduces transplant shock, and makes untangling knotted roots easier.
- When to do it: Trim roots in late winter or early spring when the tree is dormant or just beginning its growth cycle.
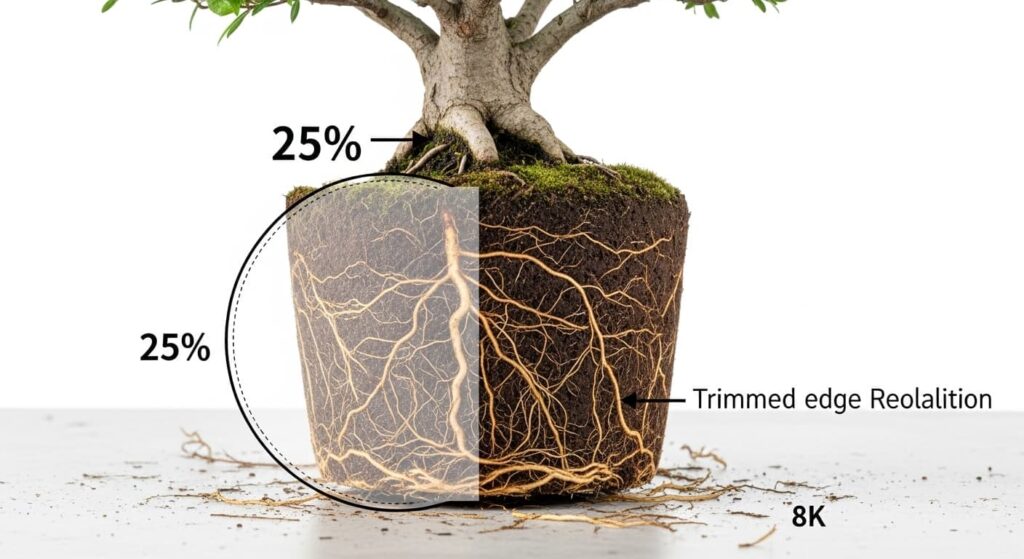
- How much to cut: Beginners should trim no more than 25% of the root mass. Mature trees can handle up to 30-40%.
- Key takeaway: Underwater root trimming is a safer, less stressful method for both beginner and experienced bonsai enthusiasts during repotting.
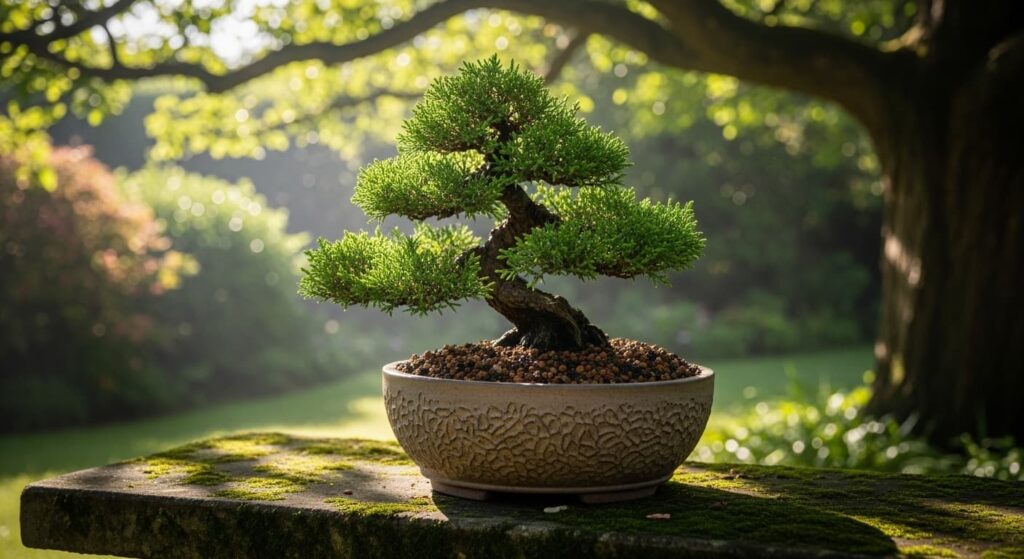
Bonsai care is a delicate art, and one of the most crucial yet intimidating tasks is root trimming. A healthy root system is the foundation of a thriving bonsai. A newer technique, bonsai root trimming underwater, is gaining favor for its gentle approach. This method can significantly reduce stress on your tree, making the repotting process smoother and more successful.
What Is Bonsai Root Trimming Underwater?
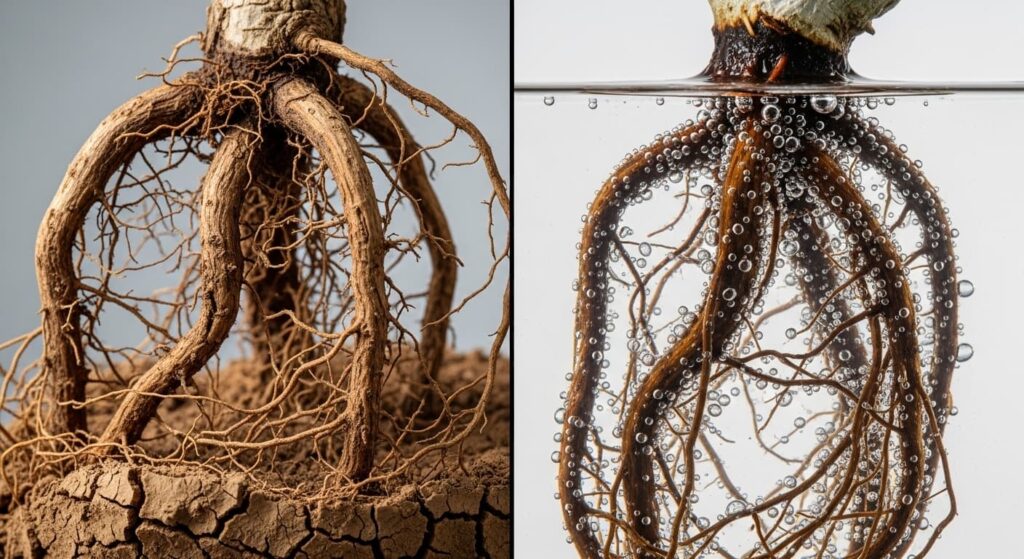
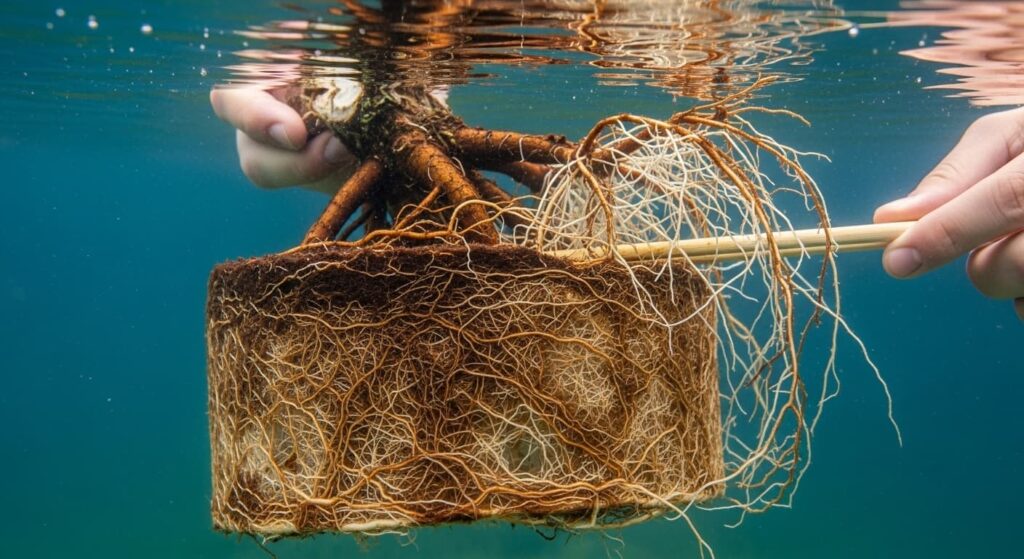
Bonsai root trimming underwater is exactly what it sounds like: the process of pruning a bonsai’s roots while the entire root ball is submerged in a basin of water. It differs significantly from traditional “dry” methods, where roots are exposed to the air.
In traditional root pruning, you remove the tree from its pot and use a root rake or chopsticks to comb out the old soil. This process, while effective, exposes the delicate feeder roots to air, causing them to dry out and die quickly. The fine, hair-like feeder roots lack a protective cuticle like leaves have, making them instantly susceptible to desiccation the moment they are no longer in contact with moist soil or water.
Underwater root pruning keeps these essential roots hydrated and protected throughout the entire process. It is especially useful for trees with compacted soil, dense root balls, or for enthusiasts who want to minimize transplant shock. This technique mirrors how professional nurseries handle bare-rooting sensitive specimens, giving it an industry-backed credibility.
Why Trim Bonsai Roots Underwater?
This method offers several distinct advantages that contribute to the overall health and vitality of your tree.
Prevents Root Shock
When fine feeder roots are exposed to air, they can dry out in minutes. This damage is a primary cause of transplant shock, where a tree struggles to absorb water and nutrients after repotting. By keeping the roots submerged, you ensure they stay hydrated and viable, leading to a much faster recovery.
Helps Untangle Roots Easily
Water acts as a natural lubricant. It helps wash away compacted soil and allows you to gently tease apart tangled and circling roots with minimal breakage. The buoyancy of the water supports the roots, making the job of combing out the root ball much less aggressive and damaging.
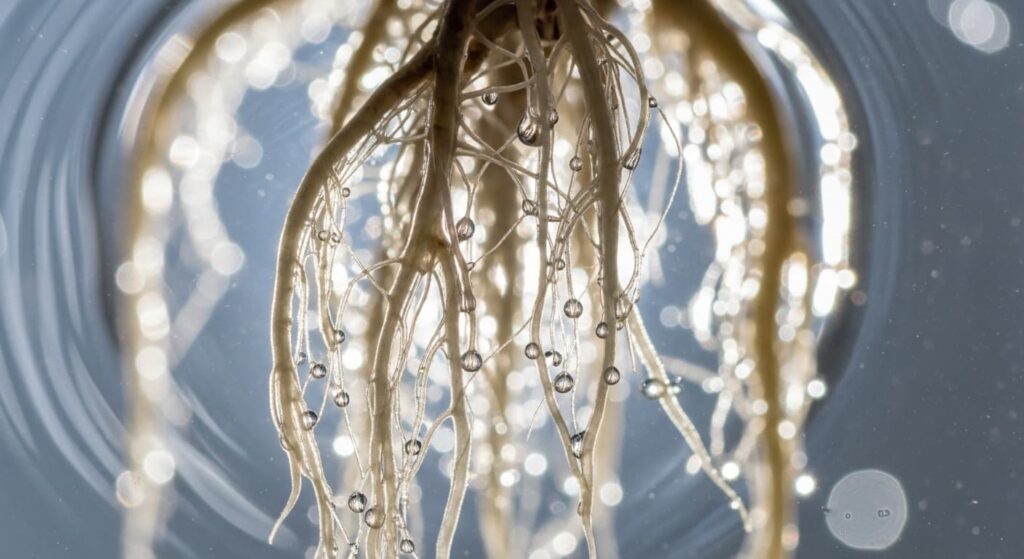
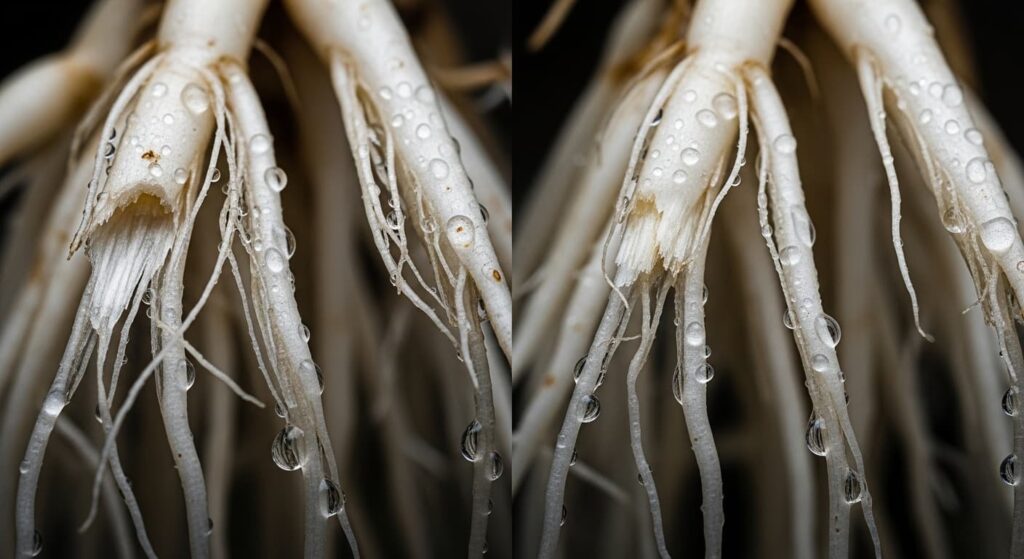
Keeps Fine Feeder Roots Alive
The tiny, hair-like feeder roots are responsible for most of the water and nutrient absorption. They are incredibly fragile. The underwater method is the best way to preserve them, giving your bonsai the best possible start in its new pot.
Reduces Stress During Repotting
Repotting is an inherently stressful event for any plant. By minimizing root damage and dehydration, underwater trimming significantly lowers the overall stress on your bonsai. A less-stressed tree will bounce back quicker, showing new growth sooner than one repotted using traditional methods.
When Should You Trim Bonsai Roots?
Timing is everything in bonsai care. Pruning at the right time ensures your tree has the energy and resources to recover quickly.
Best Season for Root Pruning
- Early Spring: This is the ideal time for most bonsai species. As the tree awakens from dormancy, its stored energy is ready to fuel new root and foliage growth, promoting rapid recovery.
- Late Winter Dormancy: For deciduous trees that have dropped their leaves, late winter is also a great window. The tree is fully at rest, and pruning before the spring push allows it to heal before its active growth period begins.
Signs Your Bonsai Needs Root Trimming
- Roots Circling the Pot: If you see a dense mat of roots circling the inside edge of the pot, your tree is root-bound and needs more space.
- Slow Growth: A noticeable slowdown in leaf and branch growth during the growing season can indicate the roots have run out of room and resources.
- Soil Draining Poorly: When the pot is full of roots, there is little soil left to hold water. If water runs straight through the pot or sits on top without absorbing, it’s a clear sign that it’s time to repot and trim.
Tools Needed for Underwater Root Trimming
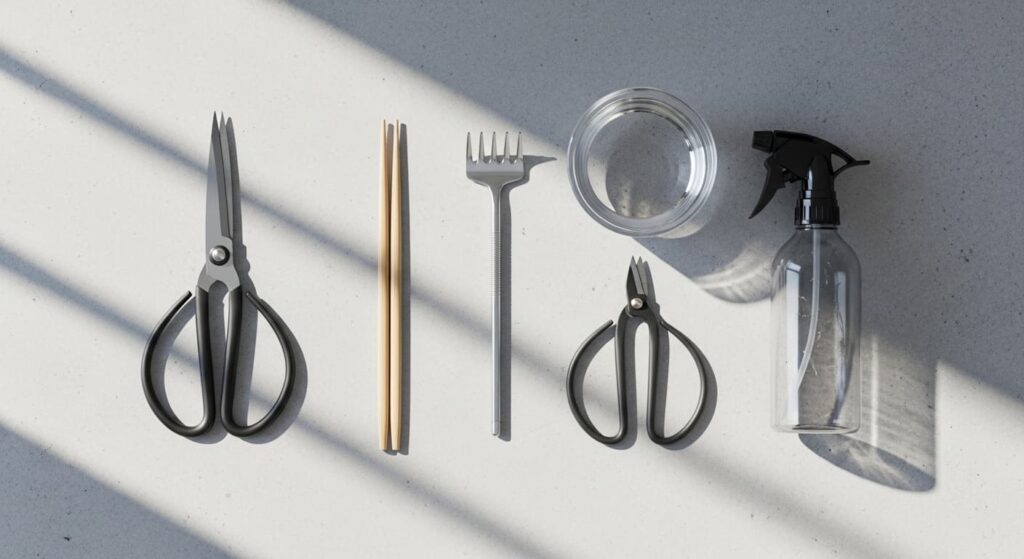
Having the right tools, clean and ready, makes the process smooth and safe for your tree.
- Bonsai Scissors or Root Cutters: Designed for making clean, precise cuts on woody roots.
- Root Rake: A single or multi-pronged tool for gently combing out soil and untangling roots.
- Chopsticks: An indispensable tool for carefully teasing apart roots and working out stubborn soil pockets.
- Water Basin or Bucket: A basin large enough to fully submerge your bonsai’s root ball. A shallow, wide container often works better than a deep bucket.
- Clean Pruning Shears: For any top pruning you may need to do to balance the tree after root work.
- Spray Bottle: Useful for misting roots if you need to lift them for inspection during the process.
Before you begin, always sanitize your tools. Wiping the blades with rubbing alcohol is a quick and effective way to prevent the spread of diseases.
Step-by-Step Guide to Bonsai Root Trimming Underwater
Follow these steps for a successful underwater root pruning session.
Step 1 — Prepare Your Workspace
Fill your basin with lukewarm or room temperature water. Ensure all your cutting tools are clean and sanitized with rubbing alcohol.
- Beginner Mistake: Using water straight from a cold tap. Cold water slows down cellular activity and can cause root cells to constrict, hindering their ability to rehydrate once potted. Always let it sit to reach room temperature.
Step 2 — Remove Bonsai from the Pot
Carefully run a knife or bonsai sickle around the inside edge of the pot to loosen the root ball. Gently wiggle the tree by its trunk base to slide it out.
- Beginner Mistake: Pulling the tree out by its trunk without loosening the root ball first, which can damage the trunk and roots.
Step 3 — Submerge the Root Ball
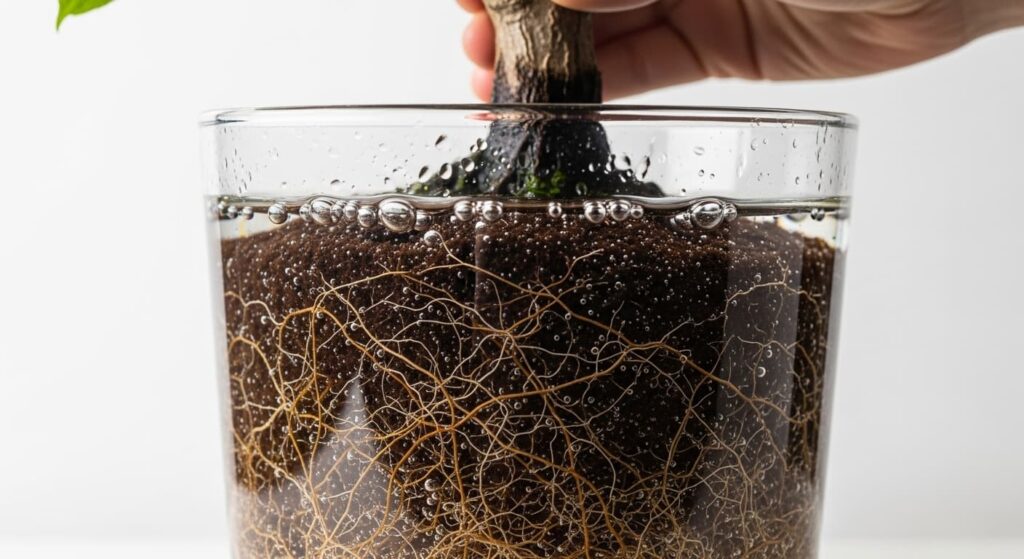
Place the entire root ball into the basin of water. Let it soak for a few minutes to allow the water to penetrate the soil.
- Beginner Mistake: Not fully submerging the roots, leaving the top portion exposed to air.
Step 4 — Gently Loosen Soil Underwater
Use your fingers and a chopstick to gently work away the old soil. Use a jabbing and prying motion with the chopstick, working from the center outwards. The water will cloud with soil—this is a good sign. Change the water if it becomes too murky to see what you’re doing.
- Beginner Mistake: Being too aggressive with a root rake right away, which can tear the delicate roots. Start with your fingers first.
Step 5 — Identify Thick vs. Feeder Roots
Once the soil is mostly gone, you can clearly see the root system. Differentiate between the thick, woody anchor roots and the fine, web-like feeder roots.
- Beginner Mistake: Treating all roots the same. The goal is to preserve the feeder roots while managing the larger structural ones.
Step 6 — Trim Long or Circling Roots
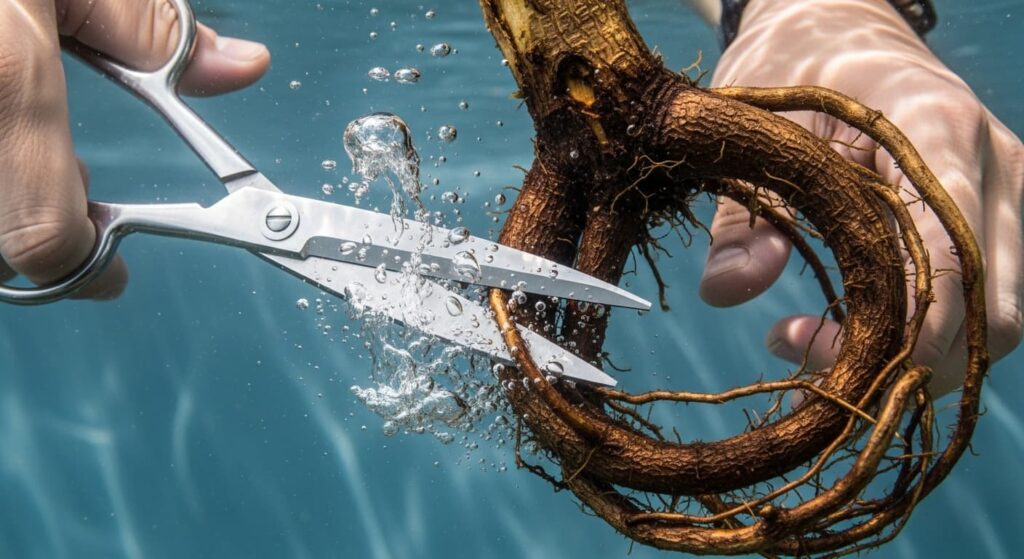
Using your sharp root cutters, trim the thick roots that are circling the bottom or sides of the root mass. Also, shorten any overly long roots to encourage finer branching closer to the trunk. After untangling, you should be left with a root ball that is roughly two-thirds its original size and has a fluffy, fibrous appearance, rather than a dense, tangled mat.
- Beginner Mistake: Cutting into the center of the root ball. Focus on trimming the outer edges and bottom.
Step 7 — Rinse Roots Carefully
Gently swish the root ball in the water to rinse away any remaining debris and soil clumps. This gives you a final, clear look at your work.
- Beginner Mistake: Vigorously shaking the roots, which can cause breakage. A gentle swishing motion is sufficient.
Step 8 — Repot in Fresh Soil
Place a layer of fresh bonsai soil in the bottom of the pot, position your tree, and work new soil in and around the roots using a chopstick to eliminate air pockets.
- Beginner Mistake: Leaving large air pockets around the roots, which can cause them to dry out and die even when the soil is watered.
How Much Root Should You Remove?
A common question is how much of the root ball to trim. The answer depends on the age and health of your tree.
- 25% Rule for Beginners: If you are new to root pruning, a conservative approach is best. Aim to remove no more than the outer 25% of the root mass.
- 30–40% for Mature Bonsai: Healthy, well-established bonsai can tolerate a more aggressive pruning of up to 40%. This encourages vigorous new root growth.
- Species Differences: Some species, like Ficus and Elms, are very resilient and recover quickly. Pines and Junipers can be more sensitive, so a lighter touch is often better.
Which Bonsai Species Benefit Most From Underwater Root Trimming?

While nearly any bonsai can benefit, some species respond particularly well to this gentle technique.
- Juniper Bonsai: Junipers have fine, delicate root systems that are prone to drying out. The underwater method protects these roots, ensuring a smoother recovery.
- Ficus Bonsai: Ficus trees are robust, but they appreciate the reduced stress. Underwater trimming helps preserve their fibrous roots, leading to a quick return to growth.
- Chinese Elm: Known for their vigorous root growth, the Chinese Elm can quickly become root-bound. Underwater pruning makes it easy to manage their dense root balls without major setbacks.
- Maple Bonsai: Maples have notoriously brittle, fleshy roots that snap easily when dry. The buoyancy and lubrication of the water make untangling them far safer, preserving these sensitive feeder roots crucial for their health.
Common Mistakes When Trimming Roots Underwater
Avoid these common pitfalls to ensure your bonsai thrives after its pruning.
- Cutting Too Many Roots: Being overzealous is the most common mistake. Stick to the 25-40% rule based on your tree’s health and your experience level.
- Using Dirty Tools: Unsanitized tools can introduce bacteria and fungus into the fresh cuts, leading to root rot and disease.
- Using Cold Water: Cold water can shock the tree’s system, slowing its recovery. Always use tepid or room temperature water.
- Damaging Feeder Roots: The primary benefit of this method is protecting feeder roots. Be gentle when combing and avoid tearing them.
Aftercare for Bonsai After Root Trimming
Proper aftercare is just as important as the pruning itself.
- Watering: Water the newly repotted bonsai thoroughly until water runs freely from the drainage holes. This settles the new soil around the roots.
- Light Conditions: Place the tree in a shaded, protected area for 2-3 weeks. Direct sunlight can scorch the leaves while the roots are recovering and unable to draw up enough water.
- Fertilizing: Do not fertilize for at least 4-6 weeks after repotting. The fresh root tips are extremely tender. Fertilizer salts, which are concentrated in a small root zone after repotting, can chemically burn these new tips, killing them before they have a chance to establish. Wait until you see clear signs of new foliage growth before introducing a very mild fertilizer.
- Recovery Signs: Look for signs of new growth, like budding or new leaves, as an indication that the tree is recovering well.
Traditional Root Pruning vs. the Underwater Method
Here’s a quick comparison to help you decide which method is right for you.
| Feature | Traditional Method | Underwater Method |
|---|---|---|
| Root Visibility | Medium | High (once soil washes away) |
| Root Stress | Higher | Lower |
| Soil Removal | Harder, can be abrasive | Easier, washes away gently |
| Feeder Root Health | Prone to drying out | Kept hydrated and safe |
| Risk of Root Tearing | Higher | Lower |
Expert Tips for Perfect Root Pruning
- Use Shallow Trays: A shallow, wide tray or basin provides easier access and better visibility than a deep bucket. A cat litter tray or a large, washed-out takeout container works perfectly.
- Master the Chopstick: Your chopstick is your best friend. Use it to gently probe and separate roots, working the soil out from the center of the root mass. The water will do most of the heavy lifting.
- Don’t Over-Clean: It’s not necessary to remove every single grain of old soil, especially if it’s a good, granular mix. Removing the compacted outer layer and the majority of the old soil is sufficient.
- Always Keep Feeder Roots Moist: Even after trimming, if you need to step away, cover the roots with a damp cloth or spray them with water from a misting bottle to keep them from starting to dry out while you prepare the pot.
- Trim Gradually: If a tree has a severely compacted root ball, don’t try to fix it all in one go. Prune a conservative amount and plan to do more at the next repotting in a year or two.
FAQs About Bonsai Root Trimming Underwater
Can I trim bonsai roots in water every time I repot?
Yes, absolutely. It’s a superior method for preserving root health and can be used every time you repot your bonsai.
Does underwater pruning prevent transplant shock?
It significantly reduces the risk and severity of transplant shock by keeping the crucial feeder roots from drying out. While not a complete guarantee, it gives your tree the best possible chance of a seamless transition.
Can beginners use this method safely?
Yes. In fact, it’s often safer for beginners because it’s more forgiving. The clear visibility and reduced risk of root dehydration lower the chances of making a critical error.
Is warm water better than cold water?
Lukewarm or room temperature water is ideal. Hot water can cook the roots, and cold water can shock them. Aim for a neutral temperature.
Final Thoughts
Bonsai root trimming underwater is more than just a trend; it’s a technique grounded in plant science. Protecting the most fragile parts of the root system, it promotes faster recovery and more vigorous growth. Whether you are a novice worried about your first repotting or an experienced grower looking to refine your bonsai care, this method offers a clear path to a healthier, happier tree.