
Last Updated on March 16, 2026 by Indoor Plant Nook
Chinese Elm (Ulmus parvifolia) is one of the most forgiving and rewarding bonsai species for beginners and experts alike. But even this resilient tree can suffer — or die — if its roots are pruned incorrectly. Whether you’re repotting for the first time or maintaining a decades-old specimen, this guide covers everything you need to know about Chinese Elm bonsai root pruning: when to do it, how to do it safely, and how to help your tree thrive afterward.
Why Root Pruning Matters for Chinese Elm Bonsai

Root pruning is not just about fitting your tree into a smaller pot. It’s a fundamental practice that:
- Controls tree size and maintains the miniaturized aesthetic of bonsai
- Encourages a dense, radial nebari (surface root structure) that adds visual drama
- Prevents root-bound stress, which leads to nutrient deficiency, poor water absorption, and dieback
- Stimulates new feeder root growth, the fine roots responsible for nutrient uptake
- Extends the life of your soil, preventing compaction and anaerobic conditions
Chinese Elm is particularly responsive to root work. Its naturally vigorous root system can fill a bonsai pot in as little as one to two growing seasons, making routine root pruning essential rather than optional.
When to Prune Chinese Elm Bonsai Roots
Timing is the single most critical factor in root pruning success. Get it right, and your tree will barely notice the surgery. Get it wrong, and you risk prolonged stress or death.
Best Time: Early Spring (Before Bud Break)
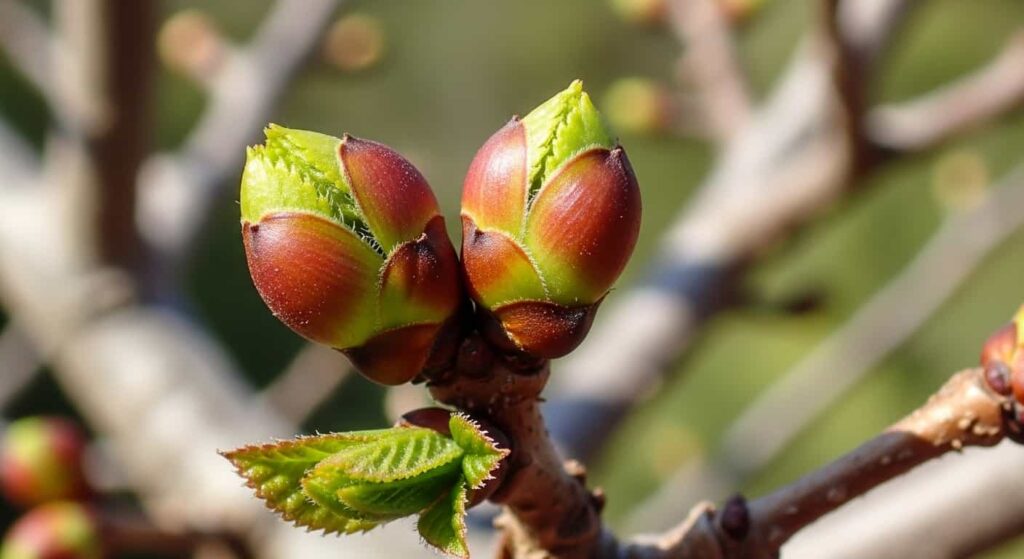
The ideal window for root pruning Chinese Elm bonsai is early spring, just as the buds begin to swell but before they fully open. At this stage:
- The tree is transitioning out of dormancy and has maximum energy reserves stored in its roots
- Temperatures are mild, reducing transplant shock
- The tree will break dormancy shortly after repotting, quickly regenerating new roots
- Soil is manageable, and roots are easier to inspect
Look for buds that are plumping and showing green at their tips — this is your signal to begin.
Secondary Window: Late Summer to Early Autumn
A second, more cautious repotting window exists in late summer (August to early September in the Northern Hemisphere), after the tree has hardened off its summer growth. This timing works well for:
- Young, vigorous trees that have become severely root-bound mid-season
- Trees that were missed during the spring window
- Light root maintenance with minimal pruning
Avoid late autumn and winter root pruning, as the tree lacks the metabolic energy to regenerate roots quickly before cold weather sets in.
How Often Should You Root Prune?
| Tree Age / Stage | Repotting Frequency |
|---|---|
| Young, developing tree | Every 1–2 years |
| Mature, refined tree | Every 2–3 years |
| Old specimen in training pot | Every 3–5 years |
Always let the roots — not the calendar — tell you when it’s time. If roots are circling the drainage holes or the root ball lifts cleanly out of the pot as a single mass, it’s time.
Tools You’ll Need

Gather your tools before you remove the tree from its pot. Working quickly minimizes the time roots are exposed to air.
- Root rake or chopstick — for loosening and separating roots
- Sharp bonsai scissors — for fine feeder roots
- Root pruning shears or bonsai branch cutters — for thicker structural roots
- Wire brush or old toothbrush — for cleaning the pot
- Sieve set — for preparing fresh bonsai soil
- Fresh bonsai soil mix (akadama, pumice, and lava rock is a proven blend)
- Wound sealant/cut paste — optional, for cuts on roots larger than a pencil diameter
- Drainage mesh and anchor wire
- Spray bottle with water — to keep roots moist during work
Pro tip: Sterilize all cutting tools with isopropyl alcohol before use. This prevents fungal and bacterial pathogens from entering fresh root wounds.
Step-by-Step: How to Prune Chinese Elm Bonsai Roots

Step 1: Water the Tree the Day Before
Water your Chinese Elm thoroughly 24 hours before root pruning. Well-hydrated roots are pliable, less prone to tearing, and easier to work with. A stressed, dry tree is a poor candidate for root work.
Step 2: Remove the Tree from Its Pot
Tip the pot sideways and gently work the root ball free. If it resists, run a thin spatula or root knife around the inner edge of the pot. Do not yank the trunk — you risk snapping roots at the nebari.
If the tree is severely root-bound, you may need to cut anchor wires and carefully pry the root ball out in sections.
Step 3: Remove Old Soil
Using a root rake or chopstick, gently comb away old soil from the outer edges and bottom of the root ball. Work inward in a systematic pattern, teasing roots apart without tearing them.
Your goals at this stage:
- Remove approximately one-third of the old soil
- Expose the major structural roots
- Identify circling, crossing, or descending roots that need to be removed
- Reveal the nebari for assessment
Keep a spray bottle nearby and mist the roots regularly — Chinese Elm roots desiccate faster than you might expect.
Step 4: Assess the Root Structure
Before cutting anything, take a moment to evaluate the entire root system:
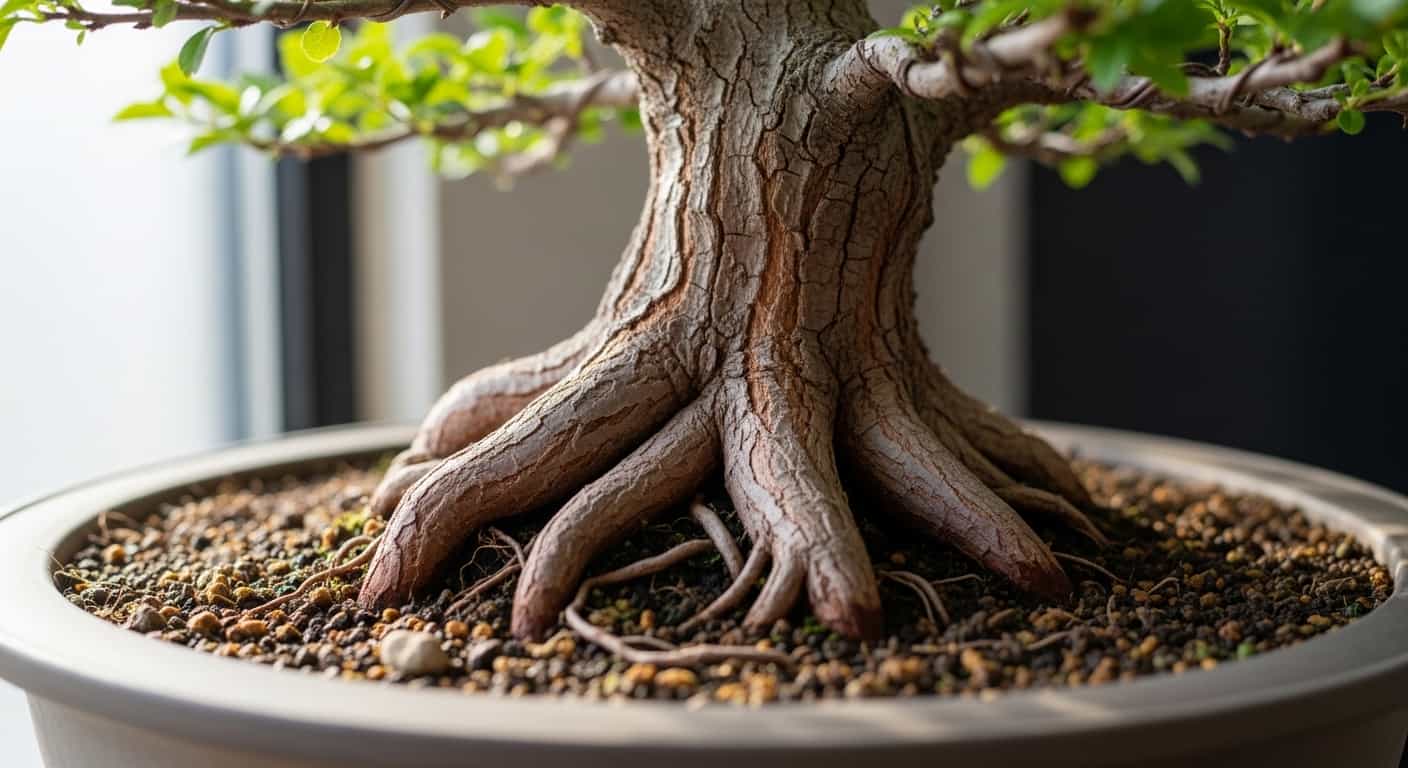
- Identify the nebari: The radial surface roots that fan out from the base of the trunk. These are your most important roots aesthetically and structurally.
- Look for tap roots: Thick, downward-growing roots that anchor the tree but offer little in terms of nutrient absorption. These should be progressively shortened over several repotting cycles.
- Spot problem roots: Any root growing across another root, circling the pot, or growing straight down should be prioritized for removal.
Step 5: Prune the Roots
Now the actual pruning begins. Follow these principles:
Remove no more than one-third of the total root mass in a single session. This is the cardinal rule of bonsai root pruning. Removing too much at once deprives the tree of its ability to take up water and nutrients, causing severe stress.
What to cut:
- Long, thick tap roots growing straight down (shorten, don’t eliminate — remove over multiple repottings)
- Circling roots that wrap around the root ball
- Crossing roots that rub against each other
- Dead or mushy roots (cut back to healthy white tissue)
- Overly long feeder roots extending far beyond the root ball
What to keep:
- Fine, fibrous feeder roots — these are gold. Preserve as many as possible
- Radial roots fanning horizontally outward (nebari builders)
- Any root that contributes positively to the surface nebari
Cutting technique: Make clean, single cuts with sharp tools. Crushing or tearing roots creates ragged wounds that are slow to heal and susceptible to rot. Cut at a slight angle so the wound faces downward, discouraging rot and encouraging callus formation.
Step 6: Prepare the Pot
While someone else mists the roots (or works quickly), prepare the pot:
- Clean the pot thoroughly with a brush
- Place fresh drainage mesh over the holes and secure with wire
- Run anchor wires up through the drainage holes
- Add a thin drainage layer of coarse pumice or lava rock to the bottom
- Add a mound of fresh bonsai soil in the center, shaped to support the root spread
Step 7: Position the Tree
Place the tree on the soil mound and adjust its position:
- Check front angle — the most visually interesting face of the trunk should face forward
- Check height — the nebari should sit slightly above the pot rim (roots will settle)
- Check tilt — a slight lean (2–5°) often looks more natural than perfectly vertical
- Thread anchor wires up through the root ball and secure firmly but without crushing roots
Step 8: Backfill with Fresh Soil
Add fresh bonsai soil in stages, working it into the root ball with a chopstick. Use an up-and-down jabbing motion to eliminate air pockets — trapped air is one of the leading causes of post-repotting root failure.
Build soil up to just below the pot rim. Leave a small gap for watering.
Step 9: Water Thoroughly
Water deeply and slowly until the water runs clear from the drainage holes. This settles the soil and ensures the entire root ball is evenly hydrated.
Some practitioners add a diluted rooting hormone solution at this stage to encourage faster root regeneration — though a healthy Chinese Elm typically does not need chemical assistance.
Post-Pruning Care: The Critical Recovery Period

The four to six weeks following root pruning are the most important period in your tree’s annual cycle. Handle this phase correctly and your Chinese Elm will emerge stronger than ever.
Placement
Move the freshly repotted tree to a sheltered location for the first 2–4 weeks:
- Outdoors in light shade is ideal — bright indirect light with protection from harsh midday sun, strong wind, and heavy rain
- Avoid full sun until you see vigorous new growth emerging from buds
- Avoid frost — even a light frost on a freshly root-pruned tree can be fatal
Watering
Check soil moisture daily. The tree’s reduced root system means it can absorb water more slowly, but the smaller root ball also dries out faster in warm conditions.
- Water when the top 1–2 cm of soil feels dry to the touch
- Water thoroughly each time
- Never let the root ball completely dry out during recovery
- Avoid waterlogging — good drainage in your soil mix prevents this
Fertilizing
Do not fertilize for 4–6 weeks after root pruning. Fresh root wounds are sensitive to fertilizer salts, which can cause chemical burn and delay healing.
After the recovery period, resume a balanced fertilizing schedule:
- Spring through midsummer: High-nitrogen fertilizer to support vigorous growth
- Late summer through early autumn: Low-nitrogen, high-phosphorus/potassium fertilizer to harden growth and build energy reserves
- Winter (if tree is in mild-climate semi-dormancy): Minimal or no fertilization
Resist the Urge to Style
It’s tempting to wire and style a freshly repotted tree, but avoid major styling work for at least 6–8 weeks after root pruning. The combined stress of root reduction and aggressive pruning or wiring can overwhelm even a vigorous Chinese Elm.
Common Mistakes to Avoid
1. Pruning Too Much Root at Once
Removing more than one-third of the root mass is the most common mistake — and the most dangerous. If a tree is severely root-bound and needs more work, spread the reduction over two repotting cycles.
2. Working in Summer Heat
High temperatures accelerate desiccation of exposed roots. If you must repot outside the spring window, work early in the morning and keep the session short.
3. Using Dull or Unsterilized Tools
Torn roots heal slowly and are vulnerable to rot. Dull cuts also crush root tissue rather than severing it cleanly.
4. Repotting into Too-Large a Pot
A pot much larger than the root ball retains excessive moisture in areas where there are no roots, leading to soil anaerobiosis and root rot. Choose a pot only slightly larger than the pruned root mass.
5. Ignoring Drainage
Compacted old soil or blocked drainage holes are root rot waiting to happen. Always use well-draining bonsai soil and inspect drainage holes before repotting.
6. Fertilizing Too Soon
Fertilizer salts on fresh root wounds can cause root burn and significantly slow recovery.
Understanding Chinese Elm Root Characteristics
Chinese Elm develops two distinct root types that serve different purposes in bonsai cultivation:
Structural roots (lignified/woody): These form the visible nebari and anchor the tree. They are long-lived and grow slowly. In bonsai, we aim to expose and radiate these roots at the soil surface for aesthetic effect.
Feeder roots (fibrous/fine): These fine white roots are the tree’s nutrient and water absorption system. They grow vigorously in good soil and are replaced annually. Preserving feeder roots during repotting is crucial to the tree’s survival.
Chinese Elm is also notable for its adventitious rooting ability — it can regenerate roots from cut surfaces more readily than many other bonsai species. This makes it particularly forgiving of aggressive root work when timing is correct.
Developing the Nebari Through Root Pruning

One of the highest aesthetic goals in Chinese Elm bonsai is developing a dramatic, radial nebari — the flared surface roots visible at the base of the trunk. Every repotting session is an opportunity to refine this feature:
- Remove downward-growing roots progressively, encouraging the tree to develop more horizontal surface roots
- Surface the nebari slightly by not burying surface roots under soil
- Use a flat-bottom container or grow slab during development phases to force horizontal root spread
- Air layering can be used to remove unwanted trunk sections and create a new, lower nebari if the current base lacks character.
Over 5–10 years of consistent root work, even a nursery-stock Chinese Elm can develop a striking, buttressed nebari.
Frequently Asked Questions
Can I root-prune a Chinese Elm in autumn?
It’s possible but risky. Autumn-pruned trees have limited time to regenerate roots before winter. If you must do it, keep pruning to an absolute minimum and protect the tree from the cold.
My Chinese Elm is dropping leaves after repotting — is this normal?
Yes. Some leaf drop after root pruning is a normal stress response. The tree sheds leaf mass to reduce water demand while its root system is reduced. New leaves should emerge within 2–4 weeks. If the tree drops all leaves and new growth does not follow, inspect the roots for rot.
How do I know if I’ve cut too many roots?
Signs of over-pruning include: wilting that doesn’t recover with watering, dieback of branch tips, and failure to break dormancy within 4–6 weeks after spring repotting. Act quickly — move the tree to shade, reduce watering slightly, and wait.
Should I seal root cuts?
For cuts larger than 5mm in diameter, a thin application of cut paste or wound sealant can reduce desiccation and the risk of rot. For fine feeder roots, sealing is unnecessary.
Can I root prune and repot at the same time I style or wire the tree?
It’s best to separate these activities. Repotting and root pruning are enough stress for one season. Style and wire the tree 6–8 weeks after repotting, once it shows vigorous new growth.
Final Thoughts
Root pruning is one of the most powerful tools in the bonsai practitioner’s kit — and for Chinese Elm, it’s a skill that pays enormous dividends over time. Done correctly in early spring, with sharp tools, a measured approach, and attentive aftercare, root pruning transforms a congested, struggling root system into a vibrant engine of growth.
Respect the one-third rule. Time your work to the tree’s biological rhythm. And remember: the goal isn’t just a tree that fits in a pot — it’s a root system so healthy and well-structured that it can sustain a living work of art for generations.
Happy growing.