
Last Updated on March 16, 2026 by Indoor Plant Nook
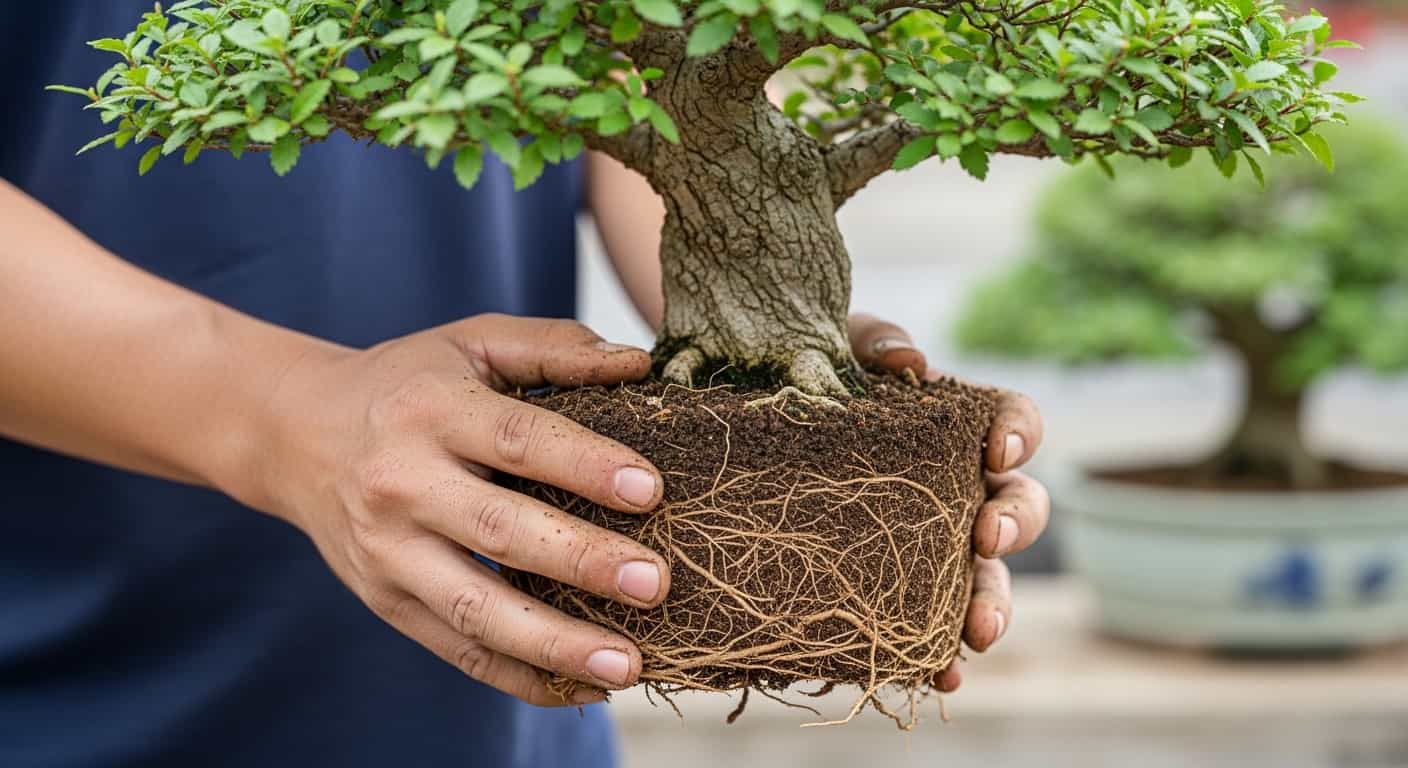
Chinese Elm (Ulmus parvifolia) is one of the most popular and beginner-friendly bonsai species in the world — and for good reason. It’s resilient, fast-growing, and responds beautifully to styling. But even the toughest tree can struggle when its roots become congested, bound, or choked in old, depleted soil.
Root washing is one of the most powerful — yet most misunderstood — techniques in bonsai care. Done correctly, it gives you a clean slate: fresh soil, healthy roots, and a tree set up to thrive for years. Done wrong, it can stress or even kill your tree.
This comprehensive guide walks you through everything you need to know about root washing your Chinese Elm bonsai: what it is, when to do it, the tools you need, and how to do it safely, step by step.
What Is Root Washing in Bonsai?
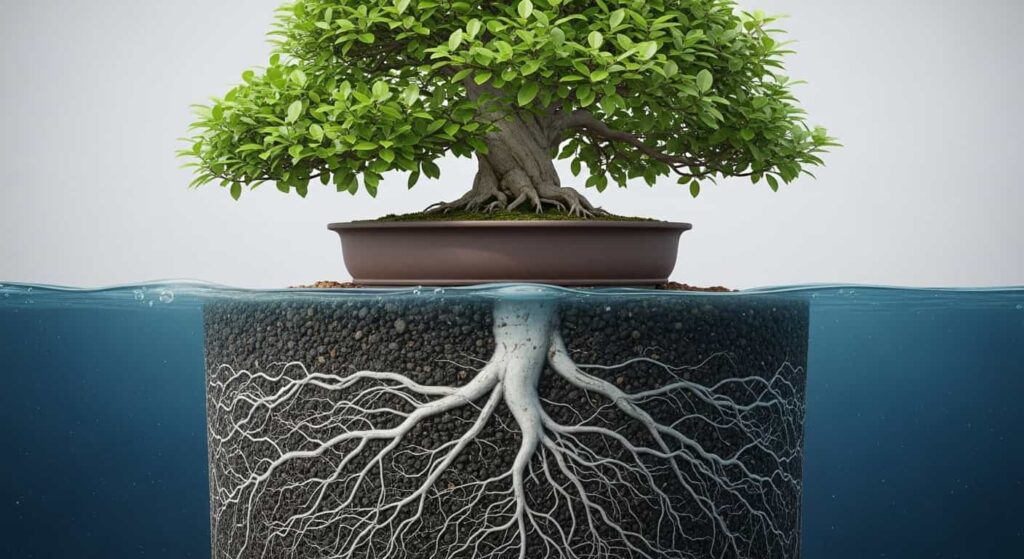
Root washing (also called bare-rooting) is the process of completely removing all old soil from the roots of a bonsai tree. Unlike standard repotting — where you loosen the outer root mass and replace some soil — root washing removes 100% of the growing medium.
This gives you the opportunity to:
- Inspect the entire root system for rot, disease, or pests
- Prune dead, crossing, or overly thick roots
- Eliminate compacted, spent soil that no longer drains properly
- Transition the tree from one soil type to another (e.g., from nursery peat to akadama/pumice mix)
- Create a neater, more radial nebari (surface root spread)
For Chinese Elm specifically, root washing is particularly valuable because the species produces dense, fibrous root systems that can become heavily compacted within just a few years.
When Should You Root Wash a Chinese Elm Bonsai?

Timing is critical. Root washing is a significant stress event for any bonsai, and doing it at the wrong time of year can seriously damage or kill your tree.
Best Time: Early Spring (Before Buds Break)
The ideal window for root washing your Chinese Elm is early spring, just as the buds begin to swell, but before leaves have fully opened. At this point:
- The tree is coming out of dormancy and has strong energy reserves
- Root growth is about to accelerate, helping the tree recover quickly
- Temperatures are mild, reducing the risk of heat stress post-repotting
In most temperate climates, this window falls between late February and early April, depending on your local conditions.
Acceptable Window: Late Summer / Early Autumn
A secondary window exists in late August through September for Chinese Elms. By this point, the tree has finished its main growth flush and is slowing down before winter. Root washing during this period is riskier but acceptable if:
- The tree is visibly healthy and vigorous
- You can protect it from early frost
- You avoid doing it too close to the first freeze
When NOT to Root Wash
Avoid washing the root of your Chinese Elm during:
- Midsummer — heat stress combined with root disturbance can be lethal
- Winter dormancy — the tree lacks the energy to recover
- Immediately after repotting, never root wash a tree that was recently repotted
- When the tree is weak, diseased, or recovering from any other stress
How Often Should You Root Wash a Chinese Elm?
Root washing is not an annual task. For most Chinese Elm bonsai, a full root wash every 3 to 5 years is appropriate. Standard repotting (without full bare-rooting) can be done more frequently — typically every 2 to 3 years for younger trees, and every 3 to 5 years for mature specimens.
Signs that your Chinese Elm may benefit from a full root wash include:
- Water pools on the soil surface and drains very slowly
- The tree looks tired despite good fertilization
- Roots are visibly circling or erupting from drainage holes
- The soil smells sour or musty (indicating anaerobic conditions)
- You want to transition to a higher-quality, free-draining substrate
Tools and Materials You’ll Need

Before you begin, gather everything in advance. Having all your tools at hand prevents you from leaving the bare roots exposed to air for longer than necessary.
Essential Tools:
- Root hook or chopstick (for gently untangling roots)
- Root rake (for loosening compacted soil)
- Clean, sharp scissors or bonsai root pruning shears
- A bucket or a large bowl for water
- Garden hose with a gentle spray setting (or a watering can with a rose head)
- Wire cutters and fresh bonsai wire (for re-anchoring the tree)
- Clean the bonsai pot with adequate drainage holes
Soil and Materials:
- Fresh bonsai substrate — a mix of akadama, pumice, and coarse sand or kiryu in approximately a 2:1:1 ratio works well for Chinese Elm
- Fine mesh or drainage screens to cover pot holes
- Optional: mycorrhizal inoculant to support root re-establishment
Optional but Helpful:
- Rooting hormone powder (to encourage new feeder root growth)
- Shade cloth or a sheltered recovery spot
- Spray bottle for misting exposed roots
Step-by-Step Root Washing Guide
Step 1: Water the Tree 24–48 Hours Before
Give your Chinese Elm a thorough watering one to two days before the procedure. Well-hydrated roots are more flexible and less prone to snapping during handling. Do not water on the same day — slightly firmer, but not dry, soil is easier to remove cleanly.
Step 2: Remove the Tree from Its Pot
Tip the pot sideways and gently work the root ball free. If the tree is stuck — which is common with root-bound specimens — run a root hook or thin spatula around the inside edge of the pot to loosen it. Avoid yanking or twisting, as this can break feeder roots unnecessarily.
Once free, set the root ball on a clean work surface.
Step 3: Remove the Bulk of the Old Soil
Using your fingers, a root hook, and a root rake, begin breaking apart the root ball from the outside edges inward. Work slowly and methodically. The goal at this stage is to remove as much of the old substrate as possible without tearing roots.
For Chinese Elm, you’ll often find a dense mat of fine white feeder roots near the surface and thicker structural roots deeper in the pot. Be especially careful with the fine roots — they are fragile but essential for recovery.
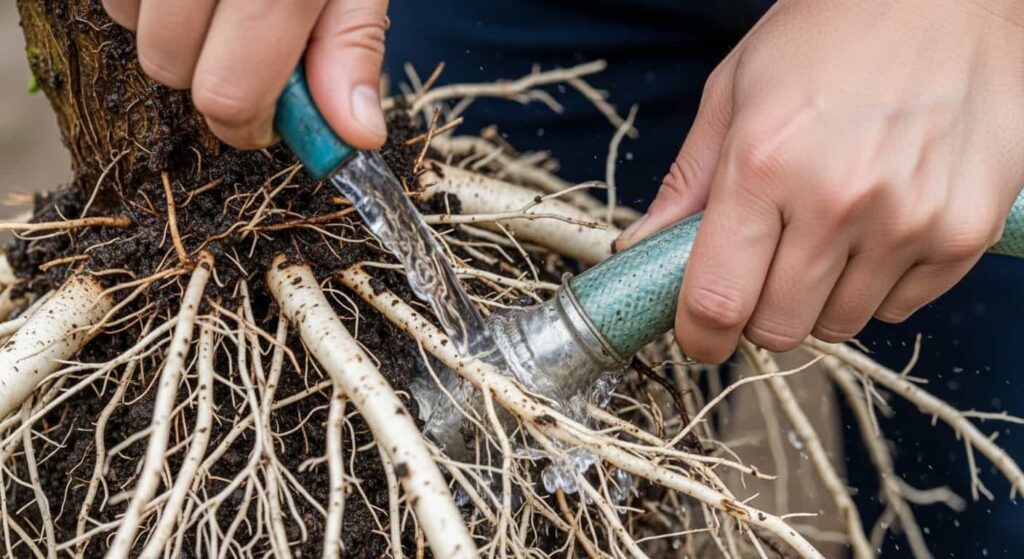
Step 4: Rinse the Roots
Once you’ve removed the bulk of the soil by hand, use a gentle stream of water to rinse the remaining particles from the root system. Work from above the root crown downward, allowing the water to carry debris away.
Key tips for rinsing:
- Use room-temperature water — cold water can shock the roots
- Keep the stream gentle; a strong blast can strip feeder roots
- Rotate the tree to rinse all sides of the root mass
- If you see stubborn clumps caught between roots, use a chopstick or finger to gently dislodge them
Continue rinsing until the roots are completely clean, and you can see the full structure of the root system clearly.
Step 5: Inspect the Root System

With the roots fully exposed, take a few minutes to carefully examine every part of the root system. This is one of the most valuable aspects of root washing — you can see problems that are completely invisible during standard repotting.
Look for:
- Black or mushy roots — signs of root rot (Phytophthora or Pythium); cut back to clean, white tissue
- Circling or girdling roots — roots that have wrapped around the trunk base, potentially strangling it over time; remove these entirely or redirect them.
- Overly thick, downward-growing tap roots — these contribute little to the tree’s health and can be shortened to encourage lateral feeder root development.
- Pests — inspect for vine weevil larvae, fungus gnats, or other soil-dwelling insects.
- Dead or discolored roots — trim back to healthy tissue
Step 6: Prune the Roots
Once you’ve completed your inspection, prune the root system strategically. Chinese Elm tolerates root pruning well, but there are important limits.
General root pruning guidelines for Chinese Elm:
- Remove no more than 20–30% of the total root mass in a single session
- Always cut cleanly with sharp, sterilized scissors or shears — ragged cuts invite disease
- Prioritize removing thick, downward-growing roots over fine feeder roots
- Shorten any roots that are significantly longer than the pot diameter
- If you find rot, cut well back into healthy tissue and treat the wound with a fungicide paste or powdered sulfur
After pruning, allow the cut surfaces to air-dry for 10–15 minutes before repotting. Some bonsai practitioners apply a thin layer of cut paste or wound sealant to larger root cuts, though this is optional for small feeder roots.
Step 7: Prepare the New Pot
While the roots are drying, prepare your pot. Secure drainage mesh over the holes using wire, then thread anchor wires through the drainage holes — you’ll use these to secure the tree firmly once it’s positioned.
Add a thin drainage layer of larger-particle pumice or grit at the base of the pot, then a mound of fresh substrate in the center. Shape this mound so the tree will sit at the correct height and angle once placed.
Step 8: Position and Re-Pot the Tree
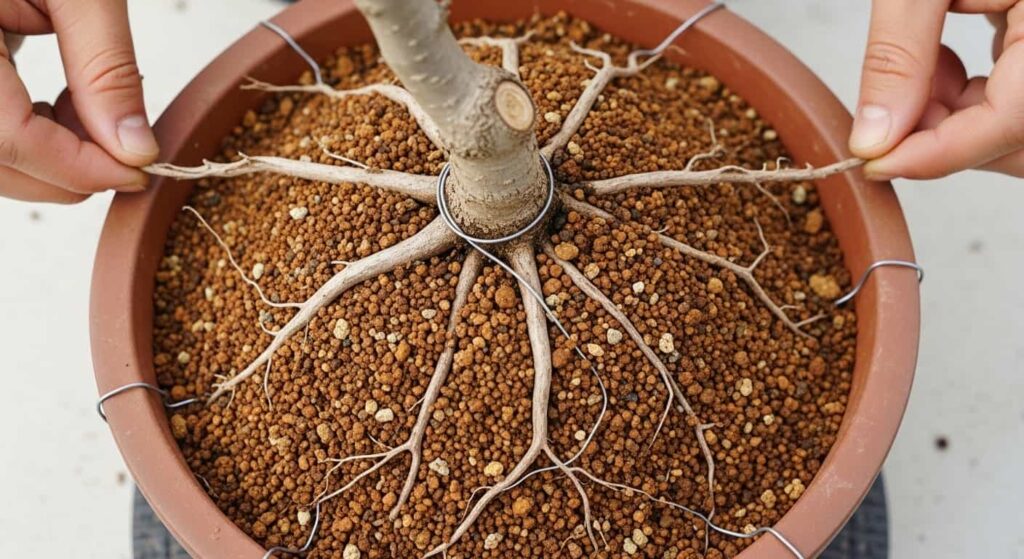
Place the tree on the mound of substrate, adjusting its position and angle for the best front and the most aesthetic nebari presentation. Spread the roots outward and downward over the mound as evenly as possible — this is called radial root spreading and is key to developing a beautiful, stable nebari over time.
Once you’re satisfied with the position, twist the anchor wires over the surface roots and secure them tightly. The tree must not rock or shift in the pot — movement prevents new roots from anchoring into the substrate.
Fill in around the roots with fresh substrate, working it between the roots with a chopstick to eliminate air pockets. Tap the sides of the pot gently to help the soil settle. Top-dress with a fine layer of akadama or decorative top soil if desired.
Step 9: Water Thoroughly
After repotting, give the tree a slow, thorough watering. Water until it runs clearly from the drainage holes, then allow it to drain completely. This first watering also helps settle the substrate around the roots.
Some practitioners add a diluted rooting hormone or seaweed extract to this initial watering to help stimulate new root growth — this is optional but can be beneficial.
Aftercare: The Critical Recovery Period
The weeks following root washing are the most important for your Chinese Elm’s survival and recovery. Follow these aftercare guidelines carefully.
Placement: Shelter from Extremes

For the first 4 to 6 weeks after root washing, keep your Chinese Elm in a sheltered location that offers:
- Bright, indirect light — avoid direct, harsh midday sun
- Protection from strong winds, which accelerates moisture loss from the foliage
- Mild temperatures — avoid placing it where temperatures drop below 5°C (41°F) or spike above 30°C (86°F)
A cold greenhouse, a sheltered porch, or a spot under a light shade cloth is ideal during this recovery period.
Watering: Careful and Consistent
Watering after root washing requires more attention than usual. The tree has fewer roots to absorb water, so it’s more vulnerable to both underwatering and overwatering.
- Check the soil daily by lifting the pot (a light pot = dry soil) or pressing a finger 1–2 cm into the surface.
- Water the soil when it begins to dry, but before it becomes completely bone dry
- Never allow the pot to sit in standing water.
As new roots establish over 4–6 weeks, the tree’s water needs will gradually increase. This is a positive sign of recovery.
Fertilizing: Hold Off Initially
Do not fertilize your Chinese Elm for at least 4 to 6 weeks after root washing. Applying fertilizer — especially nitrogen-heavy formulas — to a tree with a compromised root system can cause chemical burn and further stress.
Once you see clear signs of new growth and the tree appears stable and healthy, you can begin a gentle fertilization program with a balanced, diluted fertilizer.
Leaf Care
After root washing in early spring, your Chinese Elm may push new leaves more slowly than usual, or some existing leaves may yellow and drop. This is normal — the tree is redirecting energy to root development.
Do not try to compensate by heavy watering or fertilizing. Simply maintain stable conditions and be patient. As long as the branches remain firm and alive (not shriveled or brittle), the tree is recovering.
Misting
Light misting of the foliage during the first few weeks can help reduce transpiration stress while the roots are re-establishing. This is particularly helpful in dry or warm conditions.
Common Mistakes to Avoid
Even experienced bonsai practitioners can make errors during root washing. Here are the most common pitfalls:
1. Root washing at the wrong time of year. Midsummer root washing is the most common cause of post-repot death. Always stick to the early spring window.
2. Removing too much root mass. Removing more than 30% of the roots in one session places extreme stress on the tree. If the root system is severely compacted, it may be better to do a partial root reduction now and complete the job at the next repotting.
3. Leaving air pockets in the soil. Air pockets around roots prevent the new substrate from making contact with the roots, inhibiting new root growth. Always use a chopstick to work the soil thoroughly between roots.
4. Placing the tree in full sun immediately after repotting Bright direct sun causes heavy water loss through the leaves at a time when the root system cannot keep up. Shelter is non-negotiable during the recovery period.
5. Fertilizing too soon. It’s tempting to feed a stressed tree, but root fertilization burn on top of root washing stress can be fatal. Wait a full 4–6 weeks minimum.
6. Using water that’s too cold. Cold tap water can shock exposed roots. Let water sit at room temperature before use, especially in early spring when tap water may be very cold.
Frequently Asked Questions
Can I root wash a Chinese Elm that was recently purchased from a nursery?
It depends on the condition of the nursery soil. If the tree is in heavy peat-based nursery compost, many practitioners choose to root wash at the first appropriate repotting season to transition it to proper bonsai substrate. Allow the tree to recover and settle for at least one growing season before doing so.
My Chinese Elm is very old and large. Can I still root wash it?
Yes, but be more conservative. Reduce the percentage of roots you remove and ensure the tree is in peak health before attempting it. Older trees have less capacity to recover from aggressive root work.
Should I use rooting hormone after root washing?
It’s optional but can be beneficial. A light dusting of hormone powder on cut root ends, or adding a mycorrhizal inoculant to the soil mix, can help stimulate new feeder root development.
What if my Chinese Elm drops all its leaves after root washing?
Don’t panic immediately. Chinese Elm can drop leaves as a stress response and still recover fully. Check that the branches are still supple (not dried out or brittle). If the tree shows new bud swelling within 4–8 weeks, it is recovering. Maintain stable watering, shelter, and patience.
Can I style or wire my Chinese Elm at the same time as root washing?
It’s best to avoid heavy styling at the same session. Root washing is stressful enough on its own. If you want to do both, prioritize root work and limit above-ground pruning to removing dead wood or crossing branches. Save major styling for the following season.
Summary: Chinese Elm Root Washing at a Glance
| Factor | Recommendation |
|---|---|
| Best timing | Early spring (buds swelling, before leaf-out) |
| Frequency | Every 3–5 years |
| Root removal limit | Max 20–30% of root mass |
| Rinsing water temperature | Room temperature |
| Post-wash fertilizing | Wait 4–6 weeks |
| Post-wash sun exposure | Bright indirect light only |
| Recovery period | 4–6 weeks before normal care resumes |
Root washing is one of the most rewarding practices in bonsai cultivation. When performed at the right time, with the right technique, it gives your Chinese Elm a fresh foundation — clean roots, quality soil, and room to grow. The process takes patience and care, but the result is a healthier, more vigorous tree that will reward you with beautiful growth for years to come.
Take your time, be methodical, and trust the process. Your Chinese Elm is more resilient than you think.