
Last Updated on April 13, 2026 by Indoor Plant Nook
TL;DR
- Submerging the root ball washes away soil so you can see which thick roots to remove and which fine feeder roots to keep.
- Fine roots dry out fast in open air; a water bath keeps them hydrated while you work.
- Wet roots bend instead of snapping, so you can untangle and spread them with less damage.
- Clear water makes dark, mushy rot easy to spot and cut out before it spreads.
- Remove at most about one-third of the root mass in one session.
- For temperate bonsai, prune in early spring as buds swell; tropical species are usually repotted in late spring or early summer when it is warm.
Introduction
If you want to know how to prune bonsai roots in water, you are asking about a specific technique: doing the actual cuts while the root ball stays submerged in a basin, not just rinsing and then moving to a dry bench. Experienced growers often plunge a lifted tree straight into water and prune there so soil falls away, roots stay visible, and delicate feeder roots do not desiccate in minutes.
This article walks through why that approach works, what you need on hand, and a clear sequence from soaking and cleaning to cutting, potting, and aftercare. You will also see how this differs from rooting cuttings in water long-term, so you avoid a common and harmful mix-up.
Why Prune Roots at All (Before You Use Water)
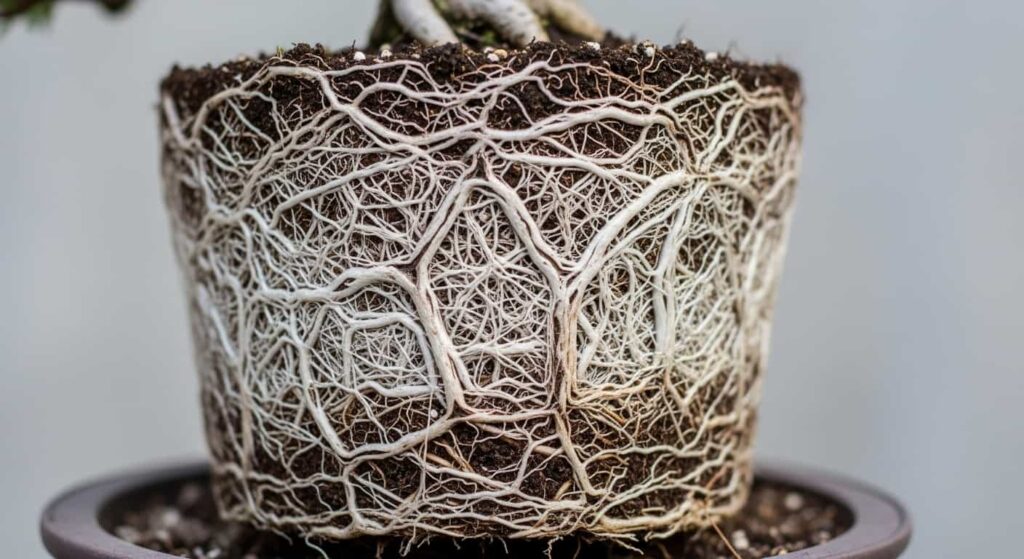
Learning how to prune bonsai roots in water still assumes you are pruning for a reason. In a small pot, roots circle and mat; thick roots dominate space, airflow and water movement suffer, and the tree can decline. Periodic root work during repotting removes some of that old wood, frees room for fresh soil, and encourages finer roots that take up water and nutrients more efficiently. The water method is simply a safer way to perform those cuts when the roots are exposed.
Why Prune Bonsai Roots in Water Instead of on a Dry Surface?
Dry soil hides structure; underwater, particles rinse off and you can see what you are cutting. That visibility is the main reason people prune bonsai roots in water rather than guessing through a dry clump.
Visibility and precision
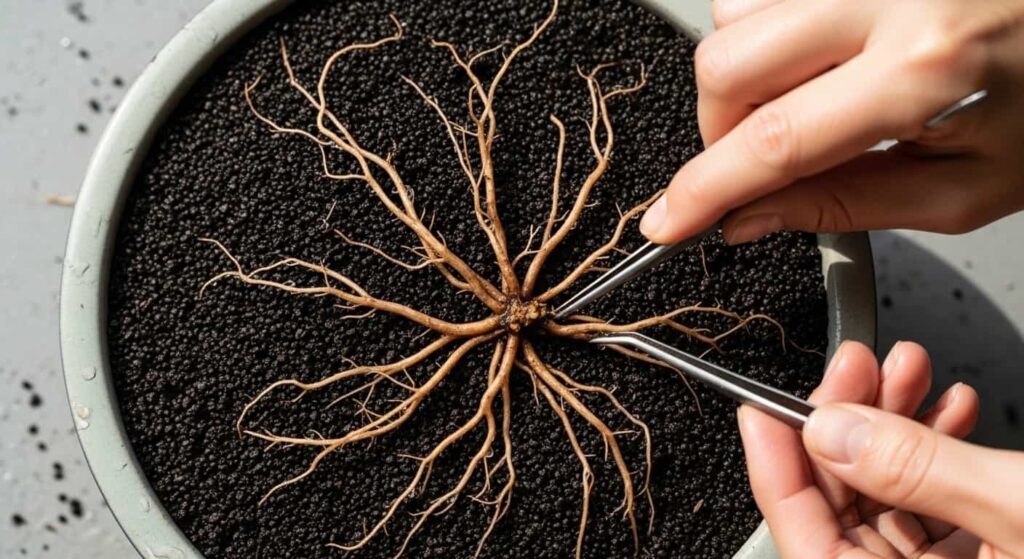
Water lifts fines and small aggregate off the roots. You can target thick downward or circling roots for removal while leaving hair-like feeders intact, and plan a shallow, radial spread that fits a typical bonsai pot.
Less risk of drying out
Feeder roots can be damaged quickly by air and breeze. Keeping the mass under water during pruning bonsai roots in water keeps those tissues from drying until you are ready to pot.
Easier handling
Soaked roots are more pliable than dry ones, so gentle combing with a rake or chopstick untangles knots with fewer snaps.
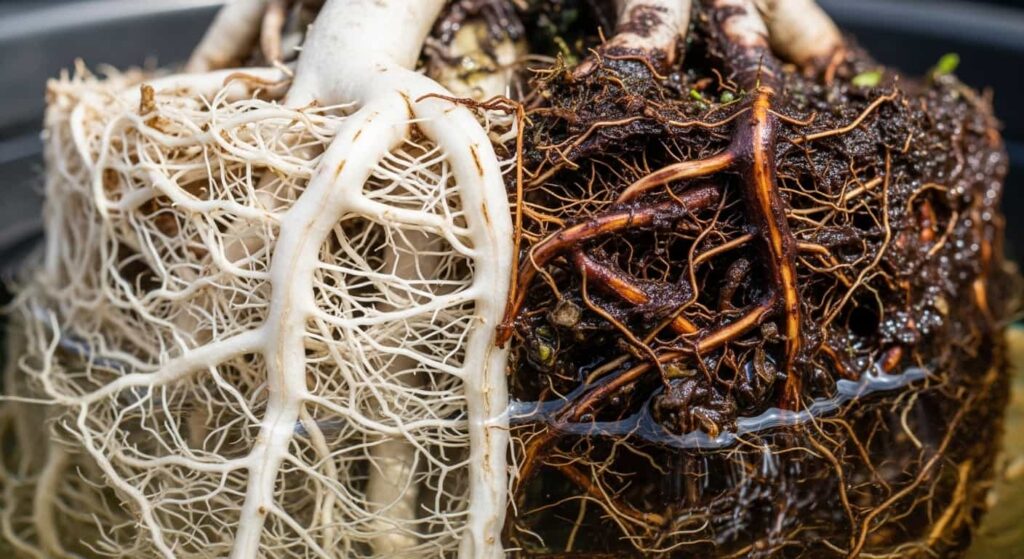
Spotting rot early
In clear water, unhealthy roots stand out: dark, soft, or foul-smelling tissue can be cut back to firm, lighter material before you plant.
Important distinction: pruning bonsai roots in water is a short step during repotting. It is not the same as trying to grow an established woody bonsai in a jar of water. Long-term water culture starves roots of normal aeration and usually leads to rot.
How to Prune Bonsai Roots in Water: Step-by-Step
The following sequence is the practical core of how to prune bonsai roots in water safely from start to finish.
Choose the right time
Root work is stressful. For temperate species such as maples and elms, work in early spring when buds are swelling but the tree has not fully leafed out; the plant is waking up and can heal cuts. For tropical bonsai such as many Ficus, late spring into early summer, when temperatures stay warm, is often safer than the coldest part of the year.
Gather tools and setup
Have everything ready before the tree leaves the pot:
- A basin of clean, room-temperature water (cold tap or hose water can shock roots).
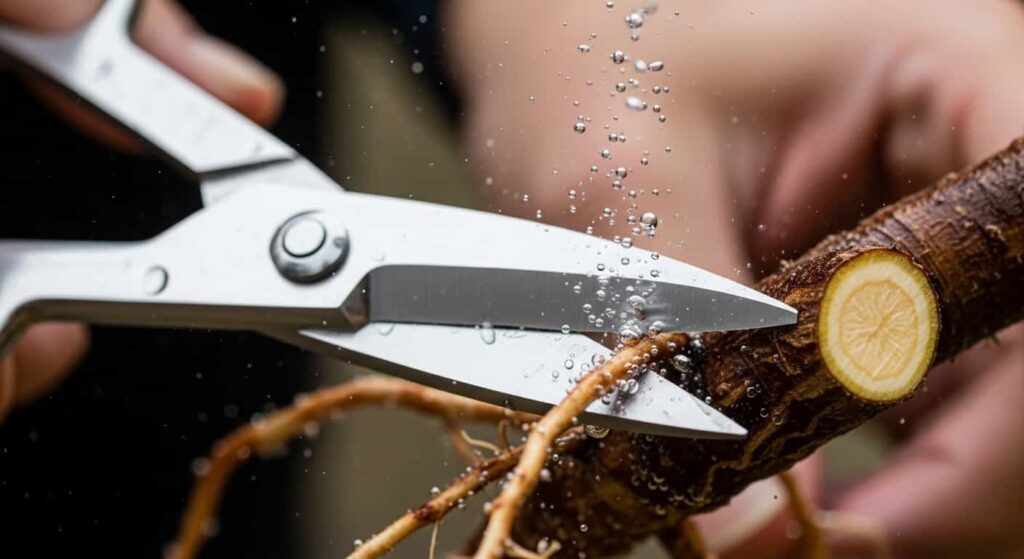
- Sharp, sterilized concave root scissors or shears; wipe blades with alcohol or dilute bleach before starting and between different trees if you repot several.
- A root rake or smooth wooden chopstick.
- Prepared pot with drainage mesh and tie-down wires if you use them.
- Fresh, fast-draining bonsai mix.
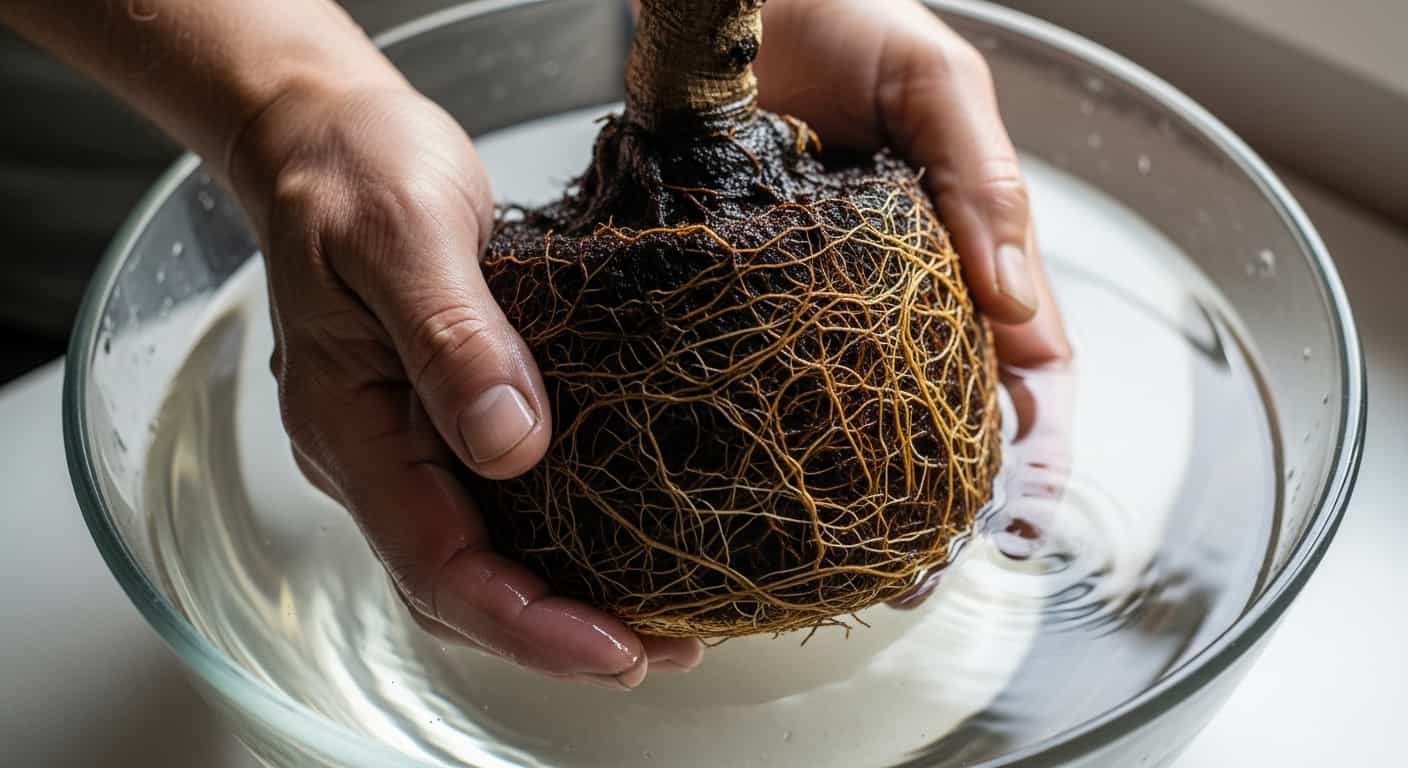
Submerge, clean, then prune underwater
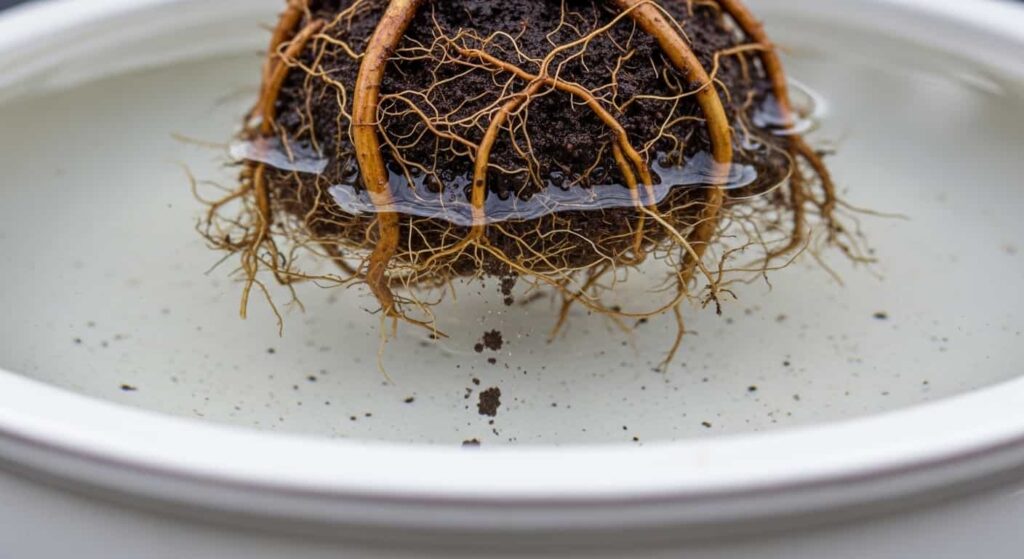
Remove the tree from the pot (cut anchoring wire from below if needed). Immediately place the whole root ball under water and keep it submerged.
Underwater, tease old soil outward from the trunk toward the tips in a combing motion. When the roots are clean and visible, cut thick roots, strong vertical roots, and circling perimeter roots so the silhouette suits a shallow container—aim for a relatively flat, radial mat. Remove any dark, mushy rot back to sound tissue.
Rule of thumb: do not remove more than about one-third of the total root mass in one go. You can always take more at the next repot if the tree responds well.
Pot up right after
Lift the tree out of the water and work promptly. Add a layer of mix to the pot, set the tree so pruned roots spread radially without stacking, then fill and settle soil with a chopstick to chase air pockets. Water until drainage runs clear.
Aftercare
Place the repotted tree in a sheltered, shaded spot for several weeks; avoid harsh sun and wind while new root growth establishes. Steady moisture without sogginess supports recovery after you prune bonsai roots in water and repot.
Mistakes to Avoid When You Prune Bonsai Roots in Water
- Removing too much at once weakens or kills the tree; stay conservative.
- Cold water can shock roots; use room-temperature or slightly tepid water.
- Letting roots air-dry if you step away—if you are not using a full basin, mist constantly or cover with a damp cloth until the tree is potted.
- Confusing this with propagation: water pruning is for established potted bonsai during repotting, not for rooting unrooted hardwood cuttings on a windowsill.
Conclusion
Knowing how to prune bonsai roots in water gives you better visibility, constant hydration for fine roots while you cut, easier untangling, and a clear view of diseased tissue. Pair that with correct timing, a one-third limit on how much you remove, and careful aftercare, and the same repot that looks drastic on the bench becomes a controlled procedure. A healthy tree, pruned at the right season, can bounce back with strong new growth and a root system that fits the pot for another cycle.