
Last Updated on March 16, 2026 by Indoor Plant Nook
Spring is the most critical — and rewarding — season for Japanese maple bonsai care. As the soil warms and buds begin to swell, your tree enters a phase of explosive energy. That energy, if channeled correctly through timely root pruning, can transform a struggling or overgrown bonsai into a thriving, finely structured masterpiece.
Root pruning is not merely maintenance. For Acer palmatum bonsai, it is the foundation of long-term health, nebari development, and pot stability. Yet it’s one of the most misunderstood and mistimed tasks in bonsai care.
This guide covers everything you need: the science behind spring root pruning, precise timing windows, step-by-step technique, aftercare, and the mistakes that kill beautiful maples every year.
Why Root Pruning Japanese Maple Bonsai Matters
Without periodic root pruning, a Japanese maple bonsai will become pot-bound. The root mass thickens into a tangled, circling mass that:
- Exhausts soil nutrients faster
- Reduces water and oxygen penetration
- Destabilizes the tree in its pot
- Produces weaker, finer growth above the soil line
- Leads to root rot in compacted, poorly draining zones
Root pruning forces the tree to replace long, thick anchor roots with finer, fibrous feeder roots — the kind that actually absorb water and nutrients efficiently. Over time, this creates the dense, radial nebari (surface root spread) that is the hallmark of a mature, high-quality Japanese maple bonsai.
When to Prune Japanese Maple Bonsai Roots in Spring
Timing is everything. Prune too early, and you risk frost damage to freshly exposed roots. Prune too late — after the leaves have fully opened — and you force the tree to recover from root work while simultaneously supporting a full canopy, leading to serious stress or dieback.
The Ideal Timing Window
Prune when buds are swelling but have not yet opened.
This is the moment when:
- Soil temperatures are consistently above 10°C (50°F)
- The tree’s energy reserves (stored starches in the roots) are being mobilized
- New root growth is imminent, meaning cut roots callous and regenerate quickly
- The canopy has not yet placed a full demand on the root system
In most temperate climates, this window falls between late February and early April, depending on your local conditions. In USDA zones 5–6, expect mid-March to early April. In zones 7–8, late February to mid-March is typical.
How to Read Your Tree
Rather than relying solely on the calendar, observe the tree itself:
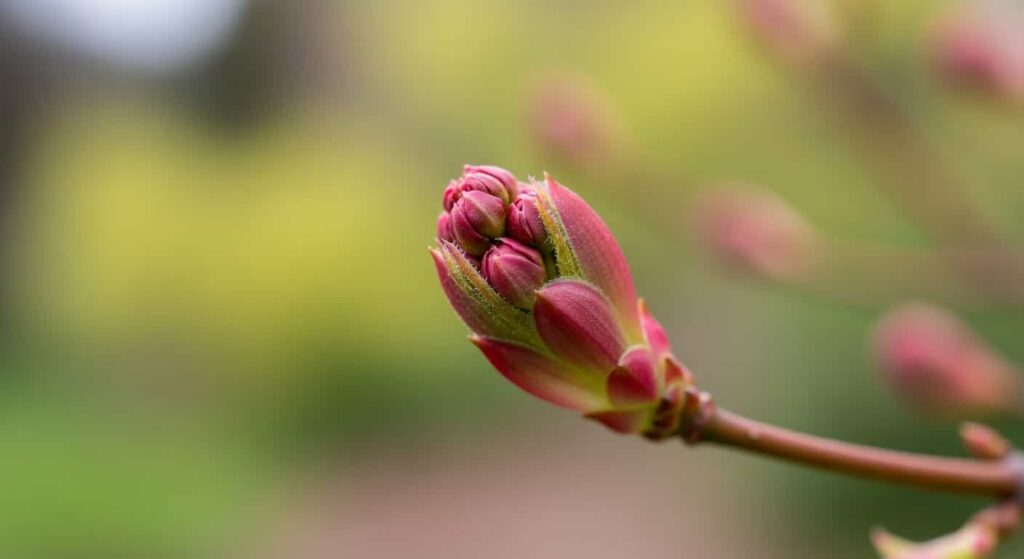
- Bud swell stage: Buds are visibly plump and beginning to show color, but remain closed — this is your green light.
- Bud break stage: The first leaves are just emerging. You can still root prune here, but work quickly.
- Full leaf-out: Too late for aggressive root pruning this year. Wait until next spring.
Tools You Need for Root Pruning
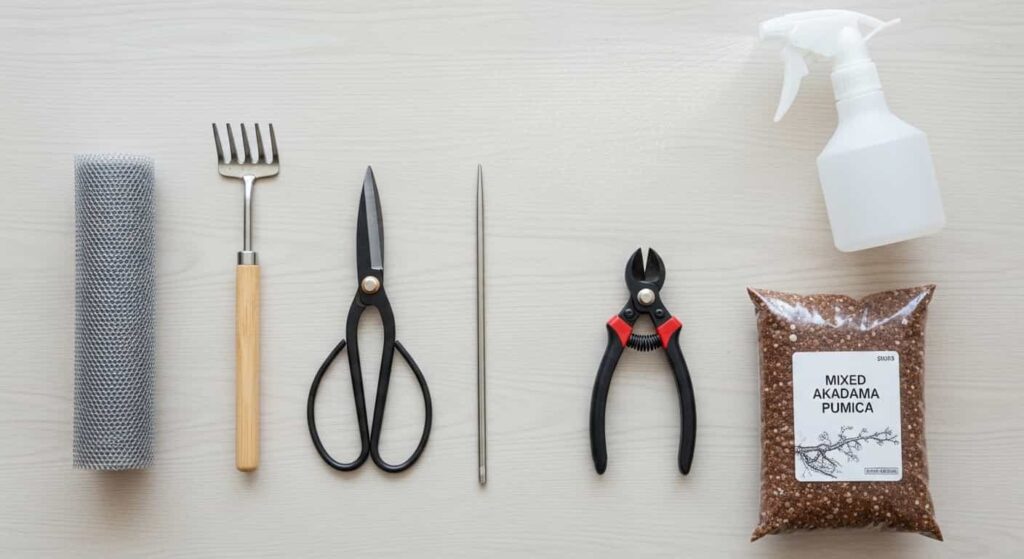
Having the right tools prevents unnecessary root damage and reduces the risk of infection.
| Tool | Purpose |
|---|---|
| Root cutters/branch cutters | Loosening and combing out the root mass |
| Sharp bonsai scissors | Cutting fine, fibrous roots |
| Root cutters / branch cutters | Cutting thick, woody tap roots |
| Chopstick or knitting needle | Working soil into root gaps when repotting |
| Spray bottle | Keeping roots moist during work |
| Bonsai pot (prepared) | Cleaned, with drainage mesh fitted |
| Fresh bonsai soil | Akadama, pumice, and lava rock blend |
Sterilize all cutting tools before use. Wipe blades with isopropyl alcohol (70%+) or flame-sterilize and allow to cool. Japanese maple roots are vulnerable to fungal and bacterial infection through fresh cuts.
Step-by-Step: Root Pruning Japanese Maple Bonsai in Spring
Step 1: Prepare Your Workspace
Work on a clean, stable surface out of direct sunlight and away from wind. Exposed roots dry out surprisingly fast — even 10 minutes of drying on a warm spring day can cause significant cell death at the cut tips.
Fill a spray bottle with clean water and keep it within reach throughout the process.
Step 2: Remove the Tree from Its Pot
Turn the pot on its side and gently press on the drainage holes to loosen the root ball. For trees that have been in the same pot for several years, the root mass may be tightly locked in. Use a thin wooden tool or chopstick to work around the inner edge of the pot — never use metal tools here, as they can slice roots you want to keep.
If the tree resists, soak the pot in water for 10–15 minutes to soften the soil, then try again.
Step 3: Evaluate the Root Mass
Set the tree on your work surface and take a moment to assess the root structure before cutting anything:
- How large is the overall root mass relative to the pot size?
- Are there any thick, downward-growing tap roots?
- Can you identify circling or crossing roots?
- Is there evidence of root rot (dark, mushy, foul-smelling roots)?
This assessment guides your pruning decisions in the next step.
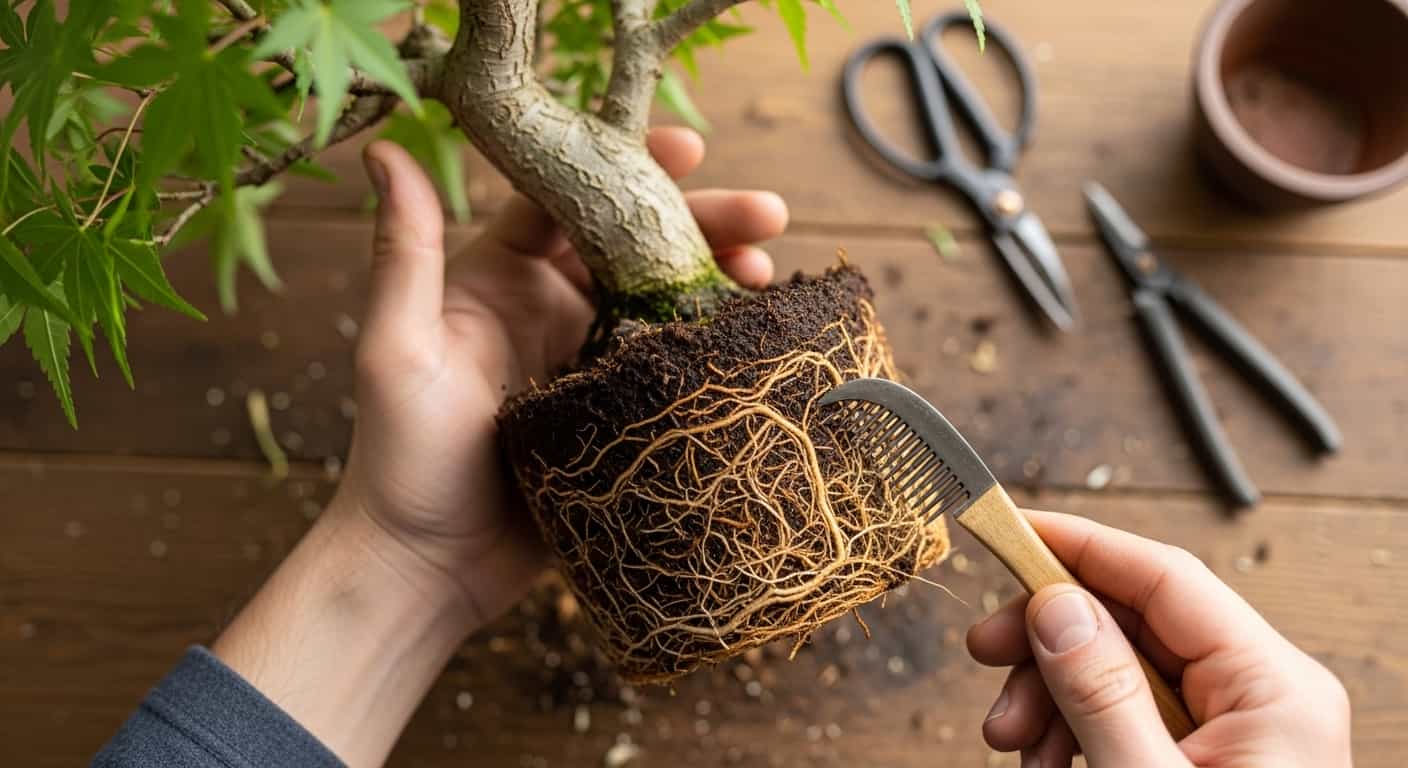
Step 4: Comb Out and Loosen the Root Ball
Using your root rake, gently work from the outside inward to loosen and separate the outer root mat. The goal is to free fine roots from compacted soil, expose the root structure, and identify which roots need to go.
Remove old, exhausted soil as you work — it should fall away once loosened. Do not rush this stage. Tearing roots by forcing the rake through compacted soil causes unnecessary damage.
Step 5: Prune the Roots
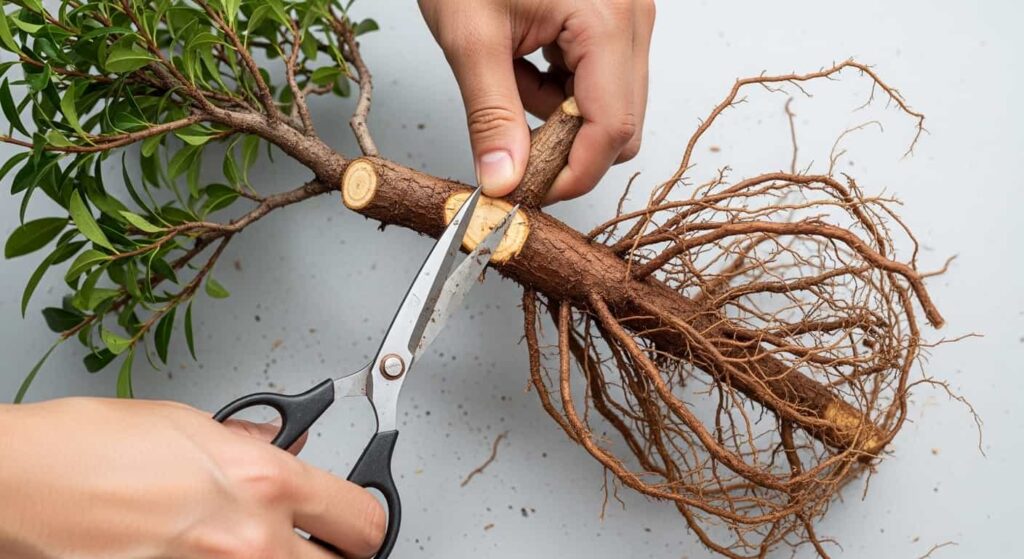
With the root mass exposed and combed out, begin pruning:
Remove these roots first:
- Downward-growing tap roots (they anchor the tree but do nothing for nutrient absorption and prevent proper seating in the pot)
- Circling or crossing roots that disrupt nebari development
- Dead, dark, or mushy roots (signs of rot)
- Very long roots that extend well past the pot diameter
Then, reduce the overall root mass by up to one-third of its volume. For older, established maples, this is typically safe. For trees that are weaker or recently repotted, be more conservative — remove only 20–25%.
Make clean, single cuts. Do not saw or crush. Clean cuts heal faster and are less susceptible to infection.
Mist the roots with your spray bottle every few minutes throughout this process.
Step 6: Address Any Root Rot
If you find areas of rot, cut back into healthy tissue until the cut surface shows white or light-colored, firm root material. Dust the cut surface with powdered sulfur or activated charcoal to inhibit further fungal spread. Allow the treated area to dry for 15–20 minutes before potting.
Identify why rot occurred: almost always, it is caused by poorly draining soil, overwatering, or a pot without adequate drainage holes. Correct the cause before repotting.
Step 7: Prepare the New Pot
Choose a pot that is proportional to the tree — roughly two-thirds the tree’s height for oval or rectangular pots, or one-third the tree’s height for round pots. It should be only slightly larger (or the same size) as the previous pot to maintain the root restriction that drives fine root development.
Cover drainage holes with plastic mesh, secured with wire ties. Add a thin layer of coarse drainage material (large pumice or grit) to the bottom before adding your bonsai soil mix.
Step 8: Pot the Tree

Add a mound of fresh soil in the center of the pot to support the root mass. Position the tree, ensuring it sits at the correct angle and front-facing orientation. The nebari should sit just at or slightly above the final soil surface.
Work fresh soil around and between roots using a chopstick, eliminating air pockets. Air pockets are one of the leading causes of post-repotting decline in Japanese maple bonsai — take time to fill every gap.
Secure the tree with tie-down wires through the drainage holes if it is unstable.
Step 9: Water Thoroughly
Once potted, water deeply until water drains freely from the drainage holes. This first watering settles the soil, collapses any remaining air pockets, and gives the roots their first contact with fresh moisture.
Aftercare: The First Six Weeks

The six weeks following root pruning are the most vulnerable period in the tree’s annual cycle. Support the recovery properly, and you will be rewarded with vigorous spring growth.
Placement
Keep the freshly repotted tree in a sheltered location — protected from harsh sun, strong wind, and frost. A cold greenhouse, an unheated garage with good light, or a sheltered spot on the north side of a building all work well in the early weeks. Move it to its normal position once the leaves are fully open and new root growth has established (typically 4–6 weeks).
Watering
Water when the top 1–2 cm of soil begins to dry, but do not let the pot become waterlogged. With a freshly pruned root system, the tree’s water uptake capacity is temporarily reduced — overwatering now leads directly to root rot.
Fertilization
Do not fertilize for the first 4–6 weeks after root pruning. Fresh cuts need time to callous, and new feeder roots need time to establish. Fertilizing before this point draws the tree’s energy toward the canopy before the roots can support it.
Once new growth has hardened and the tree shows vigorous extension, begin a balanced fertilizer program — a low-nitrogen formula in spring, transitioning to a higher phosphorus and potassium mix by midsummer.
Frost Protection
Spring frosts are a significant risk for freshly repotted Japanese maples. A late frost hitting a tree with newly emerged leaves and a pruned root system can cause severe dieback. Monitor forecasts and be prepared to move the tree indoors or cover it with horticultural fleece on cold nights.
How Often Should You Root Prune Japanese Maple Bonsai?
The frequency depends on the tree’s development stage and vigor:
- Young trees in development: Every 1–2 years. Young maples grow vigorously and fill pots quickly; frequent root pruning builds ramification and nebari rapidly.
- Established trees in refinement: Every 2–3 years. Refinement-stage trees need less aggressive root work and benefit from slightly longer intervals to accumulate energy.
- Older, mature display trees: Every 3–5 years, with light root maintenance (combing and partial removal) in between full prunings.
Always let the tree’s condition guide you. If the pot is clearly root-bound (roots emerging from drainage holes, rapid water runoff, poor growth despite good care), it is time to repot regardless of the schedule.
Common Mistakes to Avoid
Pruning Too Late in Spring
The most common and costly mistake. Once leaves are fully open, the canopy’s demand for water and nutrients cannot be met by a newly pruned root system. Result: leaf scorch, dieback, and sometimes tree death.
Removing More Than Half the Root Mass
Even healthy Japanese maples struggle to recover from losing more than 50% of their roots in a single session. Be disciplined: remove what is necessary, not everything you could.
Using Blunt Tools
Torn or crushed root tissue is vulnerable to infection and callouses far more slowly than a clean cut. Sharpen and sterilize tools before every root pruning session.
Planting into Completely Dry Soil
Dry soil does not make good contact with roots and makes initial watering uneven. Pre-moisten your bonsai soil mix slightly (it should hold its shape when squeezed but not drip water) before potting.
Placing in Full Sun Immediately After Repotting
Freshly pruned roots cannot yet support the evapotranspiration demands of a tree in full sun. A week or two of dappled shade or indirect light dramatically improves recovery.
Skipping Drainage Mesh
Without mesh, fine soil particles wash through drainage holes over time, clogging them and creating waterlogged conditions at the pot base — exactly where root rot begins.
Soil Mix Recommendations for Japanese Maple Bonsai
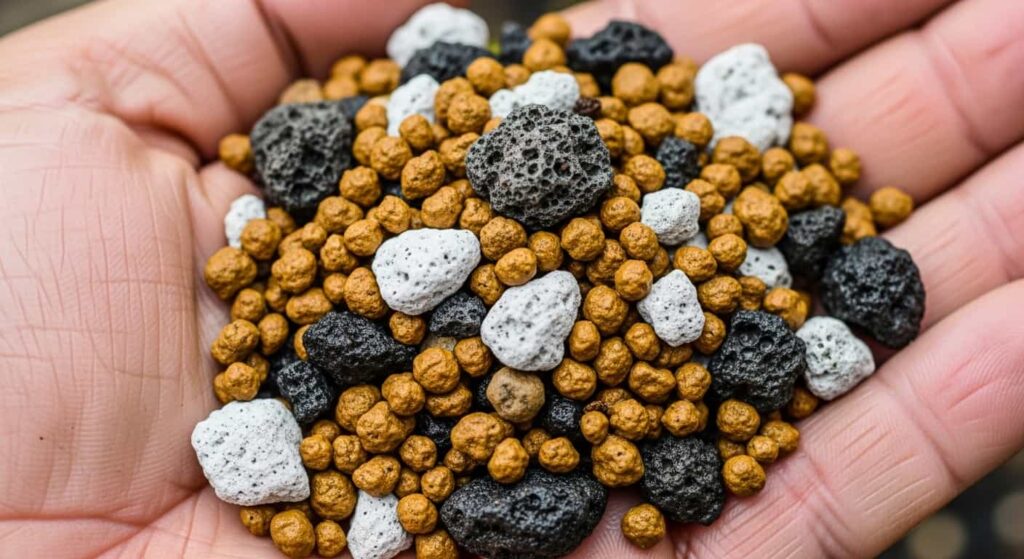
Japanese maples need a fast-draining, aerated substrate that retains just enough moisture between waterings. A widely used and effective mix is:
- 50% Akadama: Provides moisture retention and nutrient exchange
- 30% Pumice: Promotes drainage and aeration; resists compaction
- 20% Lava rock (kiryu or similar): Improves drainage, adds minerals
For climates with high rainfall or humid summers, increase the pumice and lava rock ratio to prevent waterlogging. For hot, dry climates, increase the akadama ratio slightly to retain more moisture.
Conclusion
Root pruning your Japanese maple bonsai in spring is not a task to fear — it is one of the most empowering things you can do for your tree’s long-term development. Done at the right moment, with clean tools, proper technique, and attentive aftercare, it resets the root system, drives fine feeder root development, and sets the stage for a season of strong, healthy growth.
Watch your tree closely as spring approaches. When those buds begin to swell and that unmistakable reddish tinge appears at the tips, your maple is telling you: it’s time.
For best results, keep a bonsai journal noting the date of root pruning, the condition of the root mass, the pot and soil used, and how the tree responded. Over several years, this record becomes invaluable for refining your timing and technique for each tree.