
Last Updated on March 6, 2026 by Indoor Plant Nook
TL;DR
Underwater root trimming involves pruning a bonsai’s roots while the root ball is submerged in water.
The primary benefit is preventing air from entering the tree’s vascular system (xylem), which can cause a fatal condition called air embolism.
This method is best for delicate tropical and sub-tropical species like Ficus, Carmona, and Chinese Elm, especially during major repotting.
Avoid this technique for most conifers and temperate trees unless you are an experienced grower, as they are generally more resilient to traditional root pruning.
Never soak roots for extended periods, use soapy water, or indiscriminately trim the fine feeder roots. Proper aftercare in a humid environment is crucial for recovery.
Have you ever held your breath while repotting a prized bonsai, fearing one wrong snip could spell disaster? The process of root pruning, while essential for the health of any containerized tree, is often a source of great anxiety for enthusiasts. A single mistake can introduce stress or, worse, lead to the slow decline of your carefully cultivated tree.
This guide explores a technique designed to minimize one of the biggest risks: underwater root trimming. We will dive into the science behind this method, weigh its pros and cons against traditional dry pruning, and provide a clear, step-by-step process. By the end, you will understand exactly when and how to use this technique to give your bonsai its best chance at a long and healthy life.
What Is Underwater Bonsai Root Trimming? (The Science, Not the Myth)
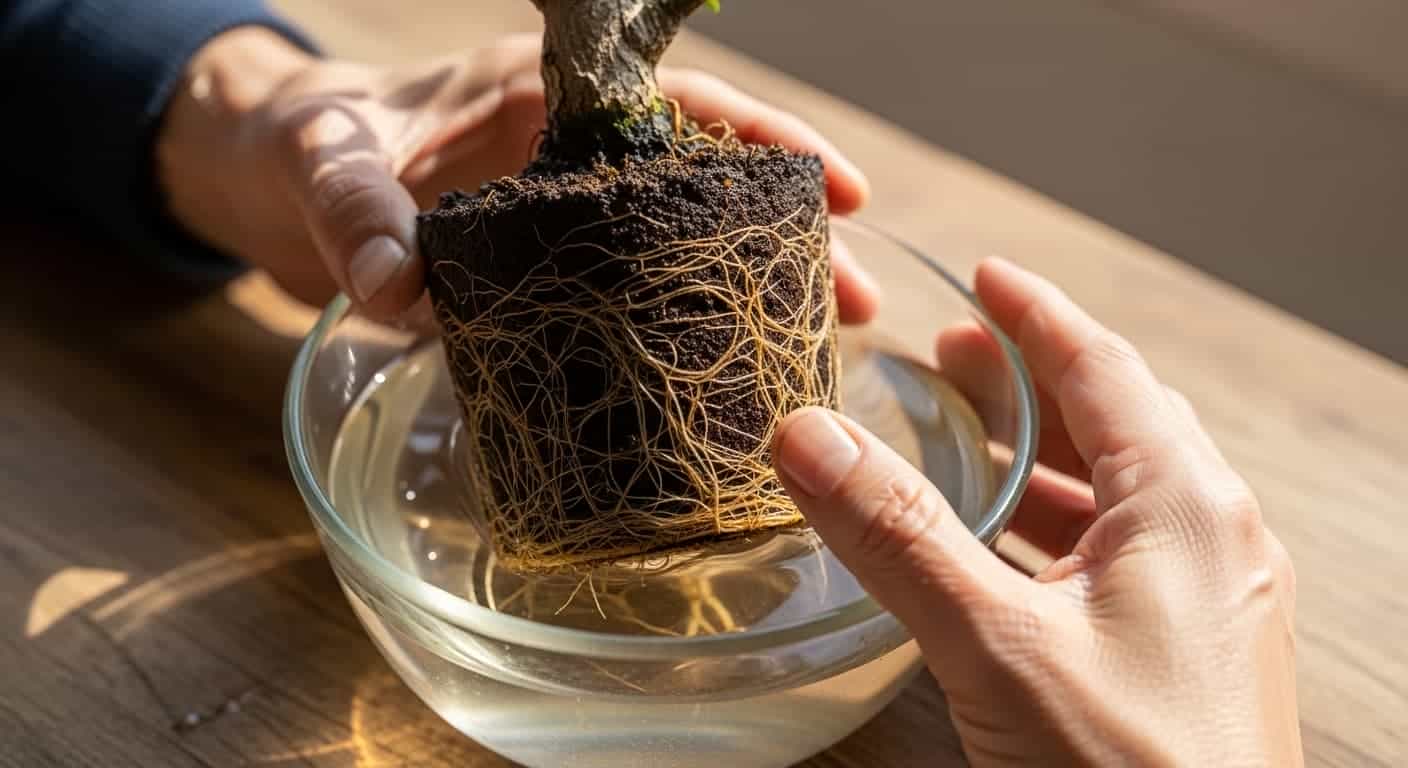
At its core, underwater bonsai root trimming is exactly what it sounds like: the practice of pruning the roots of your bonsai while the entire root ball is submerged in a basin of water. It’s a method used during repotting to protect the tree from a specific and often fatal danger.
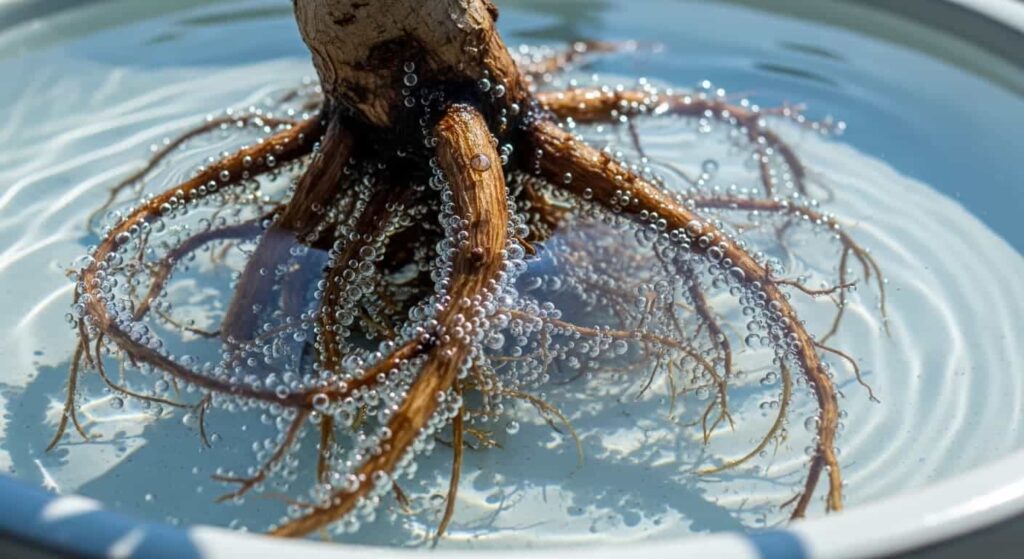
The primary reason for performing this task in water is to prevent a condition called air embolism. When you cut a root in the open air, a tiny air bubble can get sucked into the tree’s vascular tissue, known as the xylem. The xylem is like the tree’s plumbing system, responsible for transporting water from the roots to the leaves. An air bubble can create a blockage, stopping the flow of water and effectively starving that part of the tree. Submerging the roots ensures that when a cut is made, water—not air—is drawn into the open vessel, eliminating this risk.
This technique is most necessary when performing significant root work on sensitive species or on a tree that is already stressed. If you are only doing a light trim on a healthy, robust tree, the risk of a damaging embolism is lower, and dry pruning may be sufficient.
The Great Debate: Underwater vs. Dry Root Pruning
Bonsai artists have successfully used dry root pruning for centuries. So, why introduce water into the equation? Let’s compare the two methods across a few key features to help you decide which approach is right for your situation.
| Feature | Underwater Trimming | Dry Pruning |
|---|---|---|
| Air Embolism Risk | Virtually eliminated | Always present (though minimal in healthy trees) |
| Visibility of Roots | Reduced; soil clouds the water | Excellent; you can see everything clearly |
| Mess Level | Higher; requires a basin and muddy water disposal | Lower; can be done over a tarp |
| Tree Stress | Significantly reduced; roots stay hydrated | Moderate; roots are exposed to air |
| Recovery Time | Often faster for sensitive species | Standard for most hardy trees |
The key takeaway? Underwater trimming is not about replacing traditional methods—it’s about adding a specialized tool to your bonsai toolkit for when it matters most.
Which Bonsai Species Tolerate (or Require) Underwater Trimming?
Not every tree benefits from or needs this special treatment. Applying it incorrectly can do more harm than good. Understanding your tree’s specific needs is essential.
Tropical & Sub-Tropical (Good Candidates)
These species, often characterized by faster growth and more delicate root systems, are the best candidates for underwater root trimming. They are generally less tolerant of their roots drying out. The reason? Tropical trees often have larger xylem vessels to move water quickly, which also makes them more susceptible to air bubbles getting sucked in during dry pruning.
- Ficus (all varieties)
- Carmona (Fukien Tea)
- Chinese Elm
- Serissa
- Schefflera
- Premna
Using the underwater method during a major repotting can drastically improve their survival rate, especially if you are performing aggressive root reduction.
Temperate & Conifers (Proceed with Caution)
Most temperate trees (like Maples and Elms) and conifers (like Pines and Junipers) have more robust root systems. They are well-adapted to traditional repotting techniques. While underwater trimming won’t necessarily harm them, it is often an unnecessary complication.
For a healthy Japanese Maple in spring, dry pruning is the standard. Underwater trimming is generally not needed. However, if you are doing a very aggressive root reduction on an old, valuable maple, or if the tree was collected from the wild and has a compromised root system, the underwater technique could be a valuable safety net.
For most enthusiasts, reserve this method for tropical species unless you have a specific reason to use it on a temperate tree.
When to Definitely Use This Technique
Consider underwater root trimming if:
- You are repotting a tropical species during the active growing season
- The tree is already showing signs of stress (like wilting or leaf drop)
- You need to perform heavy root pruning on a sensitive specimen
- The tree is a rare or valuable specimen, where you want to minimize all risks
Step-by-Step Guide: How to Trim Bonsai Roots Underwater Safely
Ready to try it? Follow these steps for a safe and successful underwater root trimming session. Remember, efficiency is key—the entire process should take no more than 10-20 minutes.
Step 1: Gather Your Tools
Before you begin, make sure you have everything ready. You will need:
- A clean pair of root shears or sharp scissors (sterilized with rubbing alcohol to prevent infection)
- A root hook or rake (a chopstick works great in a pinch)
- A tub or basin large enough to fully submerge the root ball
- Your new pot with mesh screens already attached
- Rooting hormone powder or gel (optional but recommended)
- Fresh bonsai soil is ready nearby
Step 2: Prepare the Water Bath
Fill your basin with clean, room-temperature water. Avoid very cold or hot water, as temperature shocks can stress the tree. The water should be deep enough to completely cover the entire root ball once submerged.
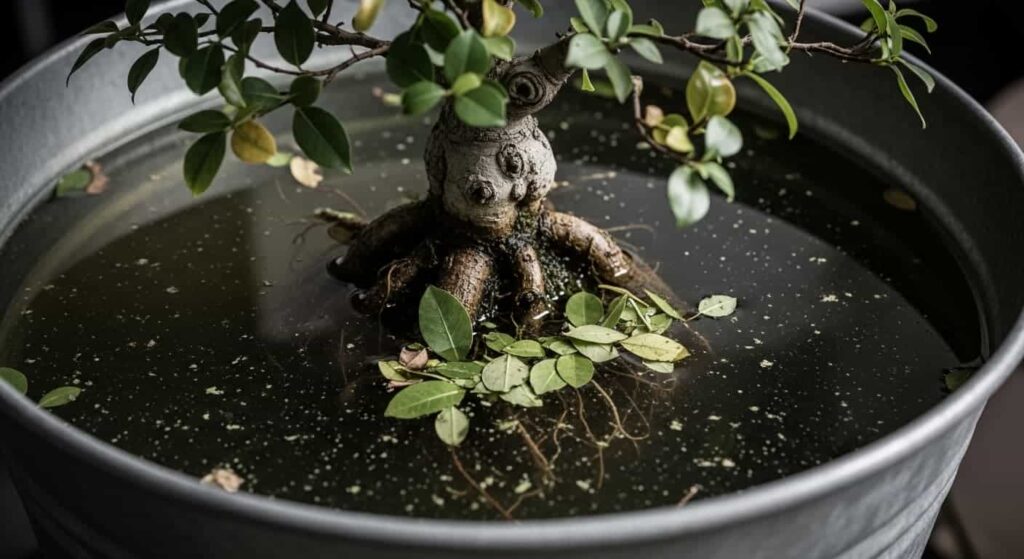
Step 3: Extract and Submerge
Carefully remove the bonsai from its pot. Gently place the entire root ball into the water bath, ensuring it is fully submerged. Let it soak for just a minute or two to soften the soil and saturate the roots.
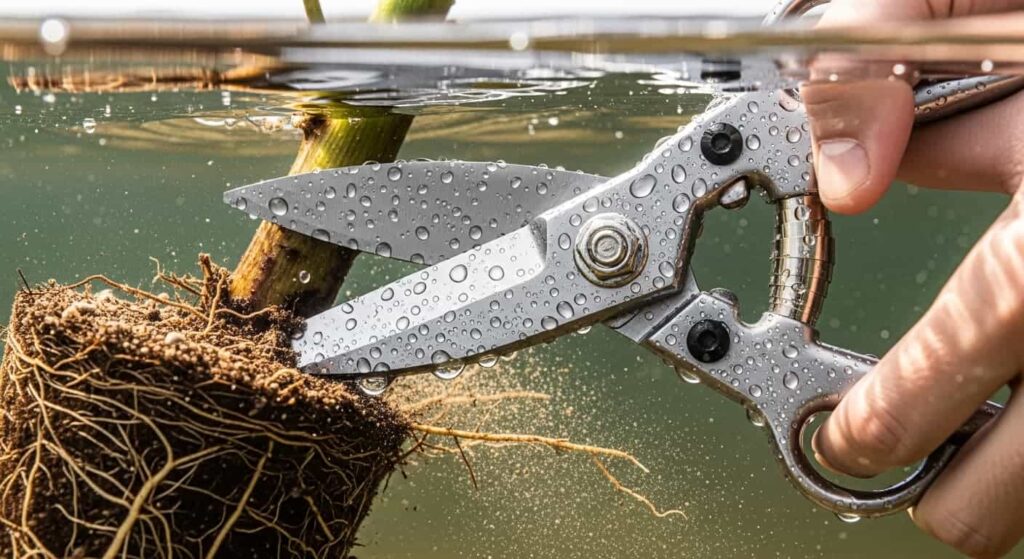
Step 4: Trim Underwater (The Window of Opportunity)
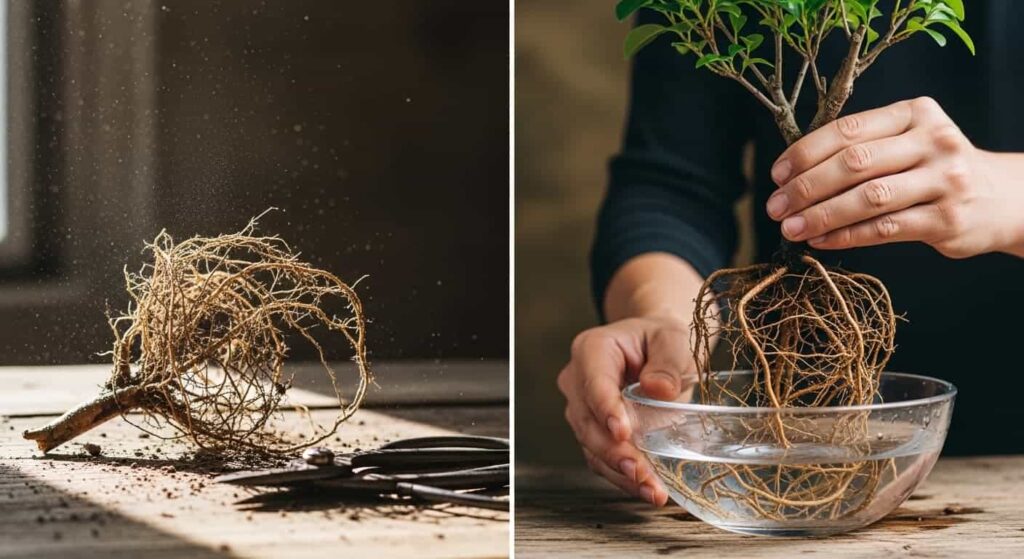
Work quickly and deliberately, aiming to finish within 10-20 minutes maximum. Use your root hook to gently tease apart the roots from the bottom and sides, allowing the old soil to fall away. The water will help it separate without tearing the fine roots.
The goal is to free up about 50-70% of the root mass to see the structure, not to remove every single particle. Once you can see the roots clearly, identify the thick, woody anchor roots that need to be shortened to fit the new pot.
As a general rule, aim to remove no more than 1/3 of the total root mass. Make clean, angled cuts with your sterilized shears, focusing on:
- The thickest, woody anchor roots
- Any roots that are circling the bottom of the pot
- Damaged or broken roots
Be extremely careful to preserve as many of the fine, fibrous feeder roots as possible. These tiny, hair-like roots are your tree’s lifeline for absorbing water and nutrients. Removing too many will severely stress the tree.
Step 5: Apply Root Hormone (The “Glue” Step)
While this step is optional, applying a rooting hormone powder or gel to the cut ends is highly recommended. It encourages new root growth and helps seal the wounds, preventing any potential infection.
Important: This must be done after you remove the tree from the water, just before potting. The hormone needs to adhere to the cut surfaces, and it won’t stick properly underwater.
Step 6: Potting Immediately
Place a layer of fresh bonsai soil in the new pot. Position your tree at the correct angle and height. Carefully work new soil in and around the roots, using a chopstick to gently poke and prod to eliminate any air pockets. The soil should make firm contact with all the roots.
Water the tree thoroughly after potting to settle the soil and ensure good root-to-soil contact.
The “Drowning” Risk: Common Mistakes That Kill Trees
The term “drowning” can be misleading, as roots need water. The real danger comes from a lack of oxygen and other common errors. Avoiding these mistakes is just as important as following the correct steps.
Mistake 1: Soaking Overnight
The biggest and most fatal mistake is leaving the root ball submerged for hours or overnight. Roots need oxygen to survive. The underwater trim should be a quick procedure, not a prolonged bath. Remember the 10-20 minute window. Any longer and you risk suffocating the roots.
Mistake 2: Using Soap or Chemicals
Never add soap, detergents, fertilizers, or other chemicals to the water. This can strip the roots of their protective layers and kill beneficial microorganisms living in the root zone. Use only clean, plain, room-temperature water.
Mistake 3: Trimming Too Many Feeder Roots
It’s easy to get carried away, but being overzealous with the shears is a common pitfall. Focus your cuts on the thick, structural roots. The fine, fibrous feeder roots are essential for recovery. If you remove them all, the tree will struggle to take up water and nutrients after repotting.
Mistake 4: Working Too Slowly
Taking too long increases stress. The roots are out of their familiar environment, even if they’re in water. Work with purpose and get the tree back into its pot and soil as efficiently as possible.
Mistake 5: Skipping Sterilization
Using dirty tools can introduce pathogens directly into the fresh cuts. Always sterilize your shears and root hook with rubbing alcohol before you begin.
Aftercare: The First 4 Weeks Post-Trimming
The work isn’t over once the tree is back in its pot. The next four weeks are critical for recovery. Proper aftercare will determine whether your tree thrives or simply survives.
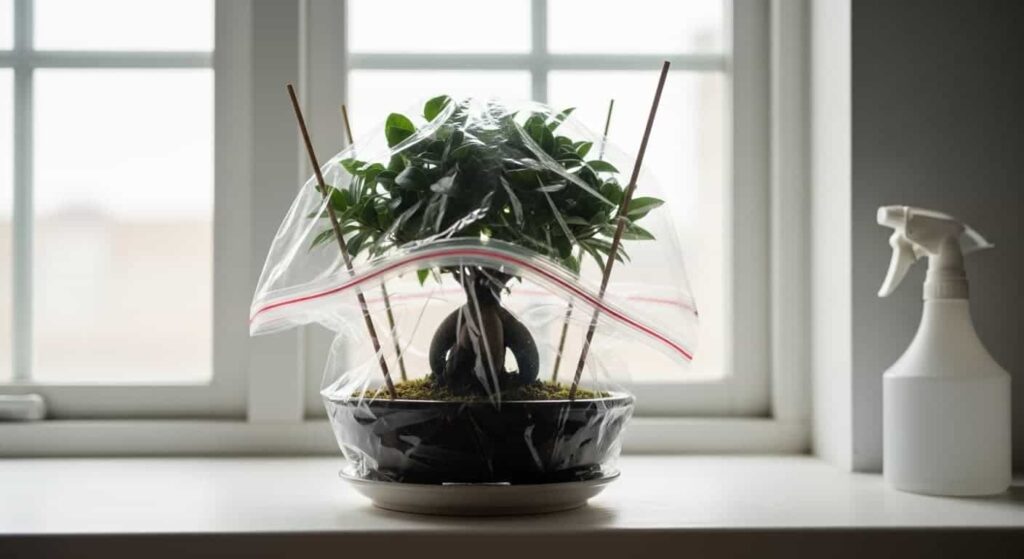
Week 1: Create a Humidity Chamber
Place the repotted bonsai out of direct sun and wind. You can create a high-humidity environment by placing a clear plastic bag over the tree (use sticks to keep the plastic from touching the leaves). This reduces water loss through the leaves while the damaged roots recover. Mist the inside of the bag if needed.
Weeks 1-2: Watering Carefully
Water the tree thoroughly after potting. For the next few weeks, monitor the soil moisture like a hawk. Because the roots are compromised, they can’t take up as much water as usual. Water only when the top layer of soil begins to feel dry to the touch. The soil must be moist but not saturated, as this can lead to root rot.
Weeks 2-3: Transitioning from the Humidity Chamber
If you used a humidity bag, don’t remove it all at once. Over the course of a week, gradually acclimate the tree by opening the bag slightly each day or poking holes in it. This allows the tree to adjust to normal humidity levels without going into shock.
Weeks 3-4: Look for Signs of Success
In the coming weeks, watch for positive signs like new bud growth or leaves perking up. This indicates the roots are recovering and beginning to function. A negative sign would be leaves that remain droopy or start to yellow and drop despite proper soil moisture. If this happens, check your watering habits and ensure the tree isn’t in direct sun.
No Fertilizer for One Month
Do not fertilize for at least one month. Fertilizing a newly repotted tree can burn the sensitive, developing roots. Let the tree focus its energy on recovery first. After a month, you can begin with a very diluted, balanced fertilizer.
Frequently Asked Questions
Can I trim roots underwater for any bonsai?
No. It is most beneficial for delicate tropical and sub-tropical species like Ficus, Carmona, and Chinese Elm. For most conifers and hardy temperate trees, traditional dry pruning is sufficient and often easier. If you’re unsure, research your specific species before proceeding.
Does underwater trimming prevent transplant shock?
It significantly reduces one major cause of transplant shock—air embolism—and keeps roots hydrated during the process. This gives the tree a much better chance at a smooth recovery, but proper aftercare is still essential to prevent shock.
Should I use cold or warm water?
Use tepid or room-temperature water (around 65-75°F or 18-24°C). Extreme temperatures can shock the root system and add unnecessary stress to an already vulnerable tree.
Can I combine this with leaf pruning?
Yes. For deciduous and broadleaf evergreen trees, reducing some of the foliage at the same time can be beneficial. This balances the workload between the reduced root system and the canopy, as there are fewer leaves for the roots to support. Remove no more than 30% of the foliage if you choose to do this.
How long should roots stay underwater?
The entire process should take no longer than 10-20 minutes. Any longer and you risk oxygen deprivation to the roots. Work efficiently and have everything prepared beforehand.
What if I see mold after using a humidity bag?
A little mold on the soil surface is sometimes normal. Improve air circulation slightly and ensure the bag isn’t completely sealed. If mold appears on the tree itself, remove the bag immediately and treat with a fungicide if necessary.
Final Thoughts: When to Use This Technique
Underwater root trimming is not a magic bullet, but a specialized tool in the bonsai artist’s toolkit. It provides a layer of insurance against the hidden danger of air embolism, offering a safer path for repotting sensitive trees. While it may be messier and require more setup than a dry prune, the peace of mind and higher success rate for delicate species make it a valuable technique to master.
The final verdict is that underwater root trimming is a highly effective method when used for the right tree at the right time. For your Ficus or Fukien Tea, it can mean the difference between thriving and merely surviving. For a hardy juniper, it’s probably unnecessary.
Consider adding this technique to your skillset. The next time you face a challenging repotting, you’ll have one more way to ensure your bonsai companion continues to flourish for years to come.
Remember: This is a guide, not a guarantee. Observing your specific tree’s reaction is the most important teacher. Every tree is different, and experience will teach you more than any article ever could.