
Last Updated on March 16, 2026 by Indoor Plant Nook
Repotting is one of the most important — and most misunderstood — aspects of juniper bonsai care. Do it at the wrong time or skip it too long, and your tree may become rootbound, decline in vigor, or even die. Do it right, and you’ll enjoy a healthier, more vibrant tree that thrives for decades.
This guide covers everything you need to know: the ideal timing, warning signs your tree is overdue, step-by-step technique, and how to recover your bonsai afterward.
Why Repotting Juniper Bonsai Matters
Repotting is not just about giving your bonsai a new container. It serves three critical purposes:
1. Root maintenance — Over time, roots circle the pot, become tangled, and consume all available soil space. Trimming roots during repotting encourages fine feeder root development, which directly improves nutrient and water uptake.
2. Soil refresh — Bonsai soil breaks down over the years, losing its drainage and aeration properties. Compacted old soil holds excess moisture and starves roots of oxygen, leading to root rot.
3. Growth control — Repotting resets the root system, keeping the tree’s growth proportionate to the pot size and the bonsai’s intended design.
Neglecting repotting doesn’t just stunt your bonsai — it can kill it slowly over several seasons.
When Is the Best Time to Repot Juniper Bonsai?
The Golden Window: Early Spring

The single best time to repot a juniper bonsai is early spring, just before the buds begin to swell and break. This is typically when daytime temperatures start to rise consistently but before the tree enters full active growth.
At this stage:
- The tree has enough stored energy from the previous growing season to handle the stress of repotting.
- The fast-approaching growing season allows the tree to quickly regenerate new roots.
- The risk of dehydration is low because transpiration (water loss through foliage) is still minimal.
In most temperate climates, this window falls between late February and early April, depending on your local conditions. In warmer climates (USDA Zone 9–10), it may arrive as early as January. In colder zones (5–6), it may not come until mid-April.
Can You Repot in Other Seasons?
While early spring is ideal, experienced growers sometimes repot at other times with proper precautions:
| Season | Suitability | Notes |
|---|---|---|
| Early Spring | ✅ Best | Before bud break; ideal recovery conditions |
| Late Spring | ⚠️ Acceptable | Tree is actively growing; minimize root pruning |
| Summer | ❌ Avoid | Heat stress + root disturbance = high risk |
| Fall | ⚠️ Risky | Some growers do it in early fall with strong trees |
| Winter (dormancy) | ❌ Avoid | Roots cannot regenerate in cold temperatures |
Summer repotting is especially dangerous for junipers. High temperatures accelerate moisture loss through the foliage while the damaged roots can’t compensate. Unless you have years of experience and exceptional aftercare conditions, avoid it entirely.
How Often Should You Repot Juniper Bonsai?
There is no universal schedule. Repotting frequency depends on the tree’s age, health, and root development rate:
- Young trees (under 10 years old): Repot every 1–2 years. Young trees grow aggressively and fill pots quickly.
- Mature trees (10–20 years old): Repot every 2–3 years.
- Old, refined specimens: Repot every 3–5 years or when the signs below appear.
The key is to repot based on the tree’s need, not a fixed calendar. A vigorous young tree may need annual repotting, while a refined older tree might go four or five years between repots without issue.
Signs Your Juniper Bonsai Needs Repotting
Never assume your tree is ready for repotting by calendar alone. Always inspect the root system. Here are the clear indicators:
1. Roots Circling the Pot or Emerging from Drainage Holes

When roots visibly escape from the drainage holes or circle densely along the inner pot walls, the tree is rootbound. This is the most reliable sign that repotting is overdue.
2. Water Drains Too Quickly or Pools on the Surface
If water runs straight through without being absorbed, the soil has likely been replaced by compacted roots with no space left. If water pools and drains very slowly, the soil has broken down and lost its drainage capacity.
3. Declining Vigor or Yellowing Foliage
A tree struggling in exhausted, compacted soil often shows reduced vigor — shorter internodes, smaller needles, or pale, yellowish-green foliage. If your juniper looks “tired” despite adequate watering and fertilizing, the root system may be the cause.
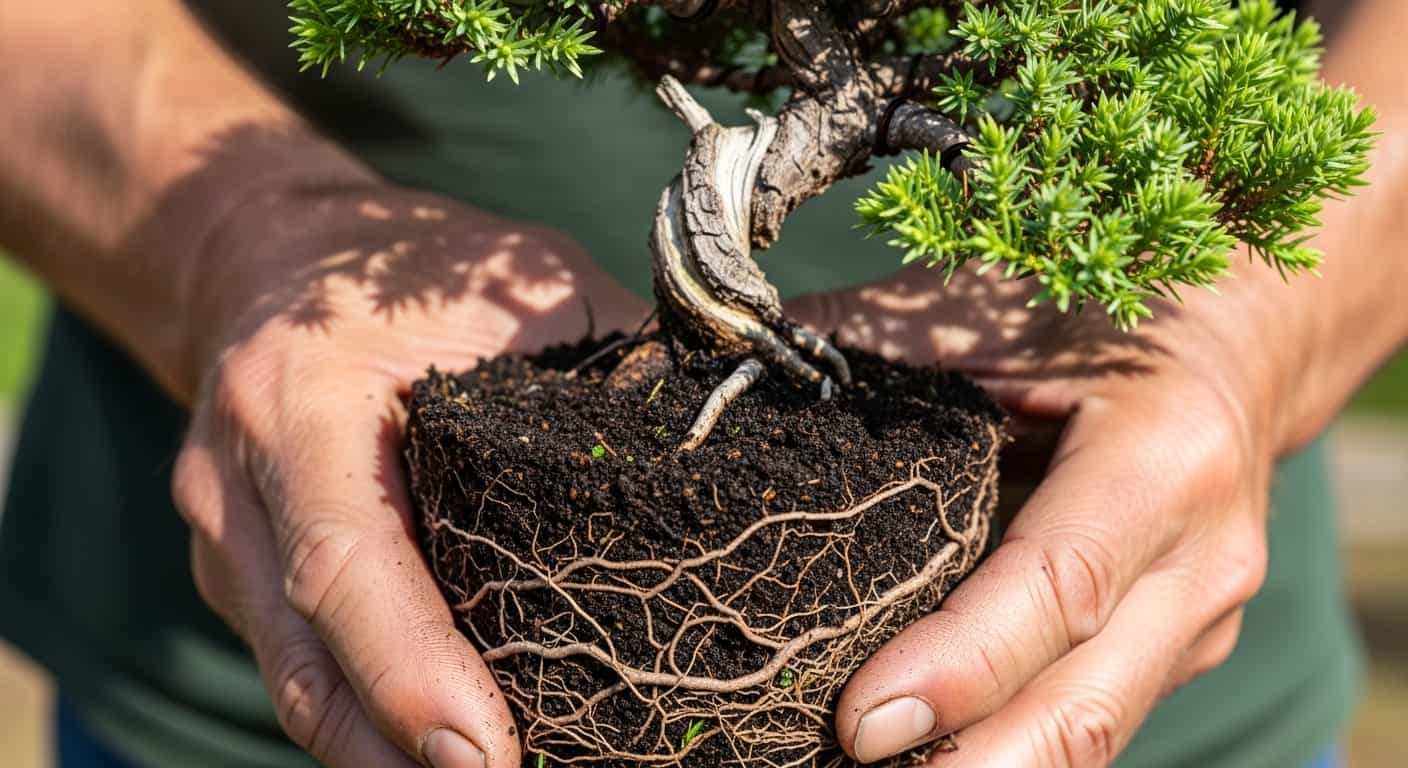
4. The Root Ball Lifts Easily from the Pot
Carefully tip the tree out of its container. If the root ball comes out as one solid, dry mass with little loose soil visible, it is severely rootbound.
5. It’s Been More Than 3–4 Years
Even if your tree looks healthy, very old soil loses its structure and nutrient-holding capacity. A precautionary repot every 3–4 years is good practice for mature trees.
What You Need Before Repotting
Gather all materials before you start. Once you remove the tree from its pot, work quickly to minimize root exposure to air.
Essential supplies:
- Sharp bonsai root scissors or pruning shears (sterilized)
- Root hook or chopstick (for loosening old soil)
- Fresh bonsai soil mix (akadama, pumice, and lava rock — ideally 1:1:1)
- The new pot (with drainage holes)
- Mesh screens to cover drainage holes
- Anchor wire (for securing the tree in the new pot)
- A fine-mist spray bottle with water
Avoid using standard potting compost. It retains too much moisture and breaks down quickly, suffocating juniper roots within a single season.
Step-by-Step Guide to Repotting Juniper Bonsai
Step 1: Remove the Tree from Its Pot
Loosen the perimeter of the root ball with a chopstick or root knife. Gently tip the tree on its side and slide it free. If the tree is secured with wire, cut and remove the wire first.
Step 2: Remove Old Soil
Using a root hook or chopstick, carefully tease away the old soil from the root mass. Work from the outside in, avoiding aggressive tearing. Remove as much old soil as possible — at least 50–75% — so the new soil can make direct contact with the roots.
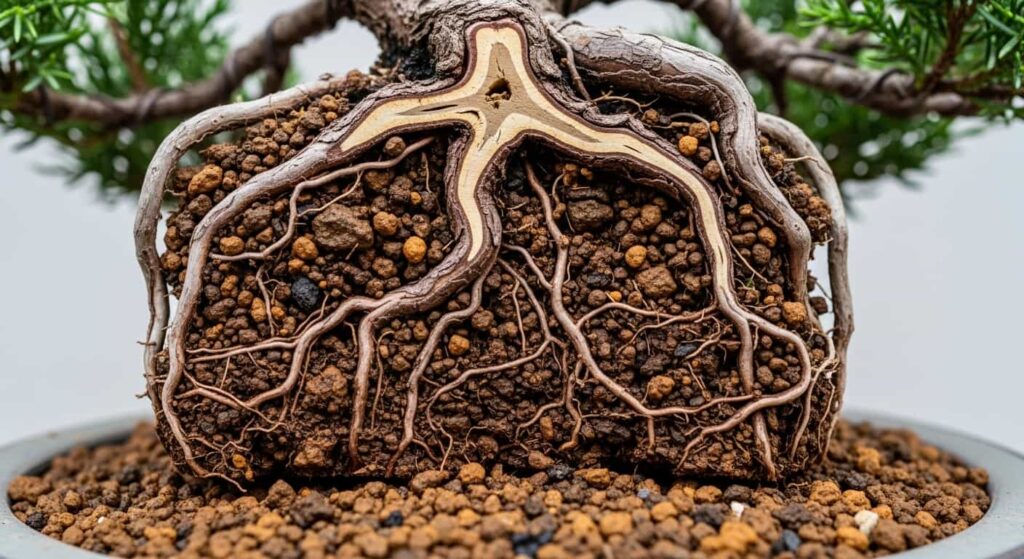
Step 3: Inspect and Prune the Roots

Examine the roots carefully:
- Remove dead, mushy, or rotting roots entirely.
- Cut away any long, circling roots using sharp scissors.
- Trim the overall root mass by no more than one-third in a single repotting session. Removing too much root at once can kill a juniper.
- Leave the fine, fibrous feeder roots intact — these are the most important for water and nutrient absorption.
Step 4: Prepare the New Pot
Place mesh screens over the drainage holes. Thread anchor wire up through the holes. Add a thin layer of coarse grit or pumice to the bottom for extra drainage.
Add a mound of fresh bonsai soil in the center — the height of this mound will position your tree at the correct angle.
Step 5: Position and Secure the Tree
Place the tree on the soil mound at the desired angle. Twist the anchor wire over the root ball and secure it firmly underneath. The tree should not wobble at all when the wire is tightened.
Step 6: Add Fresh Soil
Work fresh bonsai soil around and under the root mass using a chopstick. Push soil into every gap and air pocket — this is critical. Air pockets around roots cause die-back. Continue adding and working the soil until the pot is filled to just below the rim.
Step 7: Water Thoroughly
Water the tree deeply until water runs freely from the drainage holes. This settles the soil and ensures good soil-to-root contact. Use a gentle rose-headed watering can to avoid disturbing the surface.
Aftercare: The Most Critical Phase
Repotting stresses your juniper. The days and weeks after repotting determine success or failure.
Place in a Sheltered Location
Keep the tree in a sheltered spot out of direct harsh sunlight and strong winds for 2–4 weeks. A location with bright, indirect light is ideal. Avoid a greenhouse or enclosed space in warm weather — air circulation matters.
Water Carefully
Keep the soil evenly moist but not waterlogged. Overwatering a freshly repotted bonsai with a reduced root system is one of the most common mistakes. Check soil moisture daily using a chopstick or moisture probe.
Do Not Fertilize Immediately
Wait at least 4–6 weeks before applying any fertilizer. New, tender roots are sensitive to fertilizer burn. Once new growth begins to emerge and elongate, this is your signal that root regeneration is underway — then fertilizing is safe.
Protect from Frost
If a late frost threatens after repotting, bring the tree indoors or into an unheated garage temporarily. A freshly repotted tree is more vulnerable to frost than a tree with an established root system.
Watch for Stress Signals
Some foliage discoloration in the first week or two is normal. However, watch for:
- Severe browning or needle drop
- Wilting that doesn’t respond to watering
- Complete foliage dieback
These could indicate excessive root damage or rot, and you should assess the root ball for problems.
Common Repotting Mistakes to Avoid

Repotting in summer heat — Perhaps the single most common mistake. Even a small root disturbance in high temperatures can be fatal.
Using the wrong soil — Standard potting mix will retain water and compact over time. Always use an inorganic or semi-inorganic bonsai mix with excellent drainage.
Removing too many roots at once — Stick to removing no more than one-third of the root mass per session. If a tree is severely rootbound, you may need to spread root reduction across two repotting cycles.
Not anchoring the tree — A tree that wobbles in its pot cannot form new roots. The movement tears delicate new root tips before they can establish.
Fertilizing too soon — Fresh roots are easily burned. Patience in the weeks after repotting is essential.
Choosing the Right Pot for Your Juniper Bonsai
Repotting is also an opportunity to evaluate your container choice. A few guidelines:
- Size: The pot should be approximately two-thirds the height of the tree or two-thirds the width of the canopy (whichever is greater). Going too large is as problematic as going too small — excess soil stays wet and promotes root rot.
- Depth: The pot depth should roughly match the trunk diameter at the base.
- Material: Unglazed ceramic and stoneware pots are traditional and work excellently. They allow slight air exchange through the pot walls.
- Drainage: Always ensure at least two drainage holes of adequate size.
Juniper Bonsai Repotting: Quick Reference Summary
| Question | Answer |
|---|---|
| Best season | Early spring, before bud break |
| How often (young tree) | Every 1–2 years |
| How often (mature tree) | Every 2–4 years |
| Max root removal | No more than one-third at a time |
| Fertilize after repotting | Wait 4–6 weeks |
| Full recovery time | 4–8 weeks |
Final Thoughts
Repotting a juniper bonsai is not a task to rush or guess through. Done correctly and at the right time, it revitalizes your tree, stimulates vigorous new growth, and sets the foundation for the next several years of development. Done carelessly or at the wrong season, it can undo years of careful cultivation.
Early spring, just before bud break, remains the safest and most effective repotting window for virtually all juniper bonsai. Learn to read your tree’s signals, keep your tools sharp, and invest in quality bonsai soil — and your juniper will reward you with strong, healthy growth season after season.