
Last Updated on March 6, 2026 by Indoor Plant Nook
TL;DR: Quick Wins for Bonsai Root Pruning in Water
- Clear Visibility: Submerging roots washes away stubborn soil, letting you clearly see which thick roots to cut and which fine feeder roots to keep.
- Stops Drying Out: Fine bonsai roots can dry out and die within minutes in the open air. A water bath keeps them safely hydrated during the entire pruning process.
- Safe Handling: Wet roots become flexible and pliable. This allows you to easily untangle them without snapping delicate branches.
- Disease Detection: Working in water makes it easy to spot and remove dark, mushy roots affected by rot before they spread.
- The Golden Rule: Only prune up to one-third of the root mass during repotting to avoid shocking the tree.
- Timing is Everything: Always tackle root pruning in early spring for temperate trees, just before the tree fully leafs out for the season.
Introduction
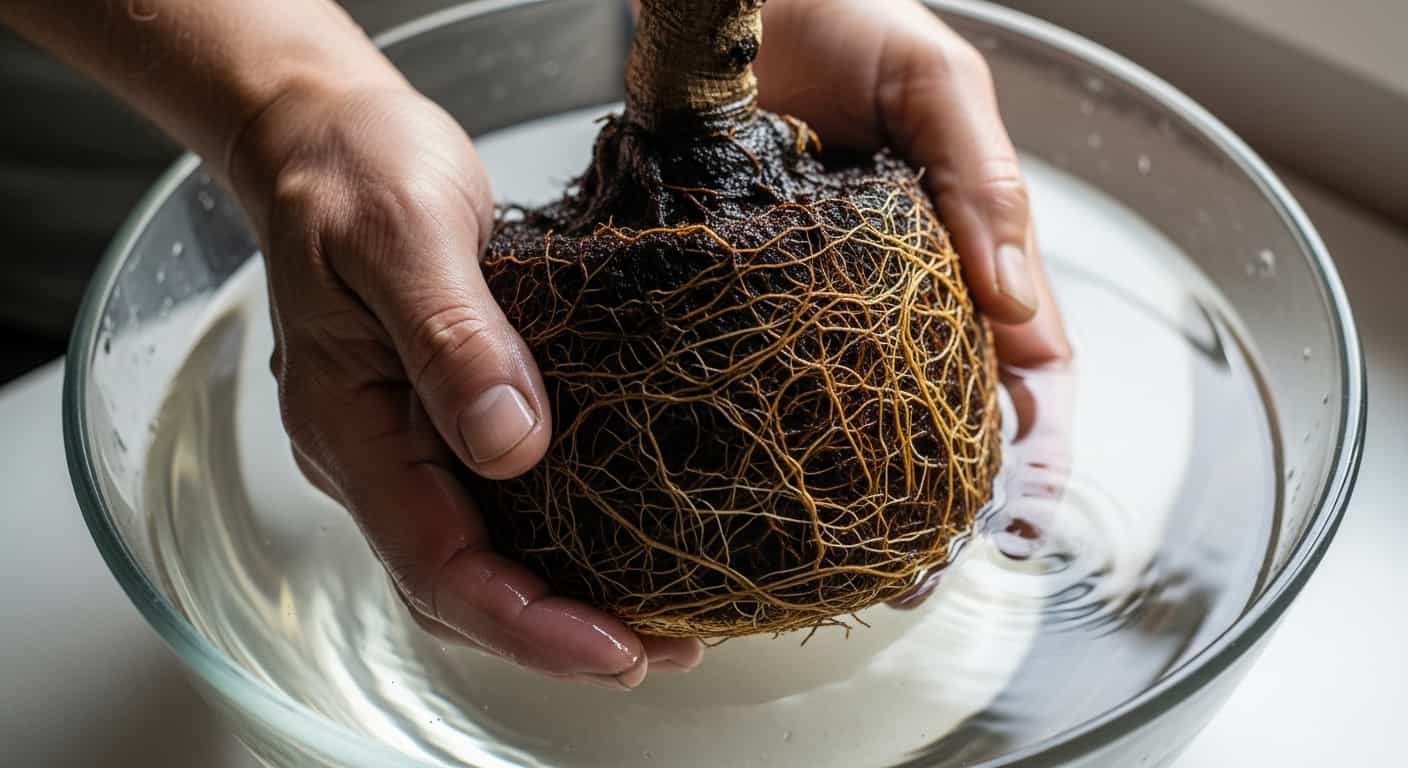
Picture the mesmerizing process of preparing a bonsai for its spring repotting. An experienced artist gently lifts a miniature tree from its ceramic pot. But instead of laying it on a dry workbench, they immediately plunge the entire root ball into a basin of water. Then, the careful snipping and pruning begin right there beneath the surface.
Why is water such a critical part of this delicate process? You might wonder if it is just a convenient way to wash away old dirt. However, there is a much deeper, biological reason behind this technique. Working with roots underwater is a calculated practice designed to protect the tree during its most vulnerable moment.
This post will dive deep into the science and art behind root pruning in water. We will separate common myths from proven facts, ensuring you have the exact knowledge you need to help your bonsai thrive for decades to come.
The Fundamental Goal: Restricting Growth to Create Art
Before we look at the water method, we must understand the “why” behind root pruning itself. The word “bonsai” literally translates to “tray cultivation.” It is the ancient art of dwarfing trees through careful container restriction and regular pruning.
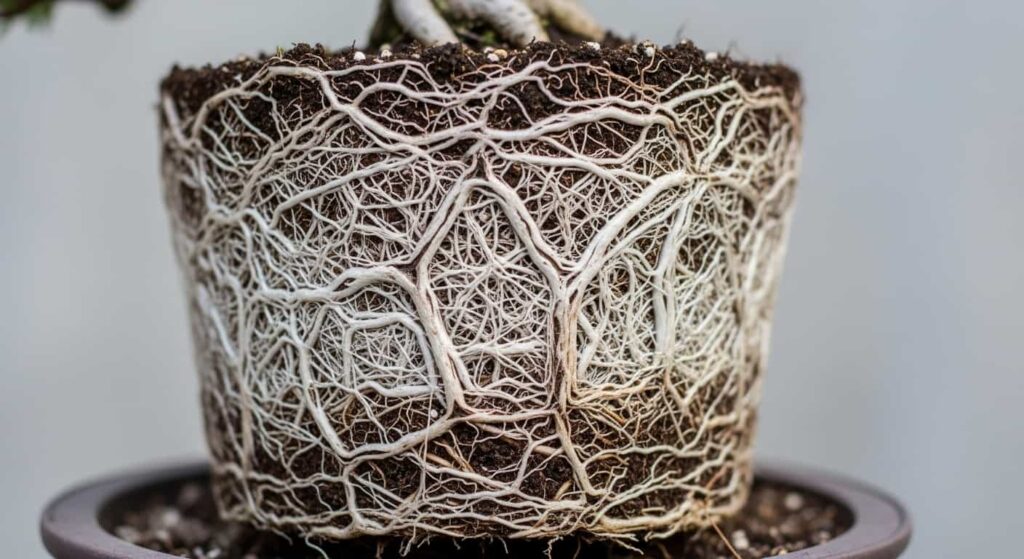
Root pruning is an essential maintenance task. If you simply leave a tree in a small pot indefinitely, it will eventually become “pot-bound.” The roots will circle the inside of the container over and over. This creates a dense, tangled mat that chokes out oxygen and prevents water from penetrating the soil. A pot-bound tree slowly starves to death.
Regular root pruning solves this problem and serves three crucial purposes:
- Prevents suffocation and rot: Removing thick, circling roots frees up physical space in the pot for fresh soil, oxygen, and water, preventing the stagnant conditions that lead to root rot.
- Encourages fine roots: Chopping thick, woody taproots forces the tree to push out fine, fibrous feeder roots. These tiny roots are incredibly efficient at absorbing moisture and nutrients.
- Maintains the aesthetic: A compact root system slows the aggressive top-growth of the tree. This helps you maintain the tree’s miniature size and balances the delicate foliage-to-root ratio.
Why Water? The Three Key Benefits of the “Water Method”
So, why perform this vital surgery in a tub of water? Bonsai masters rely on the water method because it offers three distinct advantages that dry pruning simply cannot match.
Benefit 1: Unparalleled Visibility and Precision
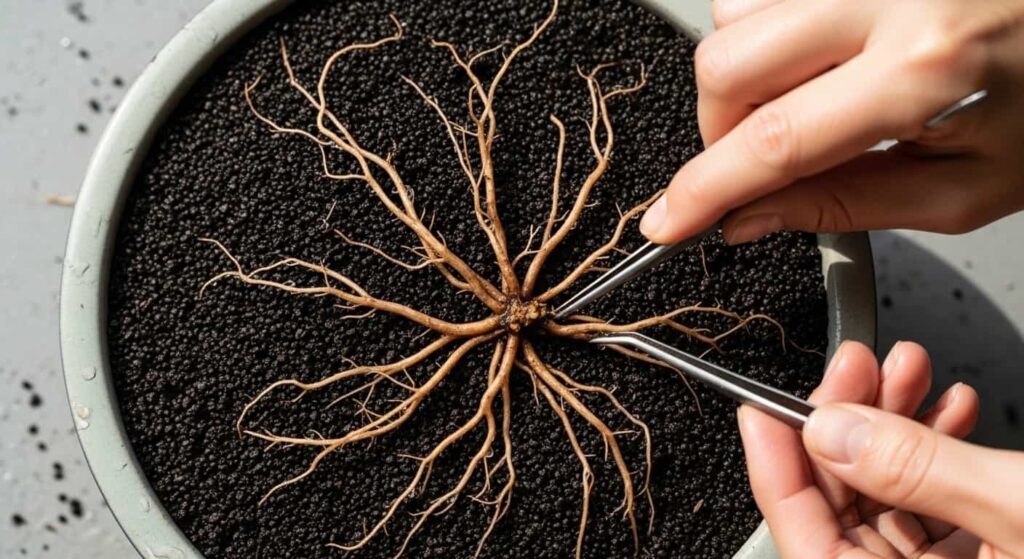
When bonsai soil is dry or slightly damp, it clings stubbornly to the fine roots. This creates a solid block of dirt that completely hides the tree’s internal root structure. If you try to prune blindly, you risk cutting the wrong things.
Water gently and effectively washes away even the smallest particles of clay and pumice. As the soil falls away to the bottom of the basin, the artist can finally see the entire root system clearly. You can easily spot the thick, woody roots that need to be removed. More importantly, you can identify and preserve the delicate, hair-like feeder roots that keep the tree alive. This incredible visual clarity allows you to make precise, radial cuts that will help the root system fit neatly back into a shallow bonsai pot.
Benefit 2: Preventing Root Desiccation (Drying Out)
Bonsai roots, especially the tiny feeder roots, are incredibly fine and sensitive to their environment. Exposure to dry room air or a light breeze for even a few short minutes can dry them out completely. This causes irreversible damage, often referred to as “root burn.” Once those fine roots dry up and die, the tree loses its ability to drink water.
The water basin acts as a protective, hydrating bath. It keeps the roots perfectly turgid and safe from the drying air throughout the entire untangling and pruning process, which can sometimes take twenty to thirty minutes for a complex tree.
Benefit 3: Ease of Handling and Manipulation
Dry roots are often stiff and brittle. If you try to pull them apart with a metal root hook, they can snap and break easily.
Water naturally makes the roots much more pliable and flexible. This wet flexibility allows you to gently untangle dense knots, remove old impacted soil, and spread the roots out flat without causing unnecessary physical damage.
Benefit 4: Proactive Disease Detection
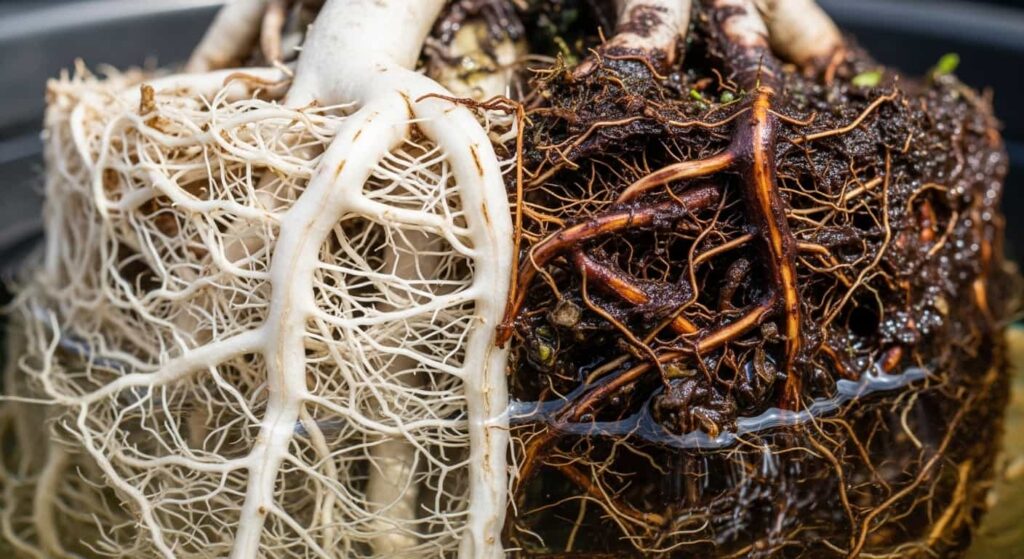
The clear water also acts as a diagnostic tool. It allows you to easily spot roots that are struggling. If you see roots that are dark brown or black, mushy, or have a foul smell, these are signs of root rot. You can immediately prune these unhealthy parts away back to firm, white, healthy tissue, preventing the decay from spreading to the rest of the root system.
Myth-busting: It is important to clarify that you are not rooting the tree in water like you would a household pothos cutting. You are strictly using the water as a temporary tool during the repotting process. Rooting a woody, established bonsai tree in water long-term is highly dangerous. It deprives the roots of necessary oxygen and almost always leads to fatal root rot.
A Step-by-Step Guide to Root Pruning with Water
Now that you understand the science, let us walk through the actual process. Here is a practical, easy-to-follow guide to safely pruning your bonsai roots in water.
Step 1: When to Do It
Timing determines your success. Root pruning is intensely stressful for a tree. For most temperate trees (like maples and elms), you must do it in early spring, just as the leaf buds begin to swell, but right before the tree has fully leafed out. During this brief window, the tree is waking up from winter dormancy and has the surging energy required to heal cut roots rapidly. For tropical species (like Ficus), wait until late spring or early summer when temperatures are consistently warm.
Step 2: Gather Your Tools
Preparation prevents panic. Have all your supplies ready before you remove the tree from its pot. You will need:
- A basin or container filled with clean, room-temperature water.
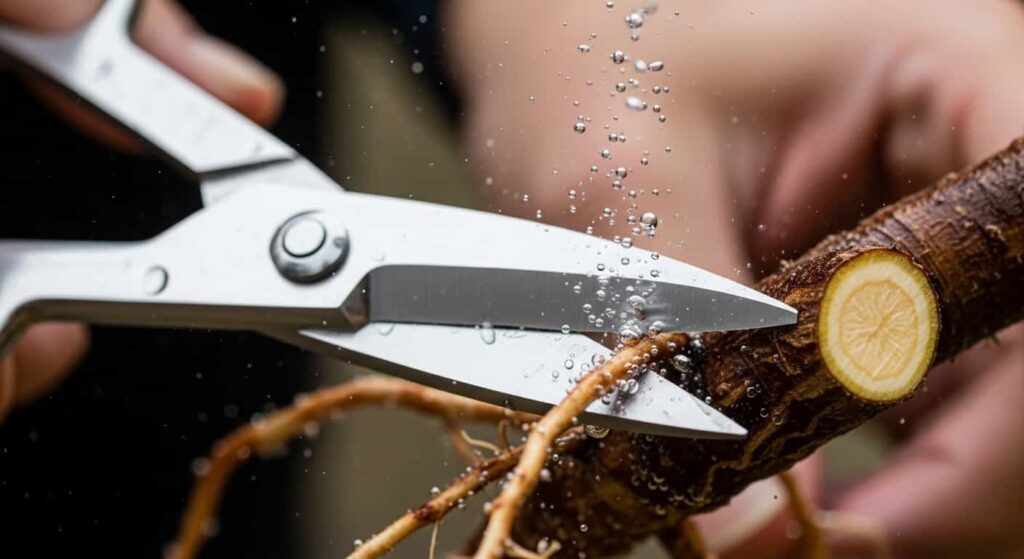
- Sharp, sterilized concave root scissors or shears. (Sterilization is key to prevent introducing diseases into the fresh wounds. Wipe the blades with rubbing alcohol or a 10% bleach solution before you start and between trees if you are repotting more than one.)
- A metal root rake or a smooth wooden chopstick.
- Your clean bonsai pot, with drainage screens already wired in place.
- A fresh, fast-draining bonsai soil mix.
Step 3: The Process in Water
Begin by gently removing the tree from its current pot. You will likely need to use wire cutters to snip the anchoring wires underneath the pot first.
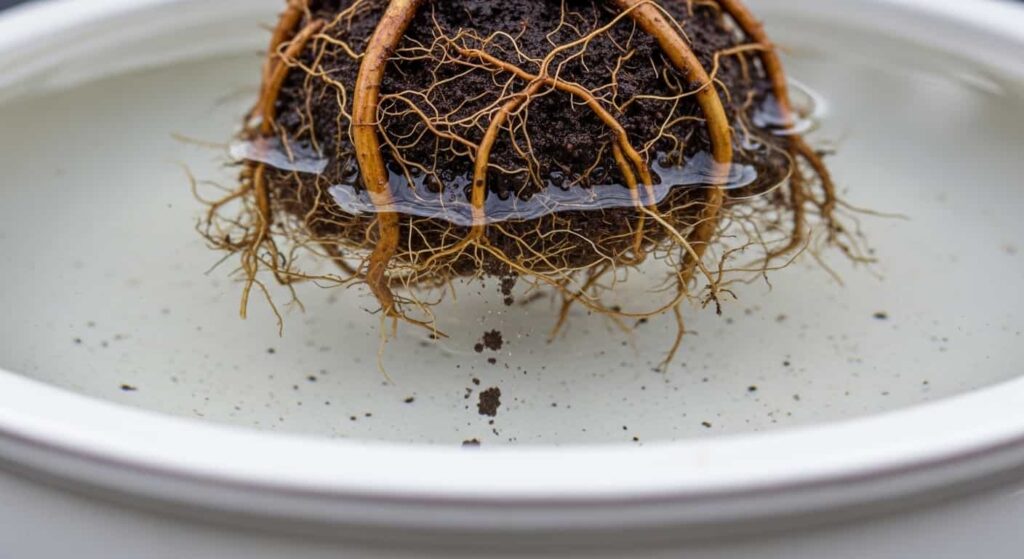
Immediately submerge the entire root ball into your container of water. Keep it under the surface. While underwater, use your root rake or chopstick to gently tease away the old soil. Always work outward from the trunk toward the tips of the roots, mimicking a combing motion.
Once the roots are clean and clearly visible, pick up your sharp scissors. Cut away any thick roots, roots that grow straight downward, or roots that circle the perimeter. Your goal is to create a flat, pancake-like radial root system that will sit comfortably in a shallow pot. While submerged, also inspect for any dark, mushy roots and prune those away completely.
The General Rule: Never remove more than one-third of the total root mass. Taking off too much will shock the tree and severely stunt its recovery.
Step 4: Post-Prune Potting
Lift the pruned tree out of the water. Move quickly now. Place a bottom layer of fresh soil into your newly prepared pot. Set the tree down onto the soil layer, spreading the wet, pruned roots radially out from the trunk so they do not overlap.
Cover the roots with more fresh soil. Take your wooden chopstick and repeatedly poke it down into the soil around the roots. This wiggling action works the soil particles down into the small gaps, eliminating any hidden air pockets that could dry out the roots later. Finally, water the pot thoroughly until clear water runs out of the bottom drainage holes. This settles the soil firmly against the roots.
Step 5: Aftercare
Your tree just underwent major surgery. Place the repotted bonsai in a sheltered, shady spot for three to four weeks. Keep it entirely out of direct sunlight and harsh winds. This gentle environment allows the cut roots to heal, recover, and begin pushing new growth into the fresh soil without the stress of rapid moisture loss.
Common Mistakes to Avoid
Even with the water method, repotting comes with risks. Watch out for these common pitfalls:
- Over-pruning: Taking off too many roots at once will weaken or completely kill the tree. Always be conservative. You can always prune more next time.
- Using Cold Water: Filling your basin directly from a cold outdoor hose can shock the warm roots. Always use room-temperature or slightly tepid water.
- Letting Roots Dry Out: If you choose not to use the full water basin method, you must work incredibly fast. Keep the exposed roots constantly sprayed with a misting bottle, or cover them with a damp towel to prevent them from drying out in the air.
- Rooting Cuttings vs. Root Pruning: Remember the difference. This water pruning process is exclusively for maintaining established, potted trees. It is not a method for starting brand-new trees from unrooted cuttings in a glass of water on your windowsill.
Conclusion
Trimming bonsai roots in water remains a gold-standard practice among enthusiasts and masters alike. It offers the clear visibility needed to make precise, safe cuts. It provides constant hydration to protect highly sensitive feeder roots. It makes the roots pliable enough to untangle and arrange perfectly. And crucially, it gives you the chance to inspect for and remove disease before it takes hold.
While the process of chopping away a third of your tree’s roots looks drastic, do not panic. A healthy bonsai, pruned at the right time in spring, will recover quickly and vigorously. You will be rewarded with a beautiful new flush of green growth and a highly refined, miniature form. Mastering this technique is a significant step in your bonsai journey, moving you from simply keeping a tree alive to actively shaping its health and artistic future for years to come.