
Last Updated on May 1, 2026 by Indoor Plant Nook
Repotting sounds intimidating the first time: roots, soil, broken stems, and the fear of “shocking” a plant you already like. In practice, repotting pothos (Epipremnum aureum and common cultivars) is one of the best beginner skills to learn because pothos recovers quickly, shows clear feedback when something is off, and tolerates reasonable mistakes better than many trendy houseplants. This guide walks you through when to repot, what supplies matter, a step-by-step workflow, and the follow-up care that prevents rot after transplant.
When pothos actually needs repotting
Not every calendar year demands a new pot. Repot when there is a real reason, such as:
Rootbound conditions: Roots circling heavily, growing out drainage holes, or lifting the plant so water races through the pot without soaking properly.
Soil breakdown: Mix that has collapsed, stays soggy too long, smells off, or no longer drains the way it used to—often after years in the same container.
Growth goals: You want a larger specimen on a pole, or you need a heavier pot for a top-heavy trailing basket.
Problem recovery: You are addressing root rot or severe compaction and must replace substrate after trimming damaged roots.
If the plant is healthy, not rootbound, and the soil still dries on a sensible rhythm, you can skip repotting. Pothos does not require annual pot changes as a ritual.
Choose the right season—flexibly
Ideal timing is often spring through early summer when longer days and warmer conditions support root regeneration. But indoor growing blurs seasons; if you have stable warmth and good light, repotting outside the “perfect” window can still succeed. Avoid repotting into cold, dark conditions if you can help it—basement benches in winter with poor light increase the odds of stalled roots and lingering wet soil.
Gather supplies before you start
Pot: Choose one one size up if growth is the goal—typically an inch or two wider in diameter for houseplant pots, not a leap into a bathtub-sized container. Oversized pots stay wet longer and invite rot.
Drainage: If your decorative cachepot has no holes, keep the plant in a nursery pot nested inside, or drill drainage if the material allows. Pothos is not a good candidate for drainage-free culture unless you are deliberately growing in water or an experienced semi-hydro setup.
Mix: Use a chunky, well-aerated potting blend. Many growers combine high-quality indoor potting soil with perlite and/or orchid bark to increase pore space. Dense “moisture control” mixes can work in dry homes but still must breathe; heavy garden soil is usually wrong for containers.
Tools: Gloves (optional), scissors or pruners sanitized with alcohol, a tarp or newspapers, a chopstick for settling soil, and water.
Workspace: A table you can wipe down; pothos sap can irritate skin for some people—wash hands after handling.
Step 1: Water lightly—or not right before—depending on your goal
There are two schools of thought. Some growers prefer repotting when soil is slightly moist so roots are flexible and less brittle. Others prefer moderately dry soil so the root ball releases from the old pot more cleanly. For beginners, lightly moist is often easiest: the root ball holds together better than dust-dry soil, but is not mud-wet.
If you are repotting due to suspected rot, the approach changes: you may need to rinse roots to inspect them, and you will remove damaged tissue before replanting.
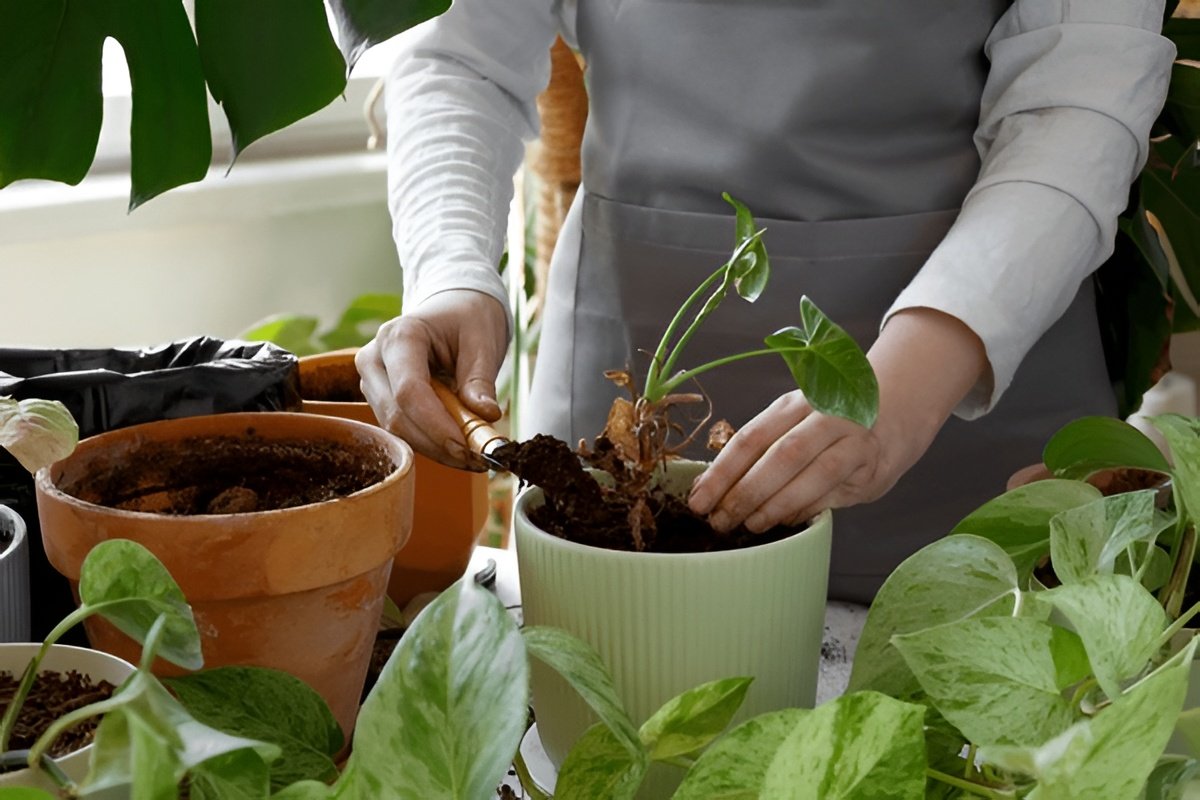
Step 2: Remove the plant from the pot
Tip the pot sideways, support the stems with your hand, and slide the root ball out. If it sticks, squeeze plastic nursery pots gently or run a knife around the inner edge of rigid pots. Never yank stems like rope handles; mechanical injury becomes entry points for disease and weakens the plant.
If roots emerge from drainage holes, coax them through or unthread carefully rather than tearing.
Step 3: Inspect roots and soil
Healthy roots are generally pale, firm, and fragrant in an earthy “normal soil” way—not sour or fermented. Dark brown/black roots that are mushy or hollow-feeling are typical signs of rot and should be trimmed back to firm tissue with clean tools.
Tease apart circling roots at the bottom gently. For mild circling, loosen the outer layer so roots can grow outward. For severe mats, you may slice vertically in a few places with a clean blade—this sounds dramatic, but for aggressive root systems it can stimulate new growth outward. Do this conservatively if you are new; pothos is resilient, but you still prefer minimal trauma.
Remove old debris from the surface—salt crust, dead leaves, moss that hides moisture patterns.
Step 4: Prepare the new pot
Place a mesh or pottery shard over drainage holes if soil falls through easily; do not create a “sealed pond” at the bottom—drainage must remain real.
Add fresh mix to the bottom so the plant sits at the correct height: the crown should remain near the same level it was before, not buried deeply under new soil.
Step 5: Center the plant and fill around the root ball
Set the root ball in place, keep the plant upright, and add mix around the sides in stages. Tap the pot gently or use a chopstick to settle medium into air pockets. Avoid packing soil like concrete; firm enough to support, loose enough to breathe.
If you are planting a stem cutting cluster, ensure nodes are oriented sensibly and that the soil supports stems without snapping them.
Step 6: Water thoroughly—then respect drainage
Water until liquid runs from the holes, ensuring new mix makes full contact with roots. Discard saucer water after 15–30 minutes so the plant is not reabsorbing standing moisture indefinitely.
Some growers wait a day before watering if many roots were trimmed due to rot; that choice depends on how much tissue was removed and how dry the remaining roots were. When uncertain after a heavy rot trim, err toward slightly drier restart and high humidity around foliage without soaking damaged roots immediately—yet do not leave fibrous roots bone dry for a week.
Aftercare: light, shock, and expectations
Expect a brief settling period: a leaf or two may yellow as the plant prioritizes roots. This is not always failure—watch trends. If yellowing accelerates, reassess drainage, stem rot at the soil line, or unseen mechanical damage.
Light: Provide bright indirect light after repotting; avoid blasting freshly disturbed roots with the hottest sun.
Fertilizer: Delay heavy feeding briefly; many mixes contain starters, and roots need time to reconnect before pushed with salts.
Support: If you repotted onto a moss pole, secure vines without crushing stems; aerial roots may attach over time.
Common beginner mistakes to avoid
Oversized pots: Bigger is not kinder if soil stays wet half the week.
No drainage: A recipe for grief unless you are deliberately using another system.
Burying stems too deep: Can encourage stem rot on buried tissue.
Compacted mixes: Roots need air pockets; fluff and chunkiness matter.
Repotting pest-infested plants without treatment: You move the pests into fresh real estate.
Repotting as an opportunity: division and cuttings
Repotting day is an excellent moment to split an oversized plant into two pots if the root mass allows gentle separation—or to snip a few cuttings for propagation jars while you already have tools out. Sanitize blades between plants if you are working multiples.
The first-week watering rhythm without second-guessing every hour
New soil behaves differently from the old peat that collapsed inside its previous pot. Moisture hides differently: the rim can feel dry while the core near older roots stays damp quietly. Probe in more than one place the first few days rather than reacting to a single crumbly surface. Chunky mixes can dry faster than memory suggests; peat-forward mixes forgive forgetfulness longer but punish oxygen shortages—watch weight and dryness depth together.
When to reopen the pot after “successful” repotting
If yellowing accelerates after repotting—especially if soil smells sour or stays wet while leaves still look thirsty—re-inspect roots sooner than next season’s calendar. Early intervention prevents cosmetic leaf loss from becoming systemic collapse. Photograph before and after each repot for your own learning trail; human memory exaggerates how “gentle” we were with roots.
Matching pot depth to root depth (and why it matters)
Wide, shallow soup bowls look trendy but can create a moisture profile that does not match pothos roots when the saucer never quite empties and the bottom inch behaves like a sponge. If you choose a new container, favor proportions that encourage vertical drainage and a root zone that dries relatively evenly—often a standard nursery depth beats an overly flat decorative bowl. If aesthetics demand a shallow cachepot, keep the plant in a deeper inner insert that can be lifted for judgment-free watering.
Final reassurance
Repotting pothos is less about perfection and more about creating root conditions that match how you water indoors. If your new pot drains, your mix breathes, and your watering follows the soil rather than anxiety, your pothos will likely reward you with fresh growth surprisingly soon.
Keep a dated photo after each repot—months later, when growth feels “stuck,” ex-before shots settle debates about whether roots truly recovered or the pot quietly returned to soggy margins.
Related Pothos Guides
- How Fast Does Pothos Grow? Growth Rate & What Affects It
- How to Propagate Pothos in Water — The Easiest Method, Step by Step
- How to Propagate Pothos in Soil — Tips for Better Root Success
- Propagating Pothos in LECA / Semi-Hydroponics: A Beginner’s Guide
- How Long Does It Take for Pothos Cuttings to Root?