

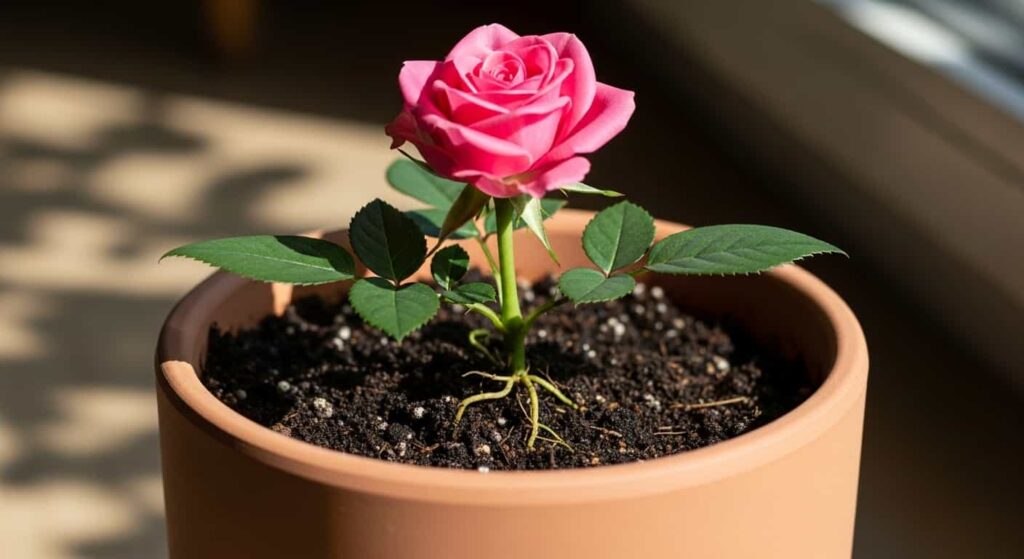
Growing roses indoors can be a truly rewarding experience, bringing timeless beauty and a delicate fragrance into your home. Unlike their garden-dwelling counterparts, indoor roses rely entirely on you for their every need, and the foundation of their health lies directly beneath the surface. The soil in their pot is their entire world—the source of nutrients, water, and air. Getting the soil mix right isn’t just a suggestion; it’s the single most important step toward cultivating vibrant, healthy indoor roses that produce stunning blooms year after year.
Many gardeners, both new and experienced, find indoor rose care challenging. Yellowing leaves, stunted growth, and a lack of flowers are common complaints. Often, the culprit is not a lack of light or improper watering but a poor-quality potting medium. Commercial, all-purpose potting soils are rarely sufficient for the specific demands of roses. These plants require a unique balance of drainage, water retention, aeration, and nutrition that a generic mix simply cannot provide.
This guide will walk you through everything you need to know to create the best soil mix for your healthy indoor roses. We will explore why soil quality is paramount, break down the essential ingredients for a perfect rose-potting medium, and provide step-by-step instructions for mixing it yourself. You’ll also learn about proper potting techniques and long-term soil maintenance to ensure your indoor roses don’t just survive—they thrive.
Why Soil Quality is Non-Negotiable for Indoor Roses
The soil in a container is a closed ecosystem. In a garden, roots can spread far and wide in search of moisture and nutrients, and natural processes help maintain soil structure. In a pot, the roots are confined. This limited environment makes the quality of the soil mix critically important for several reasons.
1. Nutrient Delivery: Roses are heavy feeders, meaning they have high nutritional requirements to support their lush foliage and prolific blooming. The soil mix must not only contain essential nutrients but also be able to hold onto them effectively, releasing them slowly over time. A well-structured soil with organic matter acts as a natural pantry for your plant.
2. Water Management: The balance between water retention and drainage is perhaps the most delicate aspect of indoor rose care.
- Drainage: Soil that is too dense or compacted will hold excess water, leading to waterlogged roots. This condition, known as root rot, is one of the quickest ways to kill an indoor rose. It suffocates the roots, preventing them from absorbing oxygen and nutrients, and creates a breeding ground for fungal diseases.
- Retention: On the other hand, a mix that drains too quickly will not hold enough moisture for the roots to absorb. You’ll find yourself watering constantly, and the plant may still show signs of dehydration, such as wilting leaves.
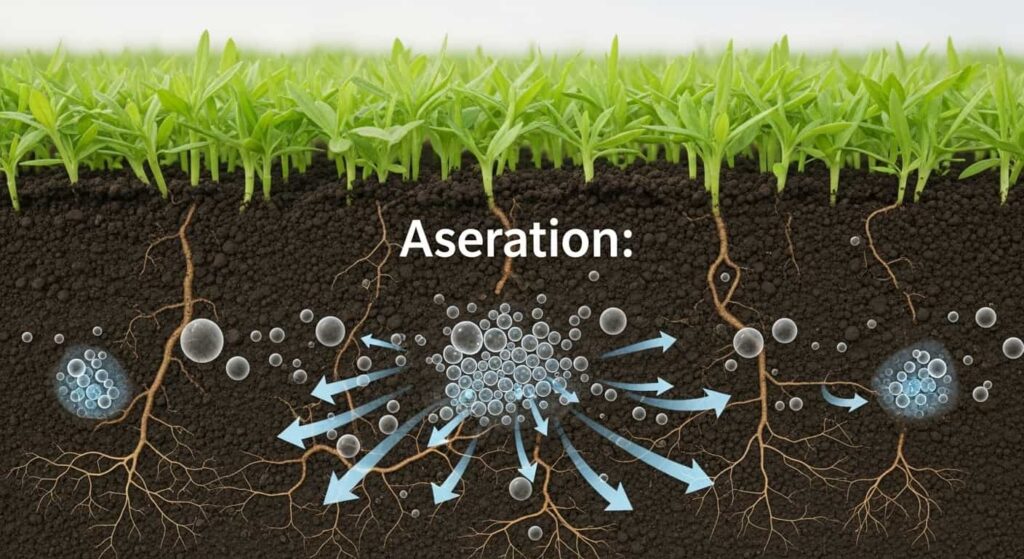
3. Aeration and Oxygen: Plant roots need to breathe. Oxygen is crucial for the metabolic processes that allow roots to absorb water and nutrients. A light, airy soil mix with plenty of pore space allows for essential gas exchange between the roots and the atmosphere. Compacted, heavy soil cuts off this oxygen supply, leading to weak, unhealthy root systems.
4. pH Balance: Roses thrive in slightly acidic soil, with a pH level between 6.0 and 6.5. This specific range is where the nutrients they need—like nitrogen, phosphorus, and iron—are most available for absorption. If the soil is too alkaline or too acidic, nutrients can become “locked up,” making them inaccessible to the plant even if they are present in the soil.
5. Structural Support: The soil mix provides the physical anchor for the rose bush. It needs to be substantial enough to hold the plant upright and support a robust root system as it grows.
Creating a custom soil mix allows you to control all these factors, tailoring the environment perfectly to the needs of your indoor roses.
The Building Blocks: Key Components of the Ideal Rose Soil Mix
Crafting the perfect soil for indoor roses is like baking a cake; it requires the right ingredients in the right proportions. Each component serves a specific purpose, contributing to the overall structure, fertility, and health of the medium. Here are the essential ingredients for a superior indoor rose soil mix.
1. The Base: High-Quality Potting Soil or Loam
Start with a solid foundation. Instead of grabbing the cheapest bag of potting soil, look for one that is specifically formulated for containers and is rich in organic matter. A high-quality potting mix will already have a good balance of drainage and water retention. Alternatively, you can use garden loam if it is available and sterilized. Loam is a soil type composed of sand, silt, and clay in balanced proportions, providing excellent structure and fertility.
What to look for:
- A base that feels light and fluffy, not dense or muddy.
- Avoid products labeled “potting soil” that are primarily composed of uncomposted wood chips or sand.
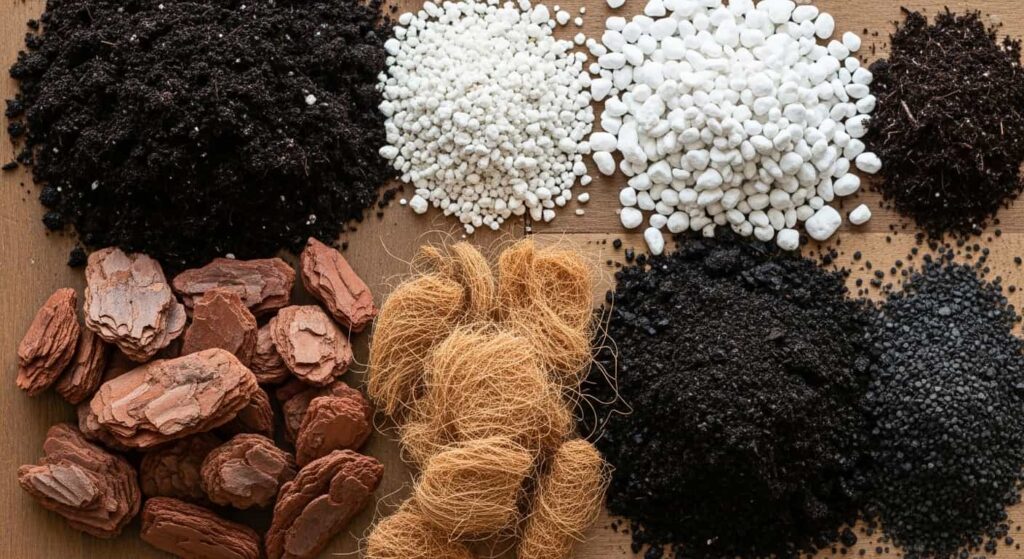
2. For Drainage and Aeration: Perlite and Pine Bark Fines
These ingredients are crucial for preventing waterlogging and ensuring your rose’s roots get enough oxygen.
- Perlite: This is a volcanic glass that is heated until it pops like popcorn, creating a lightweight, porous, and sterile material. It looks like small white Styrofoam balls. Perlite does not absorb much water, but its irregular shape creates air pockets in the soil, dramatically improving drainage and aeration. It is an indispensable component for any container plant prone to root rot.
- Pine Bark Fines: These are small, shredded pieces of pine bark. They serve a similar function to perlite by creating air pockets and improving drainage. As they slowly decompose over a long period, they also add a small amount of organic matter and help to slightly acidify the soil, which is beneficial for roses.
3. For Moisture Retention: Peat Moss or Coco Coir
These materials act like a sponge, holding onto water and nutrients and making them available to the plant’s roots as needed.
- Sphagnum Peat Moss: This is a classic soil amendment known for its ability to hold several times its weight in water. It is also slightly acidic, which helps to maintain the desired pH for roses. However, there are environmental concerns about the sustainability of harvesting peat bogs. It can also be difficult to re-wet once it completely dries out.
- Coco Coir: A popular and sustainable alternative to peat moss, coco coir is made from the fibrous husks of coconuts. It has excellent water-holding capacity, a neutral pH, and is slow to break down. It is also easier to rehydrate than peat moss. When purchasing coco coir, look for a product that has been rinsed to remove excess salts.
4. For Nutrition and Soil Structure: Compost and Worm Castings
These are the powerhouses of fertility in your soil mix. They provide a slow, steady supply of essential nutrients and introduce beneficial microbes.
- Compost: Well-rotted compost is black gold for any garden, and it’s just as valuable for container plants. It provides a wide range of macro and micronutrients, improves soil structure, and enhances both water retention and drainage. Use a finished, mature compost that is dark, crumbly, and has an earthy smell.
- Worm Castings (Vermicompost): This is another name for worm manure. Worm castings are one of the best organic fertilizers you can use. They are incredibly rich in nutrients that are readily available to plants. They also improve soil aeration and contain enzymes and beneficial bacteria that help protect plants from disease.
The Perfect Recipe: How to Mix Your Own Indoor Rose Soil
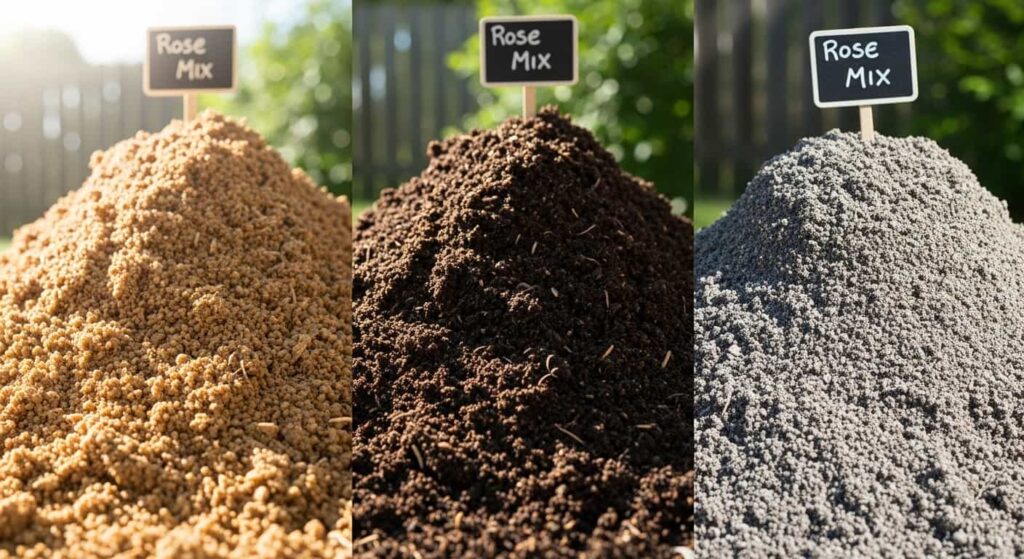
Now that you understand the components, it’s time to put them all together. This DIY recipe is designed to create a balanced, fertile, and well-draining medium perfect for healthy indoor roses.
You will need a large bucket or a tarp for mixing.
The Proportions (by volume):
- 2 parts High-Quality Potting Soil or Loam
- 2 parts Compost
- 1 part Perlite
- 1 part Pine Bark Fines
- 1 part Peat Moss or Coco Coir
- 1/2 part Worm Castings
Step-by-Step Mixing Instructions:
- Prepare Your Ingredients: If you are using compressed blocks of coco coir or peat moss, rehydrate them first according to the package directions. Break up any large clumps in your compost or potting soil.
- Combine the Base and Organic Matter: In your mixing container, start by combining the 2 parts of potting soil and 2 parts of compost. Mix them thoroughly until they are evenly distributed. This forms the nutrient-rich foundation of your mix.
- Add the Drainage Elements: Next, add 1 part of perlite and 1 part of pine bark fines. Wear a mask when handling dry perlite to avoid inhaling the dust. Mix again until the white specks of perlite and dark pieces of bark are spread evenly throughout the base. You should notice the mix becoming visibly lighter and more aerated.
- Incorporate the Moisture Retainer: Add 1 part of rehydrated peat moss or coco coir. This can be a bit tricky to integrate, so use your hands to break it up and blend it into the rest of the mixture. Ensure there are no dry pockets or clumps.
- Add the Nutrient Boost: Finally, add 1/2 part of worm castings. This final addition supercharges your mix with readily available nutrients and beneficial microbes. Give the entire mixture one last thorough blending.
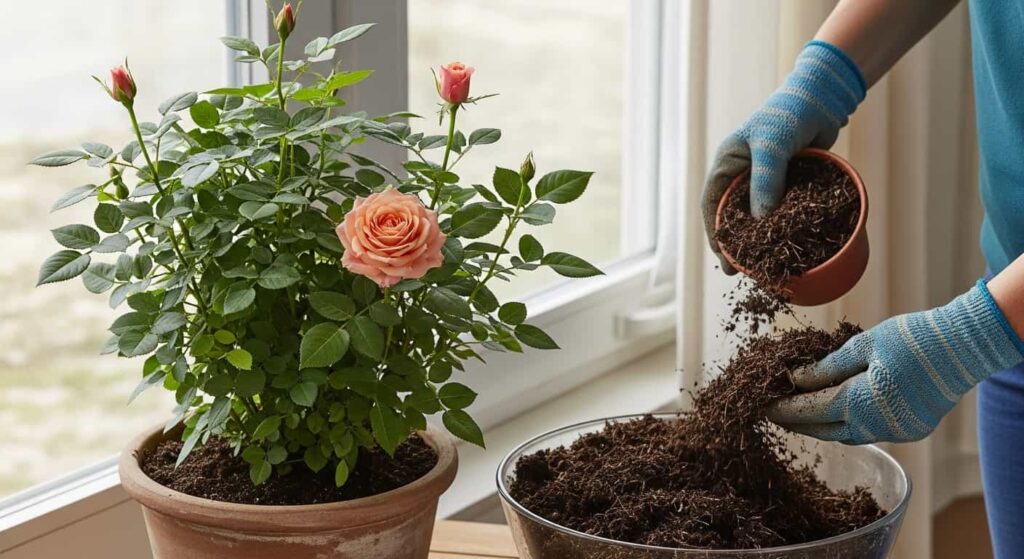
Testing Your Mix: The final product should feel rich, loamy, and light. When you squeeze a handful, it should hold its shape but crumble easily when you poke it. It should not feel heavy, muddy, or sandy. If it feels too dense, add a bit more perlite. If it seems too light and dry, a little more compost or coco coir can help.
Potting Your Indoor Rose: Setting It Up for Success
Once you have your premium soil mix ready, the next step is to pot your rose correctly.
Choosing the Right Pot:
- Size: Select a pot that is only 2-4 inches wider in diameter than the plant’s current root ball. A pot that is too large holds excess soil that can stay wet for too long, increasing the risk of root rot.
- Drainage: This is non-negotiable. The pot MUST have at least one large drainage hole, and more is better. Do not add a layer of gravel or rocks to the bottom of the pot; this old practice has been proven to hinder drainage rather than help it.
The Potting Process:
- Prepare the Pot: If you are reusing an old pot, scrub it thoroughly with hot, soapy water and then sanitize it with a solution of 1 part bleach to 9 parts water to kill any lingering pathogens.
- Add a Base Layer of Soil: Fill the bottom of the new pot with a few inches of your freshly made soil mix.
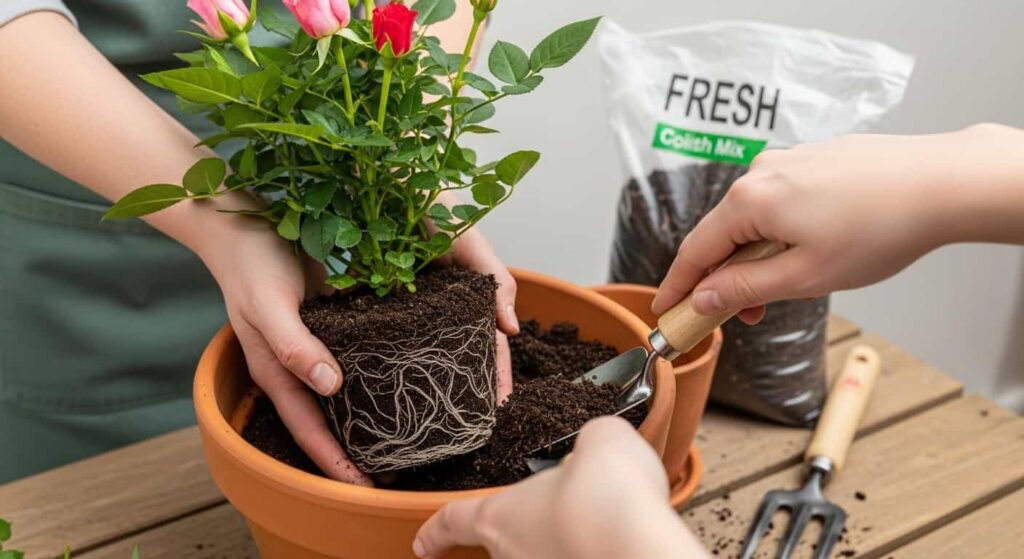
- Remove the Rose from its Old Pot: Gently squeeze the sides of the nursery pot to loosen the soil. Tip the plant on its side and carefully slide it out. Do not pull it by the stem.
- Inspect and Loosen the Roots: Examine the root ball. If the roots are tightly wound in a circle (a condition known as being “root-bound”), gently tease them apart with your fingers. This encourages them to grow outward into the new soil.
- Position the Plant: Place the rose in the center of the new pot. The top of the root ball should sit about one inch below the rim of the pot to allow space for watering.
- Fill with Soil: Add your soil mix around the root ball, gently pressing it down to eliminate large air pockets. Do not compact the soil too tightly. Fill the pot to just below the top of the root ball.
- Water Thoroughly: The most important final step is to water the plant deeply until water runs freely from the drainage holes. This helps the soil settle around the roots and eliminates any remaining air pockets. Allow the pot to drain completely before moving it to its final location.
Long-Term Soil Health: Maintenance Tips for Your Indoor Roses
Your job isn’t done after potting. The soil in a container degrades over time. Nutrients are consumed by the plant and leached out by watering, and the organic components slowly decompose, causing the soil to compact. Proper maintenance is key to keeping the soil healthy for the long term.
Fertilizing:
Even with a nutrient-rich soil mix, your indoor roses will need regular feeding during the growing season (spring and summer).
- Use a balanced liquid fertilizer formulated for roses, diluted to half-strength.
- Fertilize every 2-4 weeks. Stop fertilizing in the fall and winter when the plant’s growth naturally slows down.
- Always water the plant before fertilizing to avoid burning the roots.
Watering Properly:
- Check the soil moisture every few days by inserting your finger about two inches deep.
- Water only when the top two inches of soil feel dry to the touch.
- When you water, do so thoroughly until it drains from the bottom. Discard any excess water from the saucer. Never let the pot sit in standing water.
Top-Dressing:
Each spring, you can rejuvenate the soil without fully repotting. Gently scrape off the top inch or two of old soil and replace it with a fresh layer of compost and worm castings. This replenishes nutrients and improves the soil structure at the surface.
Repotting:
Your indoor rose will likely need to be repotted into a larger container every 2-3 years, or when it becomes root-bound. The best time to repot is in early spring, before new growth begins. Use the same process as before, moving up to a pot that is 2-4 inches larger in diameter and using a fresh batch of your custom soil mix.
By investing time and effort into creating the best soil mix, you are providing the optimal foundation for your indoor roses to flourish. This carefully crafted medium will support a strong root system, provide consistent nutrition, and maintain the perfect moisture balance, rewarding you with the lush foliage and beautiful, fragrant blooms that make growing roses indoors such a delight. Happy growing