
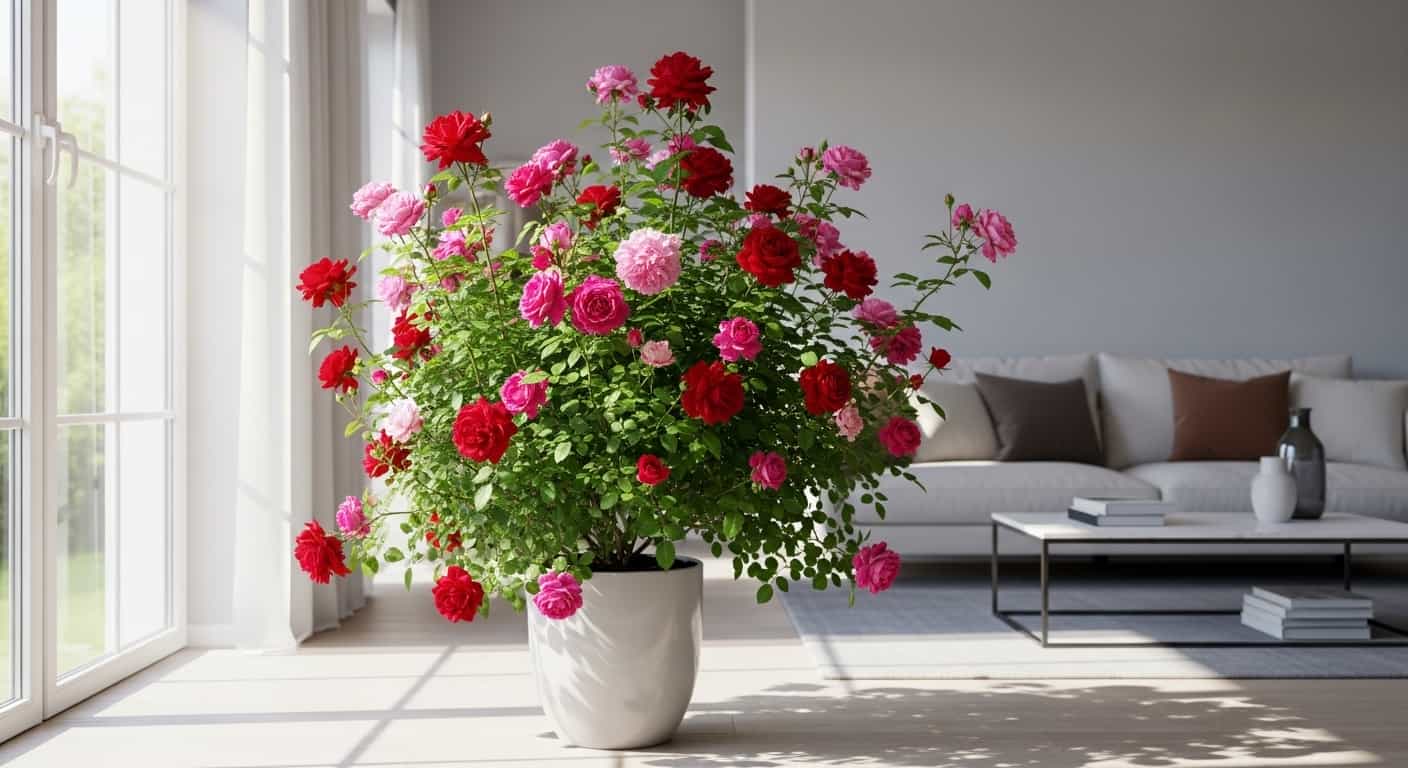
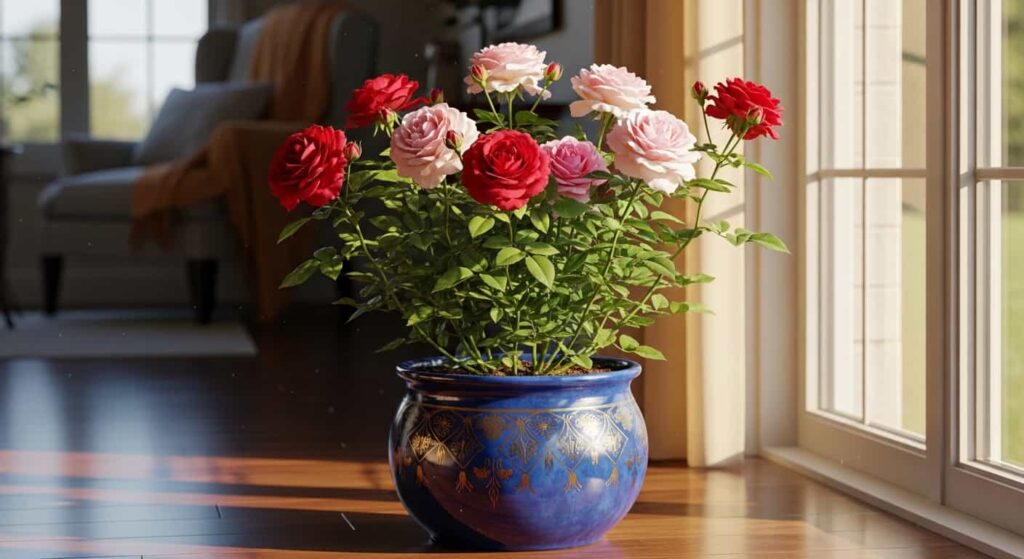
Bringing a rose bush indoors is a wonderful way to add a touch of timeless beauty to your home. While these plants can thrive in containers, they will eventually outgrow their pots. This is where transplanting, or repotting, becomes a critical skill for any indoor gardener. It’s a process that can seem daunting, as you’re disturbing the plant’s entire root system. However, when done correctly and at the right time, transplanting is one of the most beneficial things you can do for the long-term health and vitality of your indoor rose.
This comprehensive guide will walk you through every aspect of transplanting indoor roses. We’ll cover how to recognize the clear signs that your plant is ready for a new home, the best seasons to perform the task, and the essential tools and materials you’ll need. With step-by-step instructions and crucial aftercare tips, you’ll learn how to repot your rose with confidence, ensuring it has the space and nutrients needed to flourish for years to come.
Why Transplanting Is Crucial for Indoor Roses
Unlike roses planted in a garden, which can extend their roots deep into the earth in search of water and nutrients, potted indoor roses are confined to a limited environment. Over time, this small space presents several challenges that only transplanting can solve.
1. Relieving a Root-Bound Condition
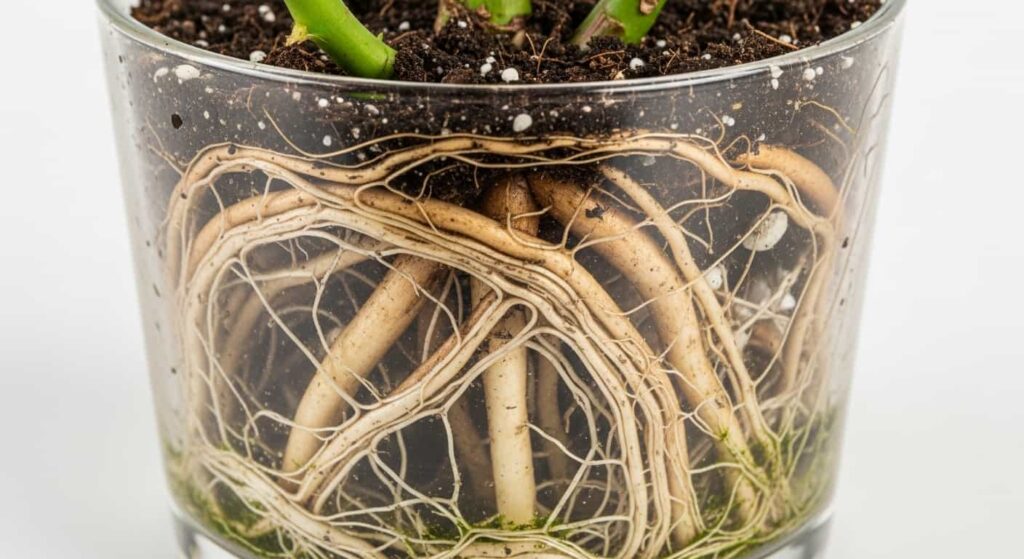
The most common reason for repotting is that the plant has become “root-bound” or “pot-bound.” This happens when the root system has grown so extensively that it fills the entire pot, often circling the bottom and sides. A root-bound plant faces several problems:
- Poor Water Absorption: The dense mass of roots leaves little soil to hold moisture. Water runs straight through the pot without being absorbed, and the plant dries out very quickly.
- Nutrient Depletion: The rose has exhausted the nutrients available in the small volume of soil.
- Stunted Growth: With no room to expand, the roots can no longer support new growth in the foliage and stems. The plant’s overall development will slow down or stop completely.
2. Replenishing Soil and Nutrients
Potting soil is not just a physical anchor for the plant; it’s a reservoir of essential nutrients and organic matter. Over time, as your rose absorbs these nutrients and you water it repeatedly, the soil degrades. It can become compacted, lose its structure, and its nutritional value diminishes. Transplanting allows you to replace this old, tired medium with fresh, nutrient-rich potting mix, giving your plant a vital boost.
3. Improving Drainage and Aeration
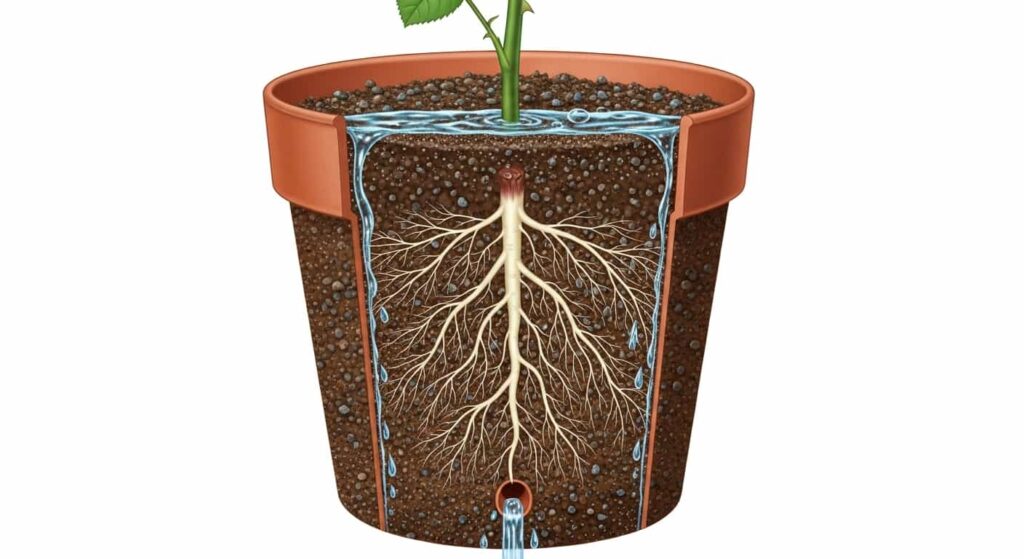
Compacted soil not only lacks nutrients but also suffers from poor drainage and aeration. When soil particles press tightly together, water can’t flow through properly, leading to waterlogged conditions at the bottom of the pot. This suffocates the roots by cutting off their oxygen supply, creating a perfect environment for root rot—one of the most common killers of container plants. Fresh potting mix restores the airy structure needed for healthy roots to breathe and for water to drain effectively.
4. Managing Plant Size
While often done to encourage growth, transplanting can also be a tool for managing the size of your rose. If you want to keep your plant at its current size rather than moving it to a larger pot, you can perform a process that includes root pruning. This refreshes the soil and revitalizes the plant without requiring you to accommodate an ever-larger container.
When to Transplant: Recognizing the Signs
Timing is a critical factor in successful repotting. The first part of getting the timing right is knowing when your plant is asking for a change. Your rose will give you several clear signals that it has outgrown its current pot.
- Roots Emerging from Drainage Holes: This is the most obvious sign. If you see roots poking out of the bottom of the pot, it’s a sure indication that the plant has run out of space.
- Rapid Drying of Soil: Do you feel like you’re watering your rose constantly, only for the soil to be bone-dry again a day or two later? When the pot has more roots than soil, there’s nothing left to hold moisture.
- Stunted or Slowed Growth: If your once-vigorous rose has stopped producing new leaves and stems during the growing season (spring and summer), or if the new growth is weak and pale, it may be root-bound and starved for nutrients.
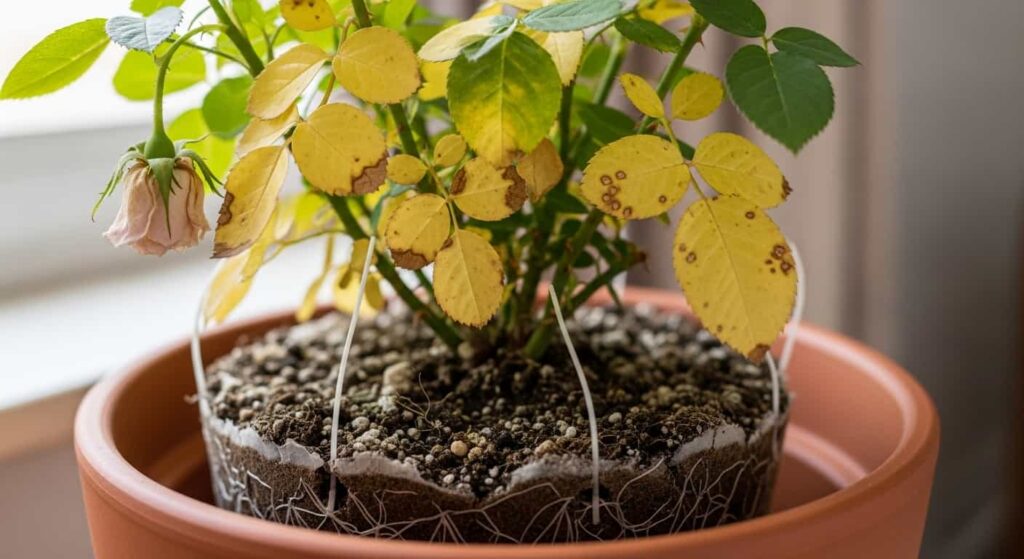
- Visible Salt and Mineral Buildup: Over time, a white crust from salts in tap water and fertilizers can form on the soil surface or the pot itself. A full soil replacement through transplanting is the best way to resolve this.
- Difficulty Removing the Plant: If you try to gently slide the plant out of its pot and it won’t budge, or if it comes out with the soil and roots in the exact shape of the pot, it is definitely root-bound.
- General Rule of Thumb: As a preventative measure, most indoor roses benefit from being repotted every two to three years, even if they aren’t showing severe signs of stress.
The Best Season for Repotting

Once you’ve determined that your rose needs a new pot, the next step is to choose the right time of year. The ideal time to transplant an indoor rose is in late winter or early spring.
This timing aligns perfectly with the plant’s natural growth cycle. During late winter, the rose is still in a state of dormancy or just beginning to wake up. Transplanting during this restful period is less of a shock to the system. As spring arrives, the plant’s energy is naturally directed toward producing new roots and shoots. Repotting just before this growth spurt means the rose will recover quickly and take full advantage of the fresh soil and extra space to fuel a vigorous season of growth.
Avoid transplanting your rose when it is in full, active bloom during the summer. The process can cause “transplant shock,” leading the plant to drop its flowers and leaves as it diverts all its energy to root recovery.
Preparing for the Transplant: Tools and Materials
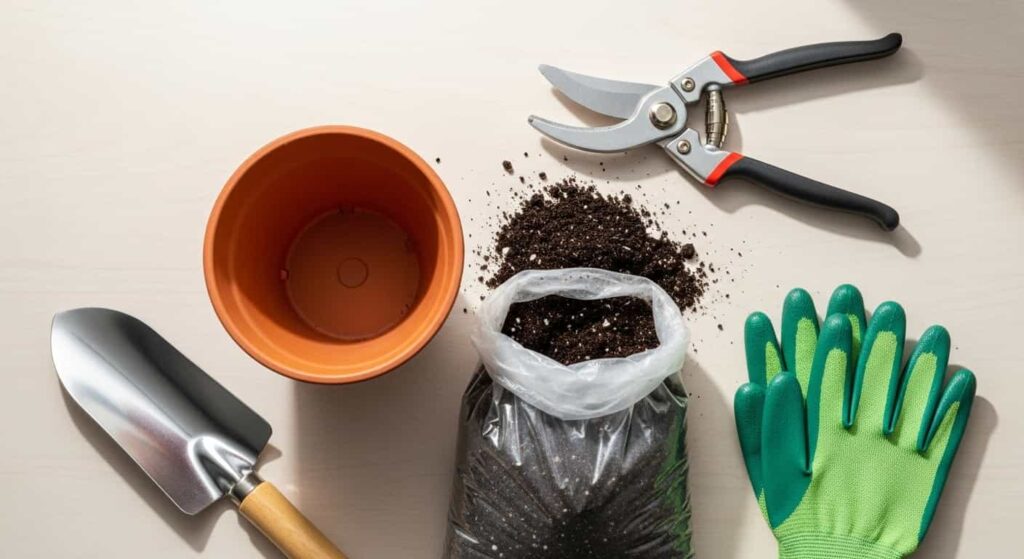
Gathering all your supplies before you begin will make the process smoother and less stressful for both you and your plant.
- A New Pot:
- Size: Choose a container that is only one to two inches larger in diameter than the current one. It’s tempting to move a small plant into a huge pot, but this is a mistake. A pot that is too large holds an excessive amount of soil that stays wet for too long, increasing the risk of root rot.
- Drainage: Excellent drainage is non-negotiable. Ensure the new pot has at least one, and preferably several, drainage holes at the bottom.
- Material: Terracotta (clay) pots are porous and allow air and water to move through the sides, which helps the soil dry out faster—a benefit for roses. Plastic or glazed ceramic pots retain moisture longer, which means you’ll need to water less frequently but be more careful about overwatering.
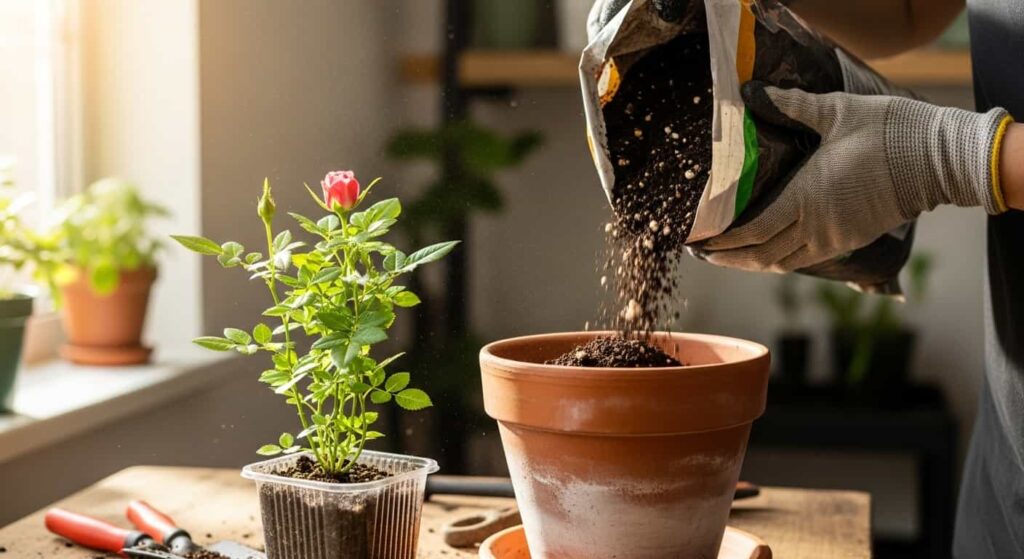
- The Right Soil: Do not use garden soil for a potted rose. It is too heavy, compacts easily, and can contain pests and diseases. Purchase a high-quality potting mix specifically formulated for roses. If you can’t find a rose-specific mix, a general-purpose premium potting mix with good drainage will also work. Look for mixes that contain ingredients like peat moss, compost, perlite, or vermiculite.
- Pruning Shears: You will need a clean, sharp pair of bypass pruners to trim any damaged roots and potentially to prune the top growth.
- Gardening Gloves: Protect your hands from thorns and keep them clean.
- A Trowel or Small Spade: Helpful for scooping new soil into the pot.
- A Workspace: Lay down newspaper or a tarp to make cleanup easy.
The Step-by-Step Guide to Transplanting Your Indoor Rose
With your supplies ready, it’s time to begin. Try to work quickly but gently to minimize the time the roots are exposed to the air.
Step 1: Water the Plant
A day or two before you plan to transplant, water your rose thoroughly. This ensures the plant is well-hydrated, which reduces stress. It also makes the soil moist, helping the entire root ball slide out of the pot more easily.
Step 2: Prepare the New Pot
If your new pot is terracotta, it’s a good idea to soak it in water for about 30 minutes to an hour beforehand. This prevents the dry clay from wicking moisture away from the fresh soil. Place a piece of mesh screen or a coffee filter over the drainage holes to prevent soil from washing out, then add a layer (1-2 inches) of fresh potting mix to the bottom of the new pot.
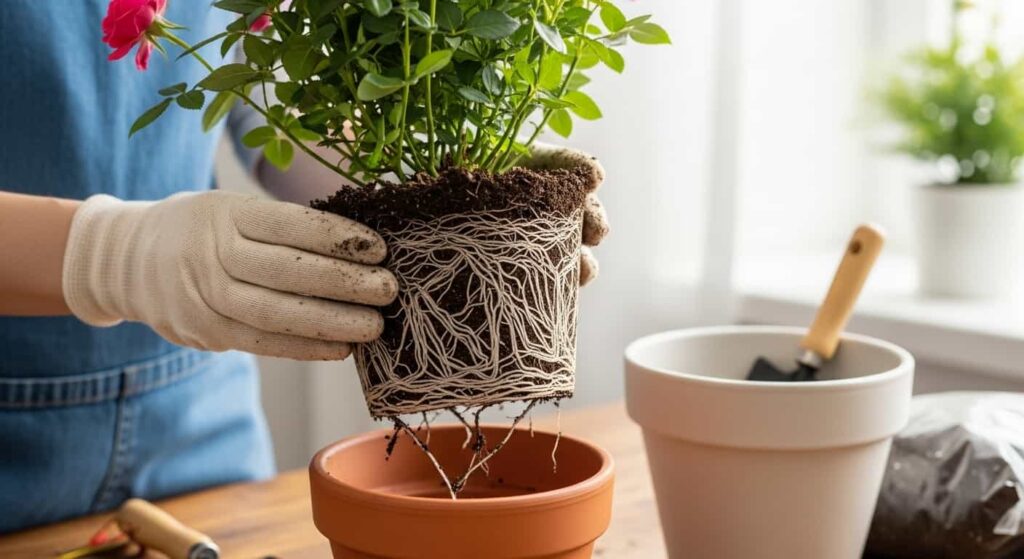
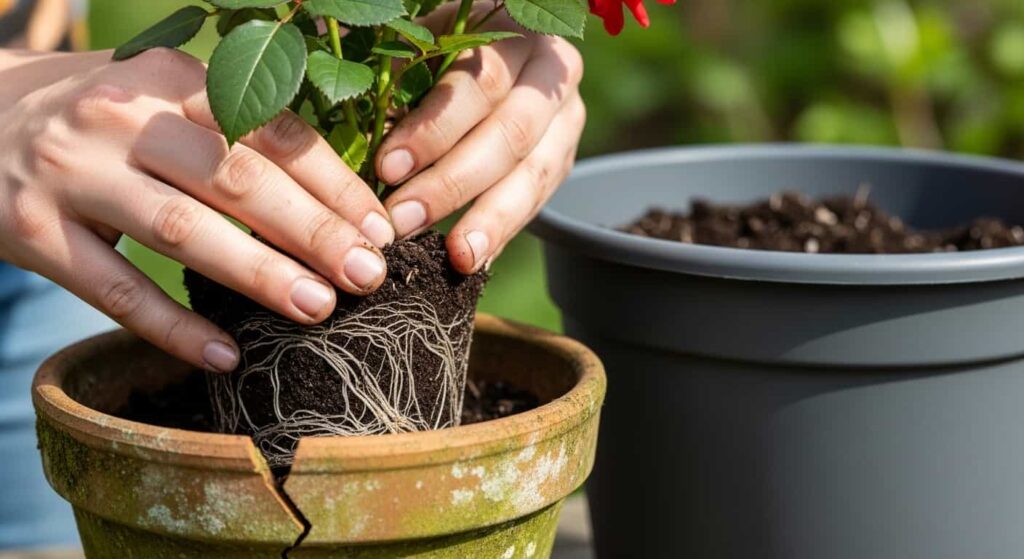
Step 3: Remove the Rose from Its Old Pot
Turn the rose pot on its side and gently tap the rim on a sturdy surface to loosen the root ball. Place one hand over the soil surface, with the plant’s main stem between your fingers, and carefully slide the plant out. If it’s stuck, you can run a knife around the inside edge of the pot, but try to pull it out gently first. Never yank the plant out by its stem.
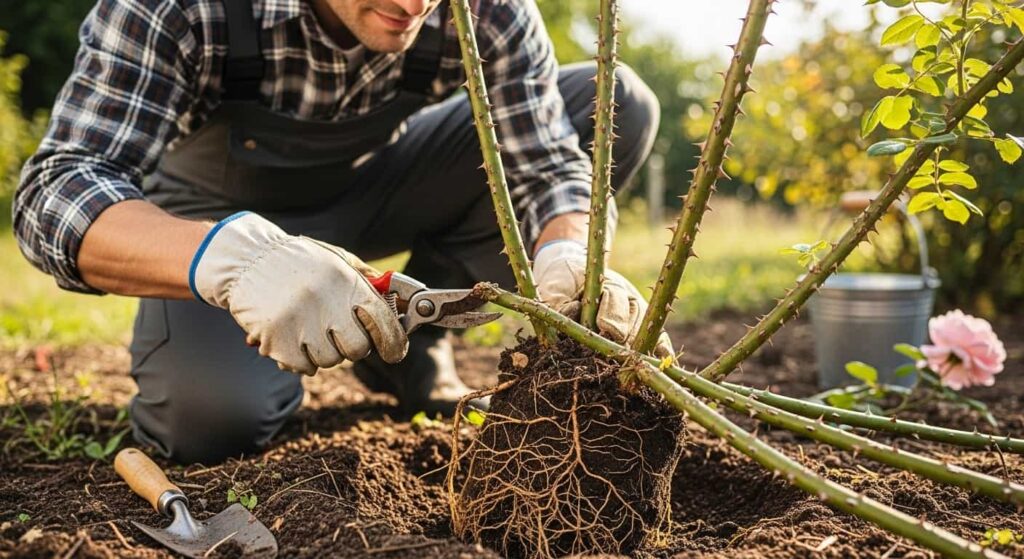
Step 4: Inspect and Loosen the Roots
Once the plant is out, examine the root system. If the roots are densely packed and circling the bottom of the root ball, your plant was indeed root-bound.
- Gently Tease the Roots: Using your fingers, gently loosen the roots, especially at the bottom and sides. The goal is to encourage them to grow outward into the new soil rather than continuing to circle.
- Prune the Roots (If Necessary): If the root ball is a very dense, tangled mat, you may need to use your sharp pruners. Make three or four vertical cuts, about an inch deep, down the sides of the root ball. You can also trim off any excessively long or mushy, brown (rotted) roots. This seems harsh, but it stimulates new, healthy root growth.
Step 5: Position the Plant in the New Pot
Place the rose into the new pot, centering it. The top of the root ball should sit about an inch below the rim of the new pot. This space, known as headspace, is important for watering. Add or remove soil from the bottom of the new pot as needed to get the height just right.
Step 6: Fill with Fresh Soil
Begin backfilling around the root ball with your fresh potting mix. Use your trowel or hands to add soil, gently pressing it down as you go to eliminate any large air pockets. Be careful not to compact it too firmly. Fill the pot until the soil level is even with the top of the root ball.
Step 7: Water Thoroughly
The final and most important step of the transplanting process is to water the plant well. Water slowly and evenly until you see water running freely from the drainage holes. This settles the new soil around the roots and eliminates any remaining air pockets. It also provides the moisture the plant needs to begin its recovery.
Aftercare: Helping Your Rose Recover and Thrive
Your rose has just been through a stressful procedure. The care you provide in the weeks following the transplant is vital for its recovery.
- Place in a Shaded Location: For the first week or two after repotting, move your rose out of direct, intense sunlight. The plant’s ability to absorb water is temporarily reduced, and placing it in a shadier, cooler spot will prevent the leaves from losing too much moisture and wilting.
- Hold Off on Fertilizer: Do not fertilize your rose for at least four to six weeks. The fresh potting mix contains all the nutrients the plant needs for now. Fertilizing too soon can burn the tender, recovering roots.
- Monitor Watering Carefully: The new, larger pot will hold more moisture, so your old watering schedule will no longer apply. Check the soil every few days by inserting your finger an inch deep. Water only when the soil feels dry at that depth. It’s crucial to avoid overwatering during this recovery phase.
- Expect Some Leaf Drop: Don’t panic if your rose drops a few yellow leaves in the week or two after transplanting. This is a normal symptom of transplant shock as the plant re-establishes its root system.
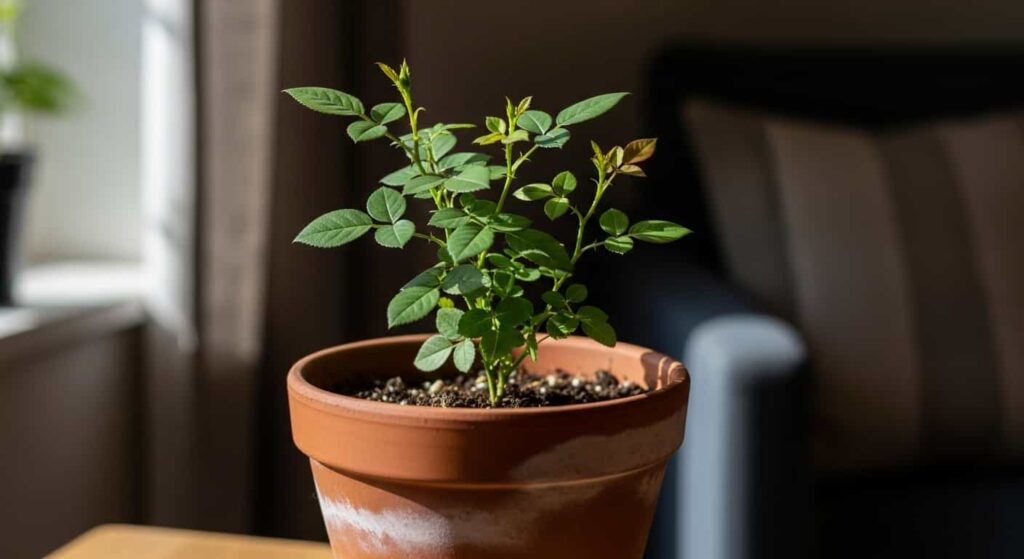
- Resume Normal Care: After a few weeks, once you see signs of new growth—like new leaves or stems—you can be confident that the transplant was successful. At this point, you can gradually move the plant back to its sunny spot and resume your regular fertilizing schedule.
By following these detailed steps, you can turn transplanting from a dreaded task into a rewarding part of your indoor gardening routine. You are providing your rose with the foundation it needs to grow stronger, healthier, and produce the beautiful blooms that make it such a cherished houseplant.