
Bringing home your first orchid is an exciting moment. With their elegant flowers and exotic allure, orchids add a touch of sophistication to any space. However, their reputation for being difficult can cause a lot of anxiety for new owners. The good news is that most orchid failures aren’t due to the plant being fussy, but rather a few common, easily avoidable mistakes.
This guide is designed to be your cheat sheet for orchid success. We will cover the top five missteps that new growers often make, turning the question of “how to keep an orchid alive for dummies” into a simple set of rules. By learning what not to do to orchids, you can sidestep the most common issues and grow beautiful, healthy plants with confidence.
Mistake #1: Overwatering (The #1 Orchid Killer)
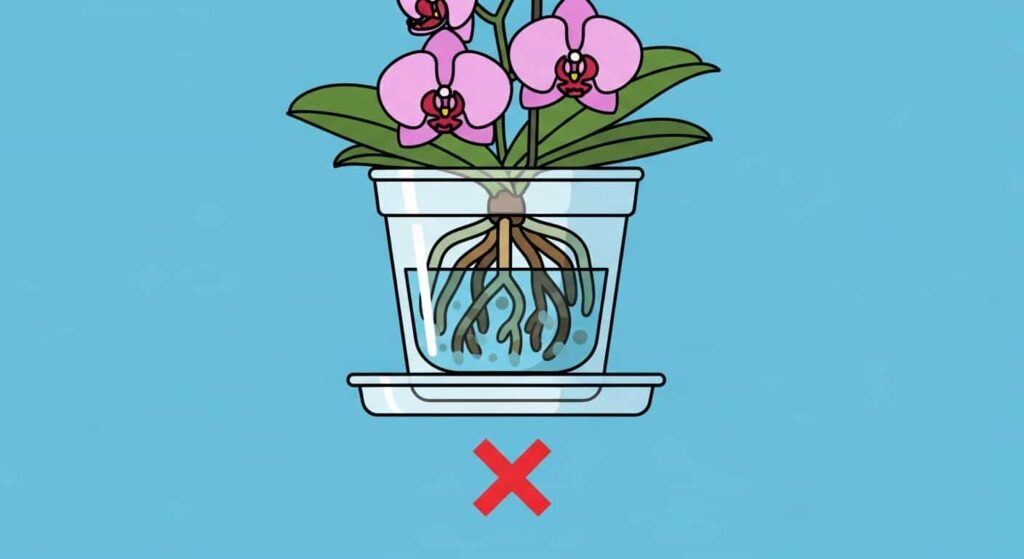
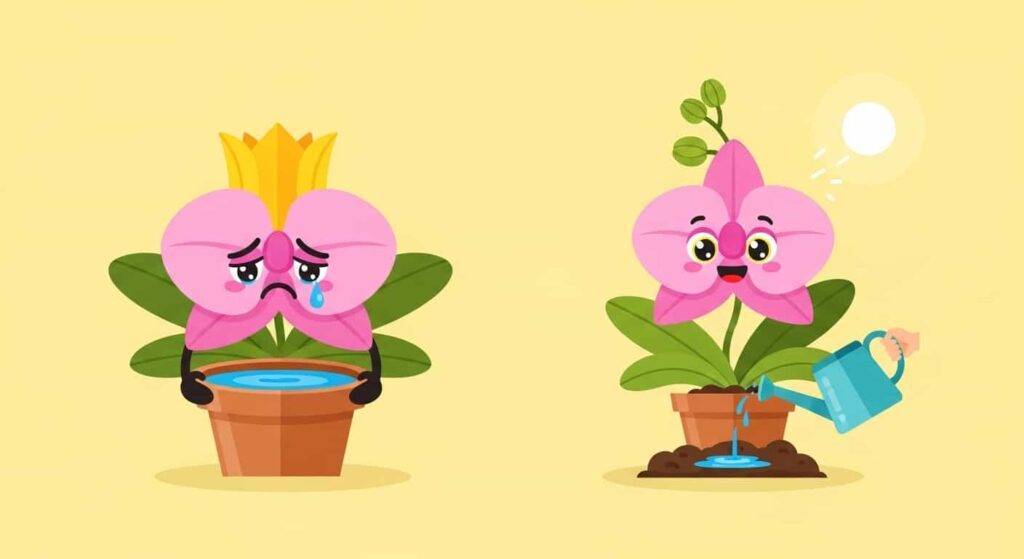
If there is one golden rule in orchid care, it is this: when in doubt, don’t water. Overwatering is, without a doubt, the most common and fastest way to kill an orchid. New plant owners often show their love with too much water, but for orchids, this kindness is deadly.
Why It’s a Problem
Most popular orchids, like Phalaenopsis, are epiphytes. In nature, they grow on tree bark with their roots exposed to the air. These roots are designed to absorb moisture quickly from rain and humidity and then dry out promptly. When an orchid’s roots are left sitting in a constantly wet, soggy potting medium, they cannot breathe. This leads to root rot, a condition where the roots turn brown, mushy, and die, effectively suffocating the plant.
How to Avoid It
- Check the Roots and Medium: Don’t water on a schedule. Instead, check the plant’s needs. For orchids in clear pots, look at the roots. Silvery-green roots mean it’s time to water; plump, bright green roots mean the plant is still hydrated. For orchids in opaque pots, stick a wooden skewer or pencil into the mix. If it comes out dark and damp, wait a few more days.
- Water Thoroughly, but Infrequently: When it’s time to water, do it properly. Take the plant to the sink and flush the potting mix with lukewarm water for about 30 seconds, letting it drain completely. This mimics a tropical downpour.
- Never Let it Stand in Water: After watering, ensure the pot is fully drained and never leave it sitting in a saucer full of water.
Mistake #2: Using the Wrong Potting Medium
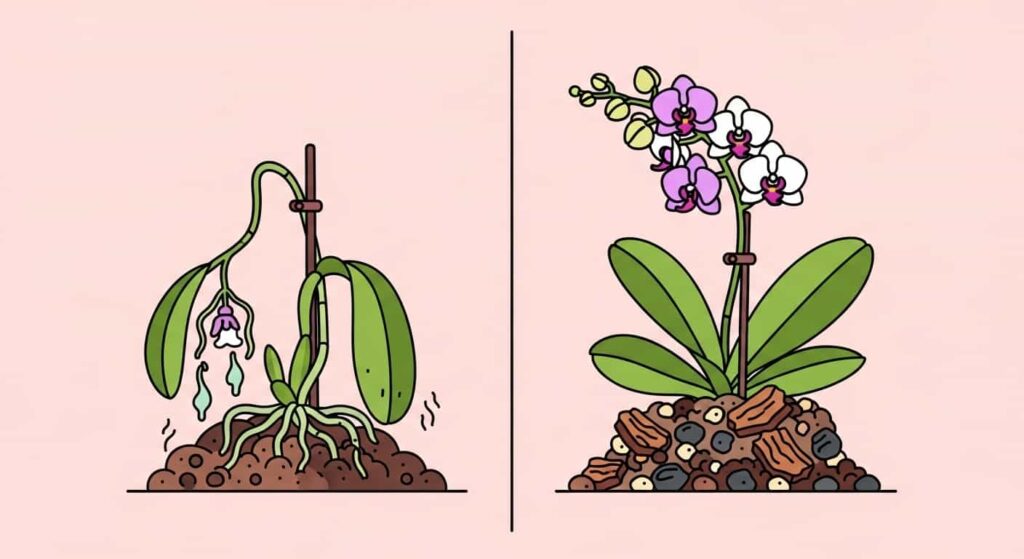
The second most common mistake flows directly from the first: planting an orchid in regular potting soil. This is an understandable error for anyone accustomed to growing traditional houseplants, but it is fatal for an epiphyte.
Why It’s a Problem
Standard potting soil is dense, heavy, and designed to retain moisture. For an orchid, this is a recipe for disaster. The soil compacts around the roots, cutting off all air circulation and creating a swampy environment that guarantees root rot. Orchid roots need air as much as they need water.
How to Avoid It
- Use a Specialty Orchid Mix: Always use a potting medium specifically designed for orchids. The most common mixes are bark-based (using fir or pine bark) and may also contain charcoal and perlite. This coarse, chunky mix allows for excellent drainage and airflow, simulating the orchid’s natural environment.
- Choose the Right Grade: Different orchids prefer different mix textures. For Phalaenopsis, a medium-grade bark mix is perfect. For orchids with finer roots like Paphiopedilum or Oncidium, a finer-grade mix might be more appropriate.
Mistake #3: Choosing a Pot That’s Too Big

When it comes time to repot, many beginners think they are helping their orchid by giving it a huge new pot with plenty of “room to grow.” This is often the biggest mistake when repotting orchids and can set the plant back significantly.
Why It’s a Problem
Orchids prefer to be snug in their pots. A pot that is too large holds a massive volume of potting mix that the plant’s root system cannot absorb water from quickly. This excess mix stays wet for far too long, creating a cold, damp environment that, once again, leads to root rot.
How to Avoid It
- Size Up Incrementally: When repotting, choose a new pot that is only one to two inches larger in diameter than the old one. This provides just enough space for a year or two of new growth without creating a swamp.
- Prioritize Drainage: Ensure the new pot has ample drainage holes. Clear plastic orchid pots are an excellent choice for beginners because they allow you to monitor root health and moisture levels easily.
- Repot at the Right Time: Only repot your orchid when it’s truly necessary—either when the bark has broken down or the roots are severely crowded. The best time is right after it has finished blooming and is starting to produce new root or leaf growth.
Mistake #4: Providing the Wrong Kind of Light

Finding the right light balance is crucial for an orchid’s health and its ability to rebloom. Beginners often go to one of two extremes: either placing the plant in a dark corner or on a windowsill with intense, direct sun.
Why It’s a Problem
- Too Little Light: While some orchids tolerate low light, most beginner-friendly types like Phalaenopsis and Dendrobium need bright, indirect light to photosynthesize effectively and gather the energy needed to produce flowers. In a dim location, the plant may survive, but it will likely never bloom again.
- Too Much Light: Direct, harsh sunlight will scorch an orchid’s leaves, creating permanent brown or black spots. The leaves may also turn yellow or reddish as a sign of stress.
How to Avoid It
- Find the “Goldilocks” Spot: The ideal location receives bright, but filtered, light. An east-facing window with gentle morning sun is perfect. A spot a few feet away from a south- or west-facing window, or behind a sheer curtain, also works well.
- Read the Leaves: Your orchid’s leaves are a great indicator of light levels. A healthy, happy plant will have bright, olive-green leaves. Dark green leaves suggest it needs more light, while yellowish leaves mean it’s getting too much.
Mistake #5: Getting Water in the Crown
This is a specific but critically important mistake, especially for monopodial orchids like Phalaenopsis, which grow from a single central point.
Why It’s a Problem
The “crown” of the orchid is the very center of the plant where new leaves emerge. This area is very susceptible to rot. If water is allowed to pool and sit in the crown for an extended period, it can cause a fatal condition known as crown rot, which will quickly kill the plant.
How to Avoid It
- Water the Base, Not the Top: When watering, focus the stream of water on the potting medium and roots, avoiding the leaves and crown as much as possible.
- Blot Any Spills: If you do accidentally splash water into the crown, don’t panic. Simply take the corner of a paper towel and gently blot the moisture out.
- Ensure Good Airflow: Good air circulation around the plant will help any stray water on the leaves or in crevices evaporate quickly, reducing the risk of rot.
Your Journey to Orchid Success
Avoiding these five common mistakes will put you on the fast track to becoming a confident and successful orchid grower. The key is to stop thinking of your orchid as a traditional houseplant and start appreciating its unique needs as an epiphyte. Provide it with the airy root environment, bright indirect light, and careful watering it craves, and it will reward you with stunning, long-lasting blooms for years to come.