
Last Updated on April 15, 2026 by Indoor Plant Nook
Bonsai Root Pruning: What It Is, When to Do It, and How
TL;DR: Quick reference for bonsai root pruning
- Why: Bonsai root pruning stops roots from choking each other and encourages healthy feeder roots that absorb water well.
- When: Early spring is best for most trees, as buds begin to swell.
- What to cut: Remove thick, woody, circling roots. Keep as many fine, hair-like feeder roots as you can.
- How much: In one session, remove no more than about 20% to 30% of the total root mass.
- Aftercare: Keep the tree shaded and out of strong wind for about two weeks. Wait for new growth before fertilizing.
Introduction
For many beginners, cutting into a plant’s roots feels wrong. You spend your time helping the tree grow—so why trim the very foundation that keeps it alive?
Bonsai root pruning is not only safe; it is essential. It is what lets a tree stay healthy in a small pot instead of slowly declining as the root system fills the container. Without periodic root pruning, a bonsai cannot keep a balanced root-to-shoot ratio, and problems like poor water uptake and stagnation follow.
This guide explains bonsai root pruning in full: why it matters, when to do it, how to prune step by step, and how to care for the tree while it recovers. Everything here stays focused on the roots—so you can prune with confidence and clear intent.
Why bonsai root pruning matters
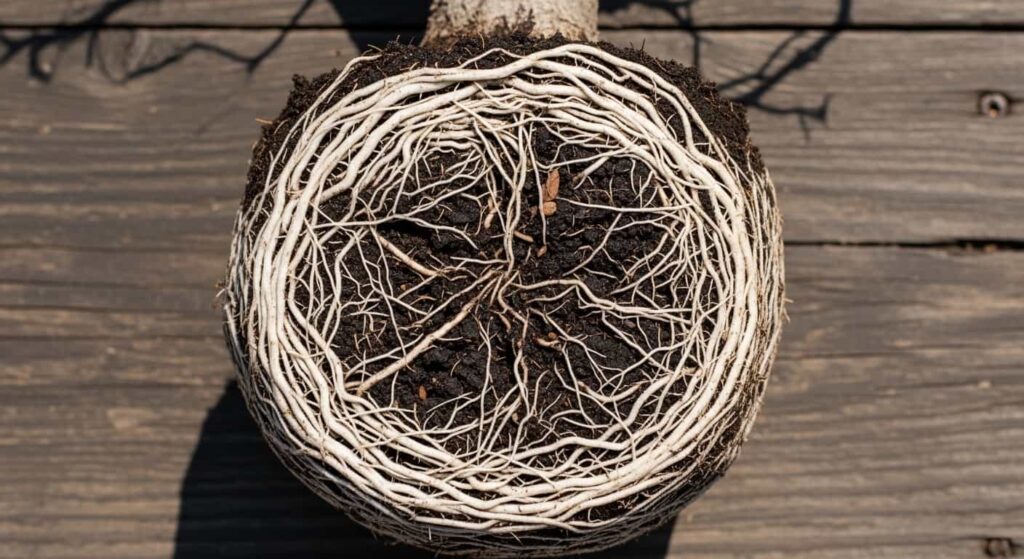
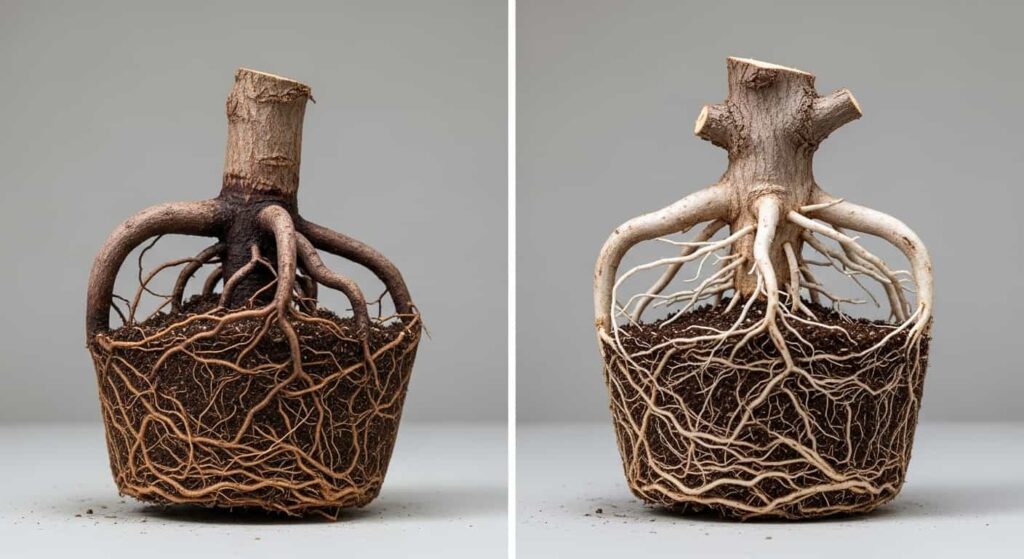
Combating root-bound growth
In nature, roots spread freely. In a bonsai pot, they eventually circle the inside of the container, tangle, and compete for space. That tight, circling mass is often called being root-bound. A root-bound tree struggles with water absorption and long-term health.
Think of it like a pot-bound nursery plant: if circling roots are never addressed, the plant can suffocate in its own root mass. Bonsai root pruning is a controlled way to open that system back up so the tree can thrive in a small volume of soil.
Encouraging feeder roots
When you remove thick, older roots, the tree responds by producing new, fine feeder roots. Those fine roots take up water and nutrients efficiently. A healthy density of feeder roots after root pruning supports a stronger, more vigorous tree above the soil line.
Keeping size and balance in scale
Bonsai root pruning helps manage overall vigor. Working the roots is part of keeping the tree in proportion to the pot and consistent with the goals of bonsai as a living art form.
When to perform bonsai root pruning
The usual window: early spring
Timing matters for safe bonsai root pruning. For most temperate species, the best time is early spring, just as buds swell but before leaves fully open. The tree is leaving dormancy with stored energy, which supports healing and new root growth after the cut.
Tropical species
Tropical indoor bonsai, such as many Ficus species, are often more flexible. You can plan bonsai root pruning during active growth in summer if you follow solid aftercare and avoid extremes.
When to avoid root pruning
Do not schedule bonsai root pruning in the depths of winter while the tree is fully dormant and root callusing is slow; that can leave cuts vulnerable to problems. Also avoid the hottest, most stressful part of summer when heat plus root loss can overwhelm the tree.
Signs your bonsai needs root pruning
How do you know it is time? Look for these patterns:
- Visual check: Roots visible at the soil surface or growing from drainage holes.
- Watering behavior: Water runs down the sides without soaking in, or the mix dries almost instantly because roots dominate the volume.
- Declining vigor: Slow growth, yellowing leaves, or a tired look despite good light and watering.
- Lift test: Gently slide the tree out of the pot. If you see a thick outer shell of tangled roots circling the root ball, plan bonsai root pruning and repotting. Do this check when you already suspect it is time—ideally in early spring before repotting—not repeatedly through the season, which can stress the roots.
Tools for bonsai root pruning
You do not need a huge kit. Gather:
- Root rake or chopstick: To tease out and untangle the root mass without tearing more than necessary.
- Sharp scissors or root cutters: Clean cuts heal more predictably. Bonsai root cutters are ideal; sharp, sturdy scissors can work. Sterilize blades with rubbing alcohol before you start to reduce the risk of introducing disease through fresh cuts.
- Pot: The same pot (cleaned) or one slightly larger—about 1 to 2 inches wider in diameter if you upsize. An oversized pot holds excess water and can harm a tree that has just undergone root pruning.
- Fresh bonsai soil: Standard potting soil stays too wet and too dense. Use a granular, fast-draining bonsai mix that holds air around the roots after repotting.
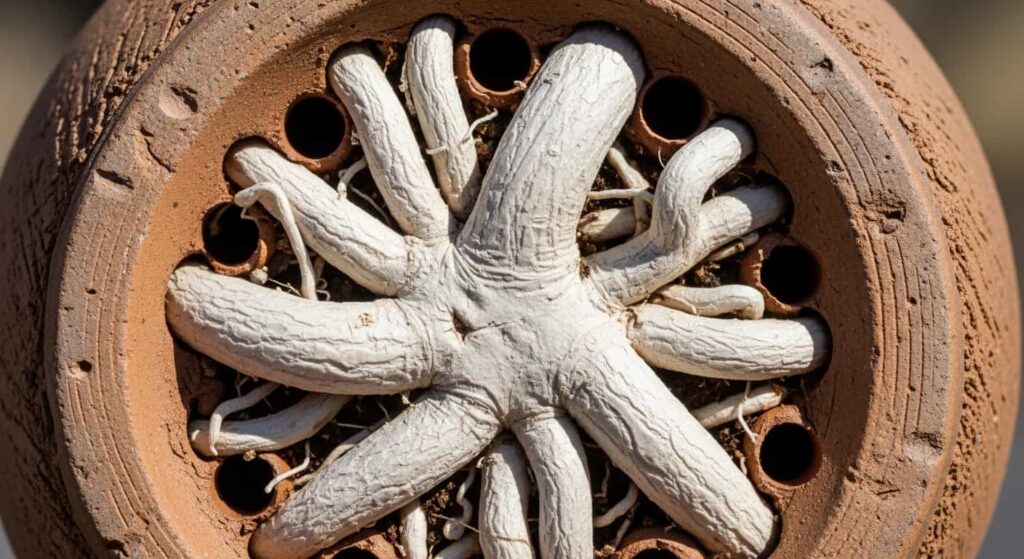
- Mesh and wire: Small mesh over drainage holes and wire to anchor the tree if your setup requires it.
Bonsai root pruning: step by step
Before you start, have ready: sharp, clean cutters; rake or chopstick; fresh bonsai soil; clean pot; mesh and wire if needed; a watering can with a gentle rose.
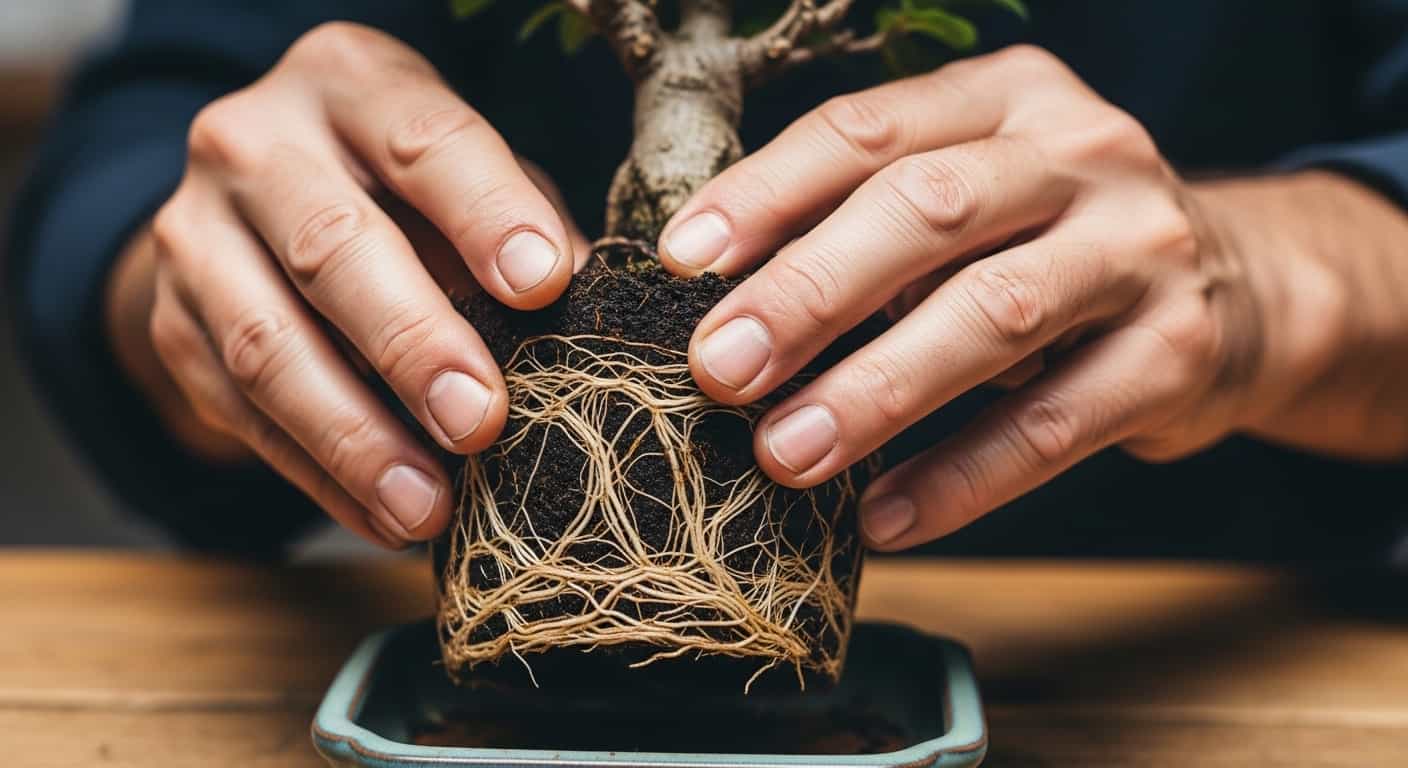
Step 1: Unpotting
Carefully remove the tree from its pot. If it is wired in, cut anchor wires from below first. Gently ease the root ball out without ripping large chunks of roots.
Step 2: Loosening the soil
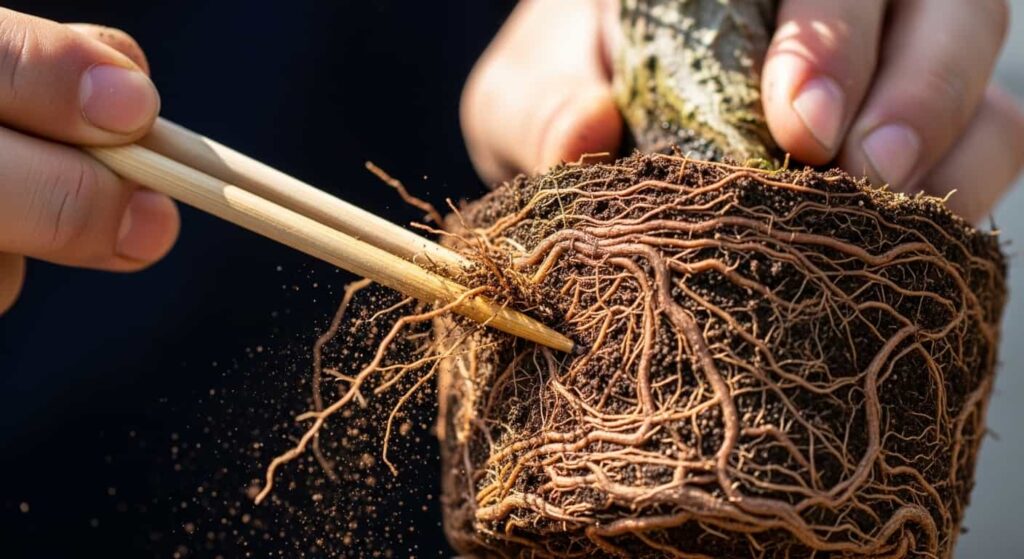
With a chopstick or rake, comb the outer roots from the bottom upward along the sides. Untangle circling roots and remove old, compacted soil. A gentle stream of water can help rinse stubborn soil without forcing the roots.
Step 3: What to cut in bonsai root pruning
This step defines whether your bonsai root pruning helps or hurts the tree.
- Remove: Thick, woody roots that circle the root ball. They take space and limit new fine-root development.
- Preserve: Fine, hair-like feeder roots whenever possible—they do most of the water uptake.
- Amount: For beginners, stay near the 20% to 30% range of total root mass in one session. Severely root-bound trees may still need a conservative first pass; you can address more at the next repotting cycle if needed. When unsure, prune less rather than more.
- Taproot: If a very thick root grows straight down, shortening it can encourage a flatter, more radial base suited to shallow bonsai pots.
Step 4: Prepare the pot
Clean the pot, cover drainage holes with mesh, and set anchoring wires if you use them.
Step 5: Repotting after root pruning
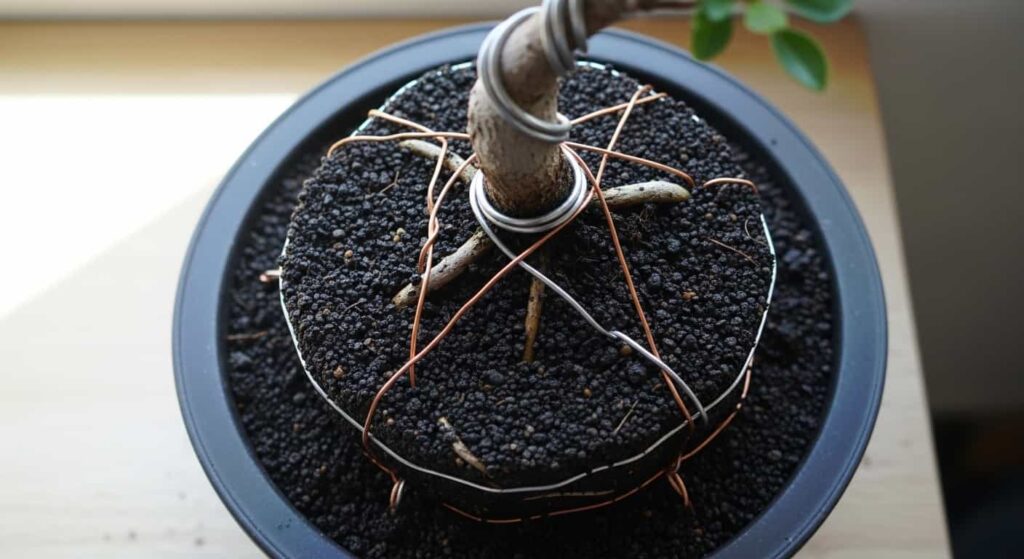
Add a base layer of mix, set the tree at the right height and angle, and secure it. Fill with fresh soil and work it into the root ball with a chopstick so there are no large air pockets where roots could dry out.
Step 6: Watering
Water thoroughly until water runs clear from the drainage holes so the new soil settles around the roots.
Aftercare: the first two weeks after bonsai root pruning
Recovery care is as important as the cuts themselves.
- Placement: Give shade and shelter from strong wind. Avoid direct sun and harsh exposure for at least one to two weeks.
- Watering: Keep the medium evenly moist but not saturated. Fast-draining bonsai soil may need daily checks.
- Fertilizer: Wait until you see strong new growth before feeding; harsh fertilizers on fresh cuts can damage sensitive new root tissue.
- Top growth: Avoid trimming branches or foliage during this recovery window. The foliage fuels recovery after root pruning.
Bonsai root pruning mistakes to avoid
- Pruning a sick tree: Stabilize health first; root pruning adds stress.
- Dull tools: They crush roots; clean cuts from sharp, sterilized tools are safer.
- Air pockets after repotting: Work soil into the root mass so fine roots are not left in dry voids.
- Too much sun too soon: Bright sun right after root pruning can cause rapid dehydration.
- Wrong roots removed: Taking too many feeder roots while leaving thick, circling wood starves the tree.
Conclusion
Bonsai root pruning looks dramatic, but it is a normal part of keeping a tree healthy in a pot. Done with correct timing, a conservative amount of removal, and careful aftercare, you reduce congestion, encourage new feeder roots, and support stable water uptake for years ahead.
If you are preparing for your first session, use the signs and seasonal timing above to pick the right moment, then follow the steps methodically. Your tree’s recovery in the weeks after root pruning is your best feedback that the work was appropriate for its condition.