
Last Updated on March 16, 2026 by Indoor Plant Nook
Root pruning is one of the most critical — and most feared — skills in pine bonsai cultivation. Done correctly, it controls growth, improves nebari (surface roots), and extends the life of your tree by decades. Done wrong, it can kill a tree you’ve spent years developing.
This complete guide walks you through everything: when to prune, what tools to use, how much to cut, and how to recover your tree safely afterward.
Why Root Pruning Matters for Pine Bonsai
Pine bonsai are long-lived trees that develop extensive root systems even inside a shallow pot. Over time, roots become pot-bound — circling the container, girdling each other, and competing for limited nutrients. This leads to:
- Reduced vigour — fewer, weaker candles each spring
- Soil compaction — poor drainage and aeration
- Root rot risk — stagnant moisture trapped in matted roots
- Aesthetic decline — loss of the radial nebari structure prized in pines
Root pruning solves all of these problems at once. It stimulates the development of fine feeder roots close to the trunk, improves water and nutrient uptake, and gives you control over the final shape of the root base — one of the key elements that judges evaluate in exhibition pines.
Best Time to Prune Pine Bonsai Roots
Timing is everything with pines. Unlike deciduous species, pines are more sensitive to root disturbance and must be pruned when they have enough energy to recover.
Ideal Window: Late Winter to Early Spring
The best time to root prune a pine bonsai is just before bud swell — typically late February through early April in temperate climates. At this stage:
- The tree is coming out of dormancy with stored energy reserves
- New feeder roots will grow rapidly in the warming soil
- The risk of fungal infection is lower before the summer heat sets in
Secondary Window: Late Summer (After Candles Harden)
A secondary pruning window exists in late July to mid-August, after the spring candles have fully hardened and before autumn growth slows. This timing works best for healthy, vigorous trees — not recently styled or weakened specimens.
When NOT to Prune Pine Roots
Avoid root pruning pines during:
- Active bud extension (spring flush)
- Midsummer heat spikes
- Late autumn, when the tree is preparing for dormancy
- Winter dormancy
Rule of thumb: If you’re unsure, wait until late winter. The spring window is more forgiving than summer for most home growers.
Tools You Need
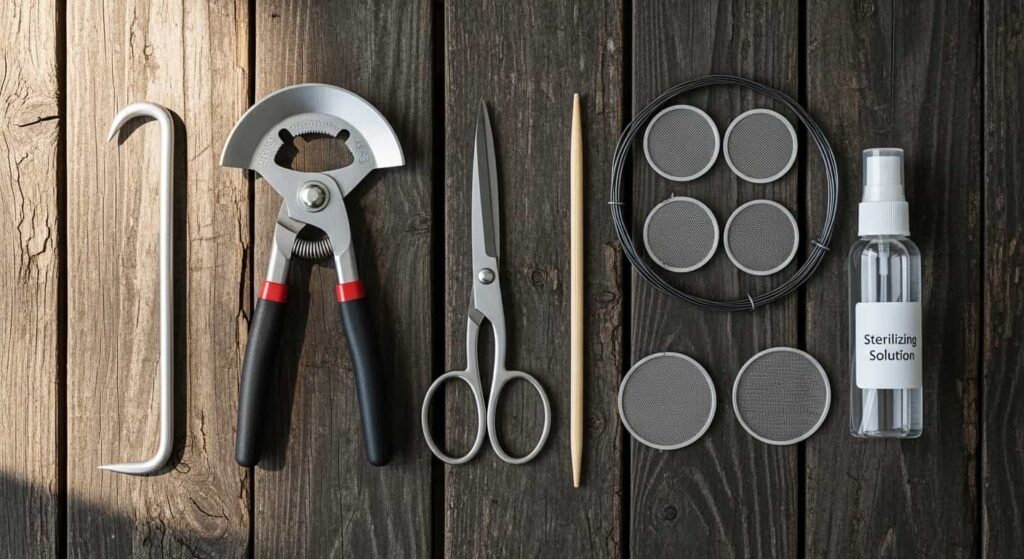
Using the right tools makes root pruning cleaner, faster, and safer for the tree.
| Tool | Purpose |
|---|---|
| Root cutters/concave cutters | Untangling and loosening root mass |
| Sharp bonsai scissors | Cutting fine feeder roots |
| Working the soil between roots after repotting | Removing thick, woody roots |
| Chopstick or knitting needle | Working soil between roots after repotting |
| Sterilizing solution (70% isopropyl) | Disinfecting tools between cuts |
| Bonsai soil mix | Akadama, pumice, and lava rock blend |
| Mesh screens | Covering drainage holes |
Always sterilize tools before and after use. Pine roots are vulnerable to fungal pathogens, and a contaminated blade can introduce disease directly into exposed tissue.
How to Prune Pine Bonsai Roots: Step-by-Step
Step 1: Prepare Your Work Area
Work in a shaded, wind-free area. Have your new pot, fresh soil mix, and all tools ready before removing the tree. Exposed pine roots dry out quickly — every minute the roots are out of the soil matters.
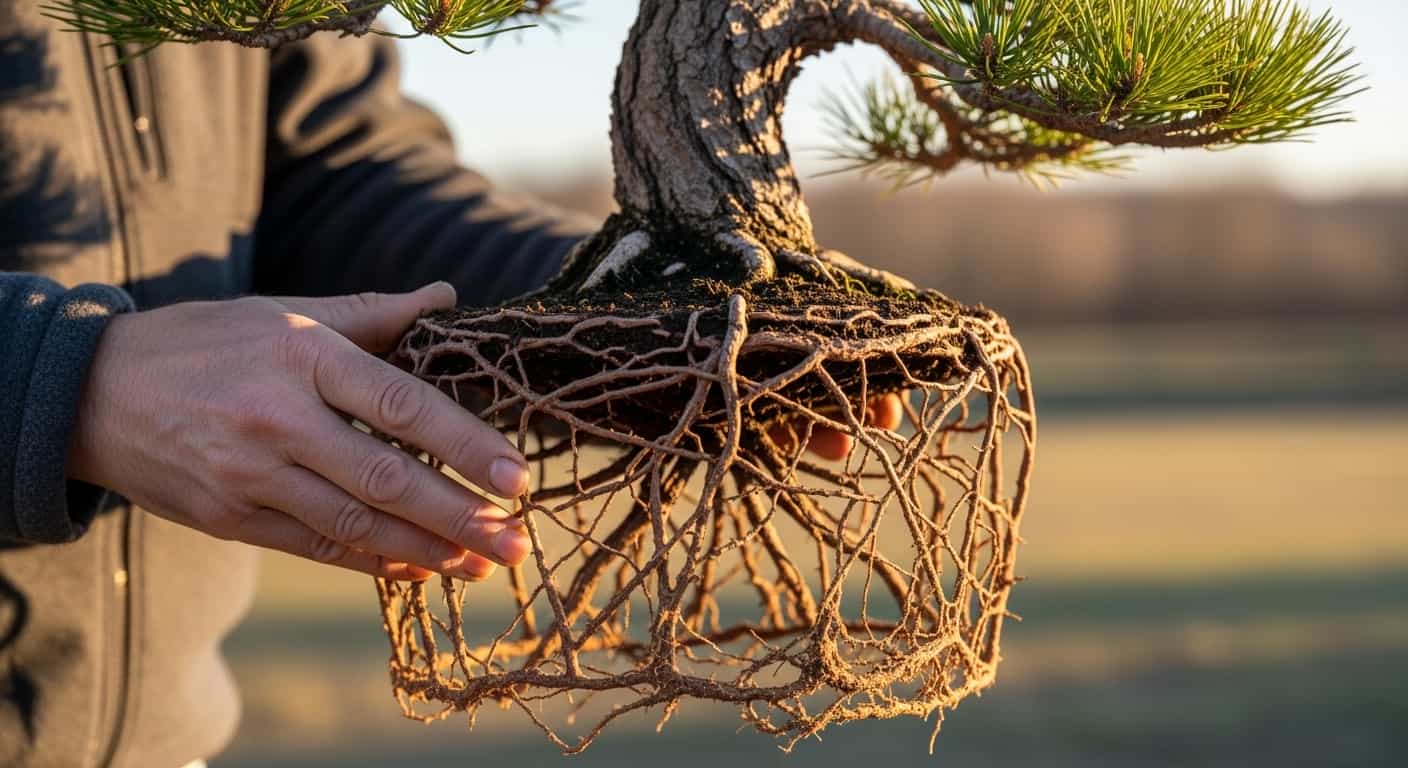
Step 2: Remove the Tree from Its Pot
Tip the pot on its side and slide the tree out gently. If it’s stuck, run a thin spatula or root knife around the inner edge of the pot to break the seal. Never yank by the trunk.
Step 3: Remove Old Soil

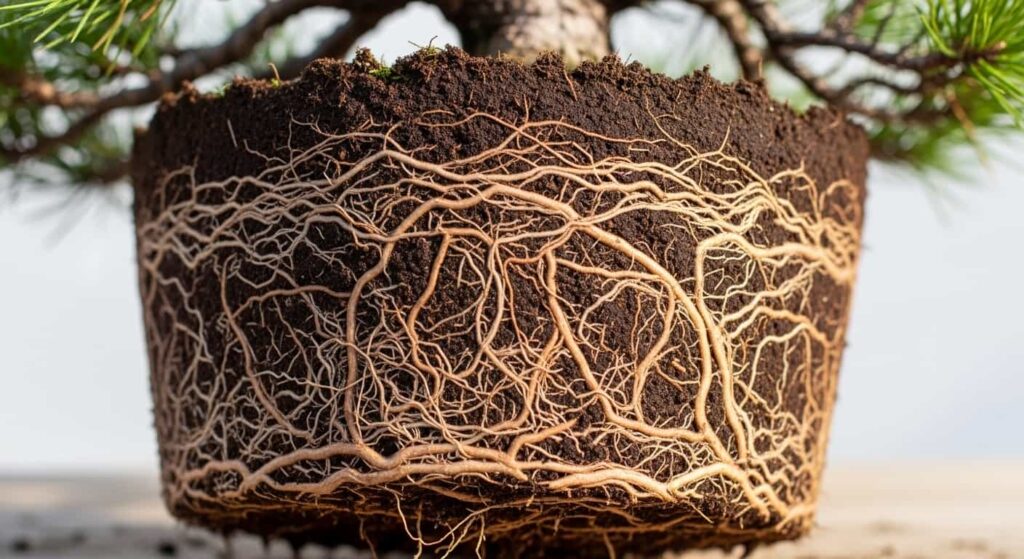
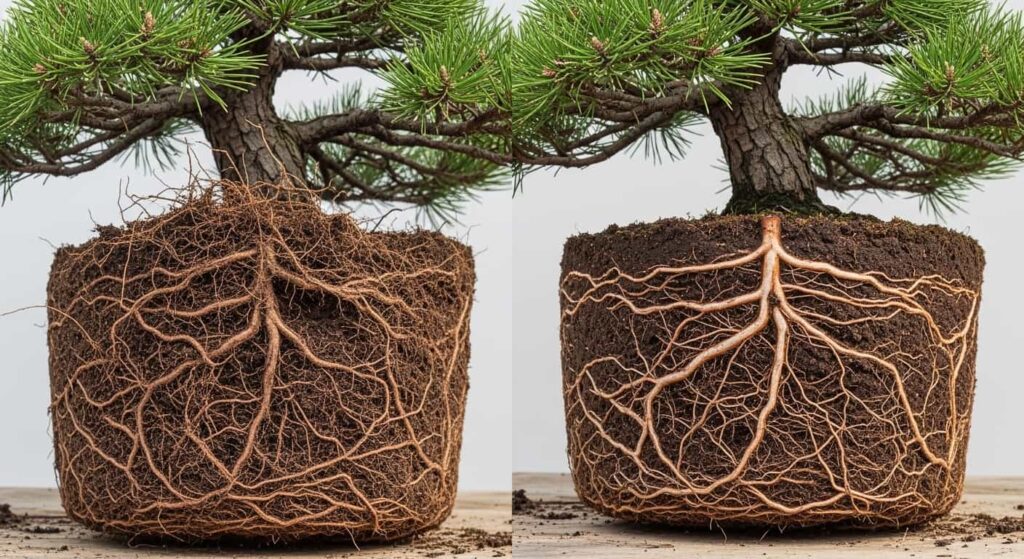
Use a root rake or chopstick to carefully remove soil from around the root ball. Work outward from the trunk. Your goal is to expose the roots clearly while doing minimal damage to fine feeders.
Remove no more than 60–70% of the old soil at one time. For older or weaker trees, keep closer to 40–50%.
Step 4: Identify What to Remove
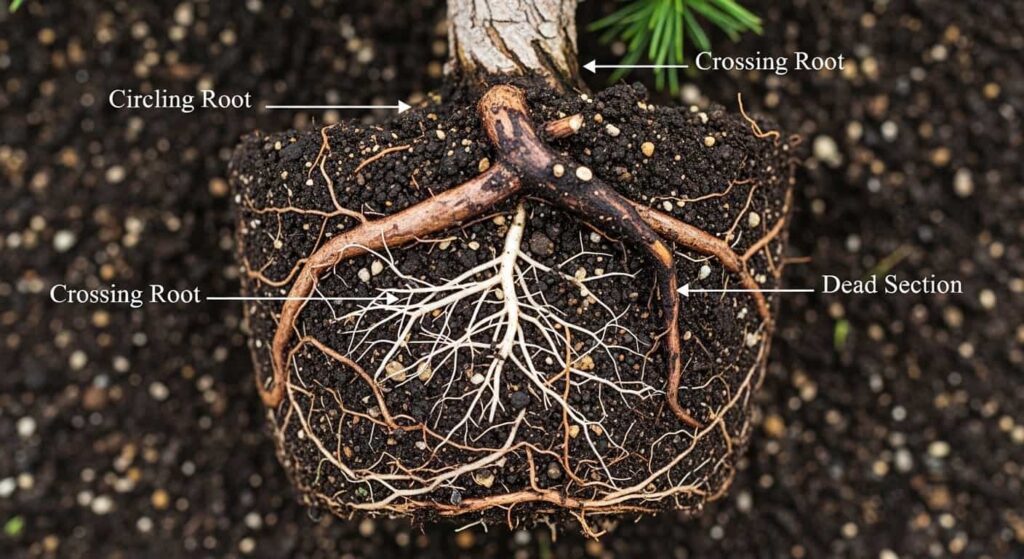
Inspect the root mass and identify:
- Circling roots — roots wrapping around the perimeter of the pot
- Downward-growing roots — tap-like roots heading straight down
- Crossing or girdling roots — roots pressing against each other
- Dead or rotting roots — dark, mushy, or hollow tissue
- Overly long surface roots that break radial symmetry
Step 5: Prune the Roots
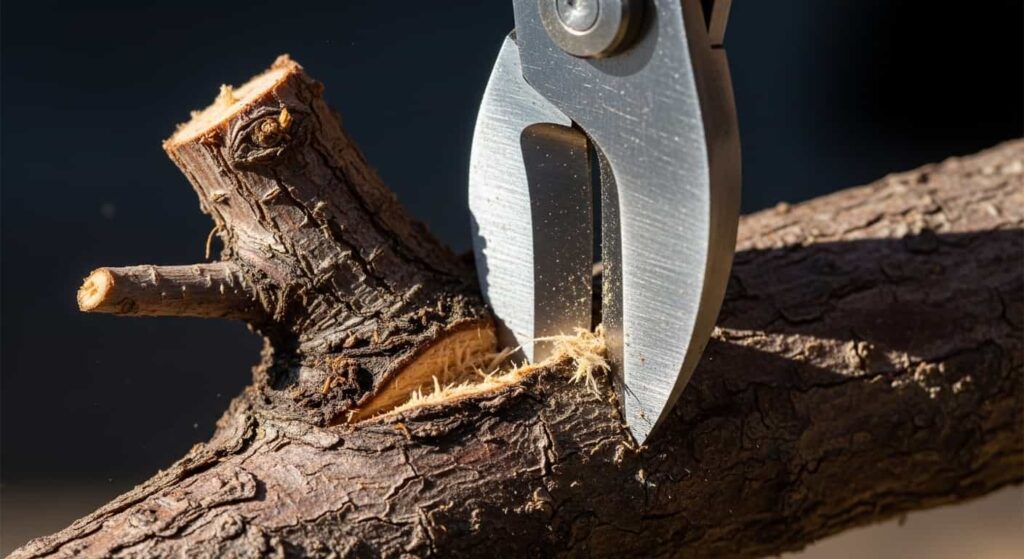
Starting from the bottom, use sharp scissors or root cutters to remove unwanted roots. Follow these principles:
- Cut cleanly — ragged cuts invite rot. One clean cut is better than multiple partial ones.
- Cut back to a fork — always leave a smaller lateral root when removing a larger one; never cut back to bare trunk.
- Preserve fine feeder roots — the white, thread-like roots near the trunk base are your most valuable assets. Protect them.
- Do not remove more than one-third of the total root mass in a single session on mature or borderline-healthy trees.
Step 6: Trim the Remaining Roots to Length
Even the roots you are keeping should be trimmed to fit the new pot with roughly 1–2 cm of clearance from the pot walls. This encourages lateral branching and prevents circling.
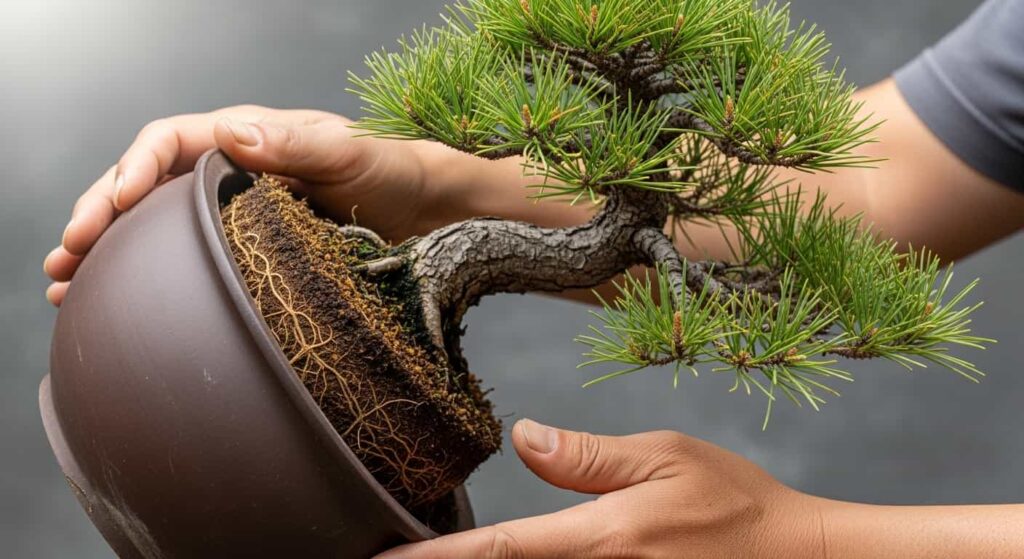
Step 7: Repot into Fresh Bonsai Soil
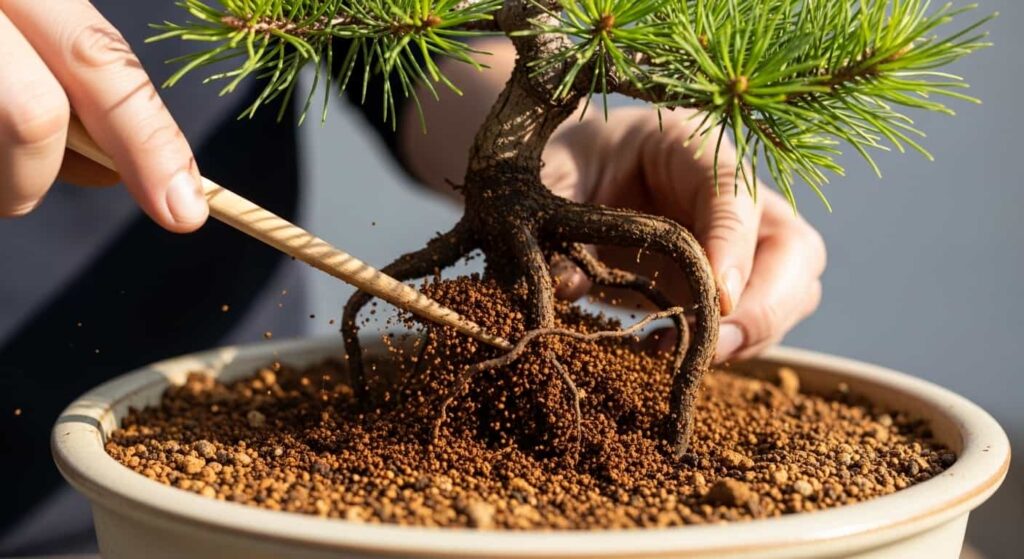
Place mesh over drainage holes, add a thin base layer of coarse akadama or pumice for drainage, position the tree, and begin working fresh soil into the roots using a chopstick. Eliminate air pockets — this is critical for root recovery. The soil column must have full contact with the root system.
Wire the tree securely through drainage holes so it doesn’t rock during root re-establishment.
How Much Root Can You Safely Remove?
This is the question most beginners get wrong — they either prune too little (achieving nothing) or too much (killing the tree).
General guidelines by tree condition:
| Tree Condition | Maximum Root Removal |
|---|---|
| Young, vigorous tree (under 10 years) | Up to 40–50% |
| Healthy, established tree | 30–35% |
| Mature exhibition tree | 20–25% |
| Weakened or recently styled tree | 10–15% (or skip entirely) |
A good test: after pruning, the remaining root system should still look substantial — not sparse and bare. If you can count the individual roots on one hand, you’ve gone too far.
Aftercare and Recovery
The work doesn’t end at repotting. Proper aftercare determines whether your pine thrives or declines after root pruning.
Watering
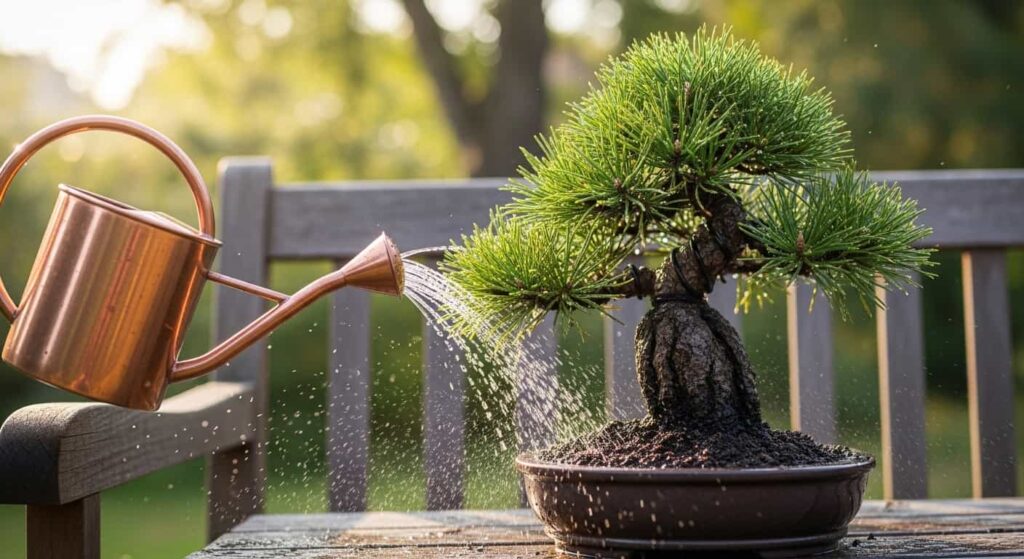
Water thoroughly immediately after repotting to settle the soil and hydrate the roots. For the first 4–6 weeks, water carefully — the tree needs consistent moisture but not waterlogged soil. Check soil moisture daily by pressing a finger 2 cm into the substrate.
Placement
Keep the tree in dappled shade for 4–6 weeks after root pruning. Avoid full sun, strong wind, or frost. A cold greenhouse or sheltered outdoor bench is ideal in early spring.
Fertilizing
Wait 6–8 weeks before applying any fertilizer. New feeder roots are delicate — concentrated fertilizer salts can burn them before they’ve hardened. When you do fertilize, start with a half-strength, low-nitrogen fertilizer.
Monitoring Recovery Signs

Healthy recovery looks like:
- Buds extending normally during spring flush
- New white root tips are visible at drainage holes within 6–8 weeks
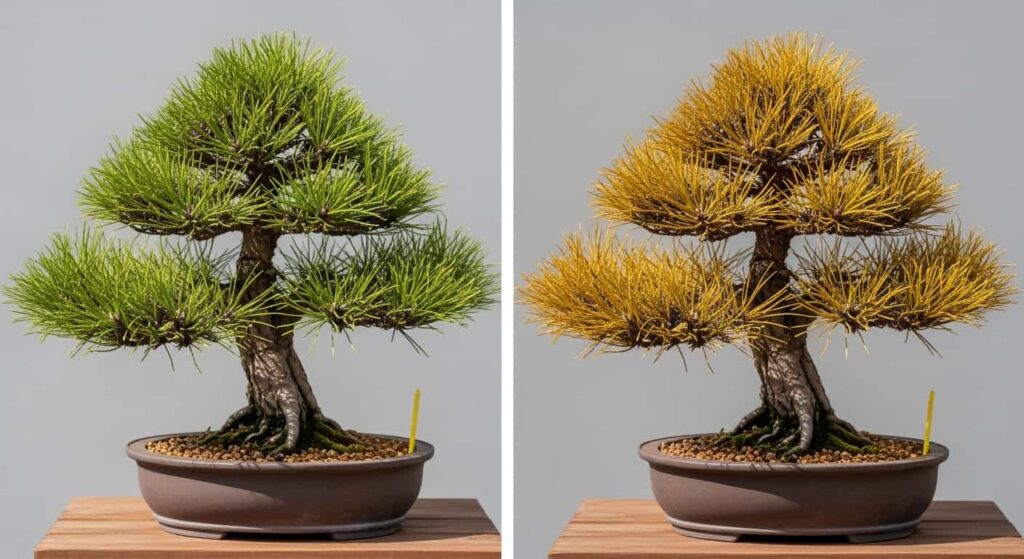
- No unusual yellowing of needles
If the tree stalls — no bud movement, yellowing needles, or soft trunk tissue — move it to deeper shade and reduce watering. Do not fertilize a struggling tree.
Common Mistakes to Avoid
1. Pruning at the wrong time. Pruning a pine during active bud extension or full summer heat puts the tree under double stress. Stick to the late-winter window unless you’re experienced.
2. Removing too many feeder roots. Fine white roots are the engine of recovery. Cutting them indiscriminately while chasing aesthetic goals leaves the tree with no ability to absorb water and nutrients.
3. Using dull or dirty tools, too, a dull blade crushes and tears root tissue instead of cutting it cleanly. Torn root ends are significantly more susceptible to rot.
4. Leaving air pockets in the soil. Air pockets prevent root-to-soil contact and create dry zones where roots die back. Always use a chopstick to work the soil thoroughly between roots.
5. Repotting into the same old soil. Old bonsai soil breaks down over time, losing its drainage properties. Always use fresh bonsai mix when root pruning — this is the whole point of the exercise.
6. Fertilizing too soon.n New, freshly cut roots cannot tolerate fertilizer salts. Burning the very roots you just worked to establish will set recovery back weeks.
Root Pruning vs. Repotting: Key Differences
These terms are often used interchangeably, but they are not the same thing.
| Root Pruning | Repotting | |
|---|---|---|
| Goal | Reduce root mass, improve structure | Refresh soil, provide more room |
| Root removal | Significant (20–50%) | Minimal (just circling/dead roots) |
| Frequency | Every 3–5 years for mature pines | Every 1–3 years depending on growth |
| Soil replacement | Full replacement | Full replacement |
| Recovery time | 6–10 weeks | 3–5 weeks |
Young pines in development may be repotted annually with minimal root work to encourage vigorous growth. Mature exhibition pines are root pruned on a longer cycle to maintain refinement.
FAQs
Can I root-prune a pine bonsai in autumn?
No. Autumn pruning leaves the tree without enough time to establish new roots before winter dormancy. Always prune in late winter or, for vigorous trees only, late summer.
My pine has very few roots — should I still prune?
No. If the existing root system is sparse or weak, skip root pruning entirely this cycle. Focus on building tree health through proper watering, fertilizing, and light management. Prune in a future season when the tree is stronger.
How do I know if I’ve pruned too much?
Signs of over-pruning appear within 2–4 weeks: needle yellowing, failure of buds to extend in spring, and wilting despite adequate water. If you suspect over-pruning, move the tree to deep shade immediately and stop all fertilizing.
Do different pine species need different root pruning approaches?
Yes, slightly. Japanese White Pine (Pinus parviflora) and Scots Pine (Pinus sylvestris) tolerate root work reasonably well when timed correctly. Japanese Black Pine (Pinus thunbergii) is the most forgiving and can be root pruned more aggressively. Mountain Pine (Pinus mugo) is slower-growing and should be pruned more conservatively.
Should I seal pruning cuts on roots?
For cuts on fine roots, no sealant is needed. For large, woody roots over 1 cm in diameter, a light application of cut paste can reduce desiccation, though it’s not universally agreed upon among practitioners.
Final Thoughts
Pine bonsai root pruning is not complicated — but it demands respect for timing, restraint in how much you remove, and patience during recovery. Follow the principles in this guide: prune in late winter, keep your tools sharp and clean, protect the feeder roots, and give the tree time to recover before pushing it with fertilizer or full sun.
A pine bonsai managed well at the roots will reward you with tight, refined growth above — the hallmark of a tree in its prime.