
Last Updated on March 16, 2026 by Indoor Plant Nook
Repotting a boxwood bonsai is one of the most impactful — and most misunderstood — aspects of bonsai care. Done correctly, root washing and repotting rejuvenate your tree, promote vigorous growth, and help you catch root problems before they become fatal. Done wrong, it can stress or even kill a healthy tree.
This guide walks you through everything: when to repot, how to safely wash the roots, how to choose the right soil and pot, and how to care for your boxwood bonsai in the critical weeks after repotting.
Why Root Washing and Repotting Matter for Boxwood Bonsai
Boxwood (Buxus spp.) is a popular bonsai species prized for its small, dense leaves, fine ramification, and remarkable tolerance for heavy pruning. However, like all bonsai, boxwood grown in containers gradually exhausts its soil. Over time:
- Soil breaks down and loses its ability to drain freely, leading to compaction and root rot.
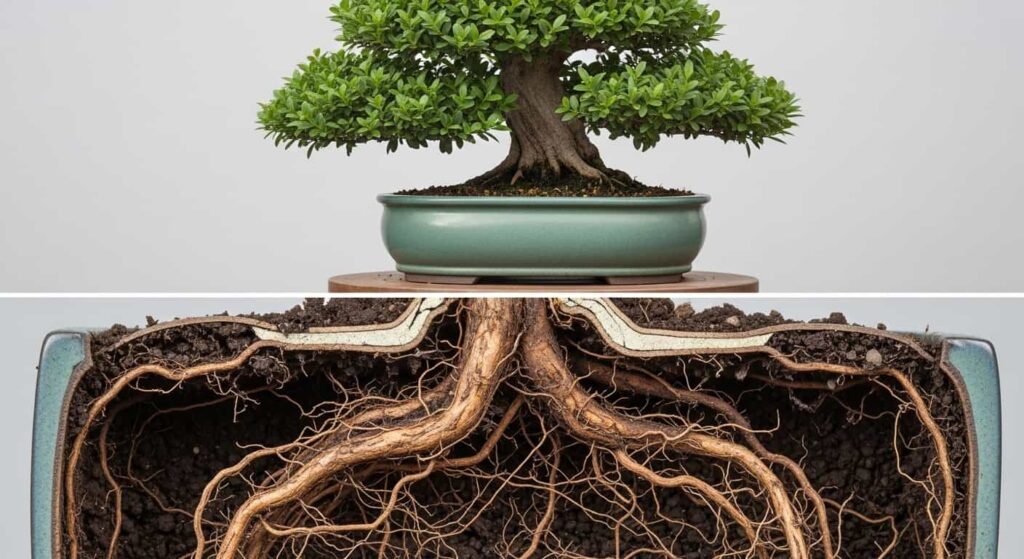
- Roots circle and bind, choking the tree’s own vascular system.
- Old organic matter accumulates, hosting fungal pathogens and harmful bacteria.
- Nutrient availability drops, even when you fertilize regularly.
Root washing — the process of removing all old soil from the root system — solves these problems in one session. Combined with fresh bonsai substrate and a well-sized pot, it gives your boxwood a clean slate and years of healthy, vigorous growth.
When to Repot Boxwood Bonsai
Timing is everything. Repotting at the wrong time can seriously damage your tree.
Best Time of Year
The ideal window for repotting boxwood bonsai is early spring, just as the buds begin to swell but before new leaves fully open. At this stage:
- The tree has energy stored in its roots and trunk from the previous season.
- New root growth is about to begin, meaning cut roots heal and regenerate quickly.
- The tree is not yet under the stress of active leaf growth.
In warmer climates (USDA Zones 7–9), this typically falls between late February and late March. In cooler zones, aim for mid-March through April.
Avoid repotting in summer (when the tree is under heat stress), in late autumn, or during freezing temperatures.
How Often to Repot
| Tree Age / Stage | Repotting Frequency |
|---|---|
| Young / developing trees | Every 1–2 years |
| Mature / refined trees | Every 2–4 years |
| Old, established trees | Every 4–5 years |
Signs Your Boxwood Bonsai Needs Repotting
- Roots are circling the bottom of the pot or emerging from drainage holes
- Water runs straight through the pot without being absorbed
- Soil dries out unusually fast between waterings
- Reduced vigor, yellowing leaves, or poor response to fertilization
- The tree can be lifted cleanly from the pot by grasping the trunk
Tools and Materials You Will Need
Before you begin, gather everything. You do not want to stop mid-process to hunt for supplies once the roots are exposed.
Tools:
- Root hook or chopstick (for loosening soil)
- Root rake
- Bonsai scissors or sharp concave cutters
- Spray bottle or gentle garden hose
- Bucket or large basin
- Mesh drainage screens
- Wire for securing the tree
- Clean workbench or potting mat
Materials:
- Fresh bonsai substrate (see soil section below)
- Appropriate bonsai pot
- Aluminum or copper tie-down wire
- Optional: rooting hormone powder or mycorrhizal inoculant
- Sphagnum moss (for covering exposed surface roots)
Choosing the Right Bonsai Soil for Boxwood
Soil choice is critical. Boxwood bonsai thrive in a fast-draining, coarse, inorganic substrate that holds just enough moisture without becoming waterlogged.
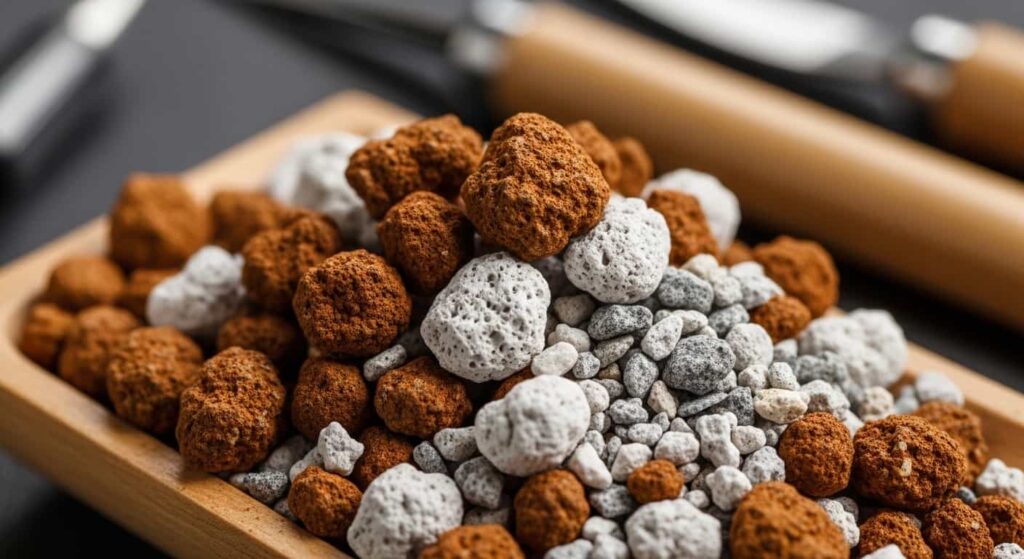
Recommended Mix
A reliable all-purpose mix for boxwood bonsai:
- Akadama – 50% (fired Japanese clay; retains moisture and nutrients while breaking down slowly)
- Pumice – 25% (volcanic rock; improves drainage and aeration)
- Decomposed granite or Kiryu – 25% (adds structure and drainage)
For beginners or humid climates, increase pumice to 40% and reduce akadama to 35%. In dry climates, a higher akadama ratio retains more moisture between waterings.
Avoid peat-based commercial potting mixes. They compact quickly, retain excessive moisture, and suffocate bonsai roots.
Step-by-Step: Root Washing Your Boxwood Bonsai
Step 1 — Water the Tree the Day Before
Give your boxwood a thorough watering 12–24 hours before repotting. Hydrated roots are more pliable, less brittle, and more resistant to transplant shock than dry roots.
Step 2 — Remove the Tree from Its Pot
Run a root knife or thin spatula around the inside edge of the pot to break any adhesion. Tilt the pot and gently ease the tree out. If it is stuck, do not pull by the trunk — tap the pot’s sides gently to loosen.
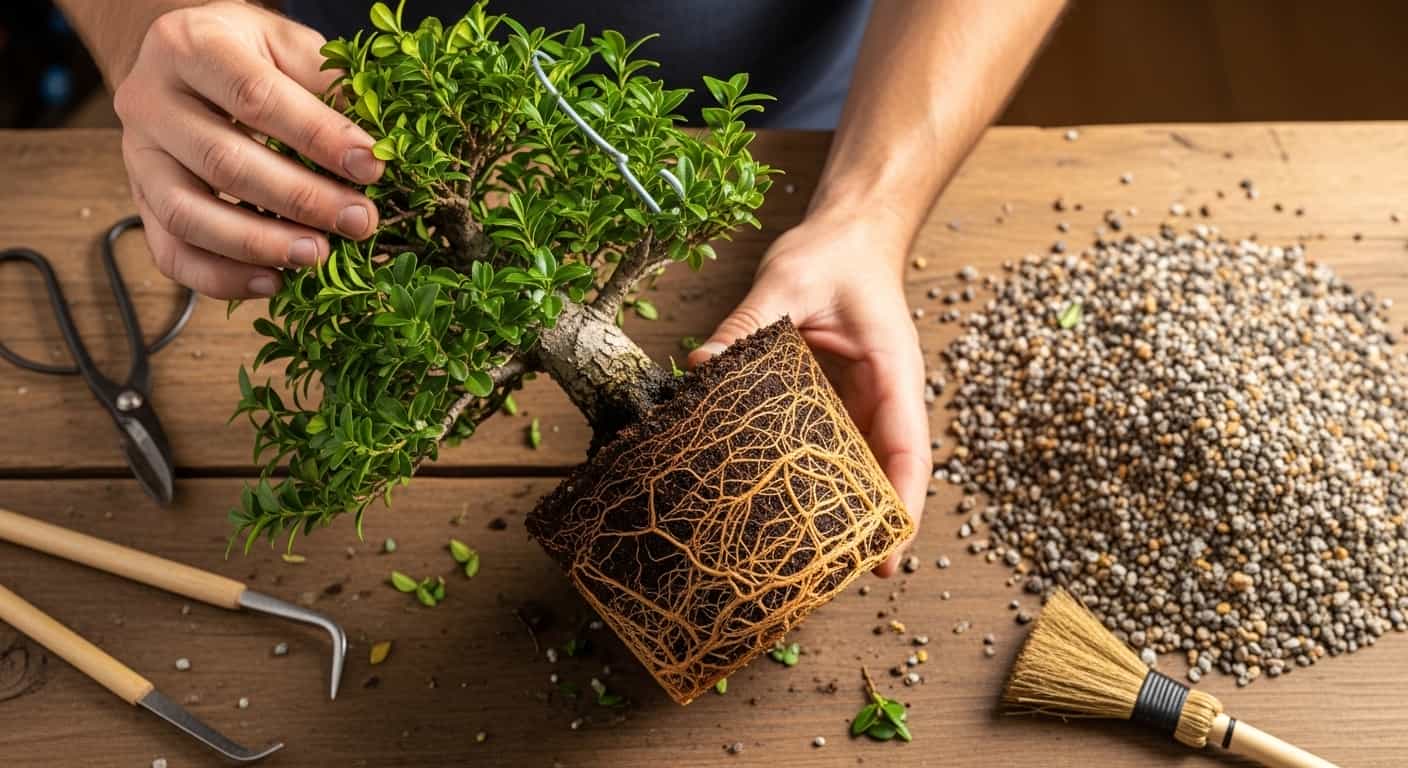
Step 3 — Remove Excess Soil
Use a root hook or chopstick to carefully comb away soil from the root mass, working from the outside inward. At this stage, you are simply loosening the bulk of the old substrate — do not force tangled roots apart aggressively yet.
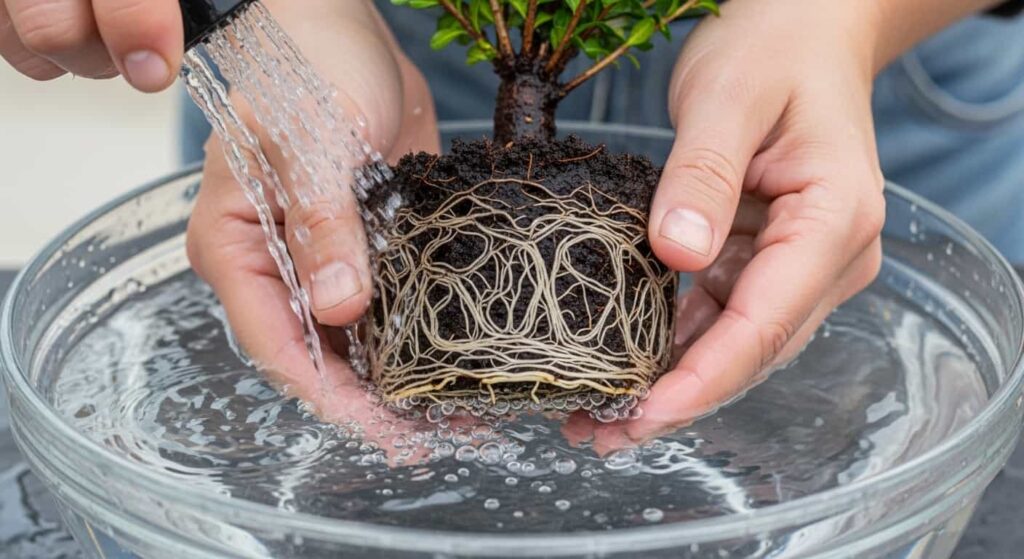
Step 4 — Root Washing
Fill a clean bucket or basin with room-temperature water. Submerge the root ball and gently agitate it. Use your fingers or a soft brush to wash away remaining soil particles. Change the water as it becomes muddy and repeat until the roots are completely clean.
Key tips for root washing:
- Use tepid water, not cold tap water — cold water can shock fine roots.
- Work gently but thoroughly — you want to see all roots clearly before cutting.
- Inspect for root rot (dark, mushy, foul-smelling roots) as you work.
Step 5 — Inspect and Assess the Root System

With the roots clean, take time to assess what you are working with:
- Healthy roots are firm, white or light tan, and flexible.
- Dead roots are dark, dry, hollow, and snap easily.
- Rotted roots are black, mushy, and may smell unpleasant.
- Circling roots wrap around the base of the trunk and can girdle the tree over time.
Step 6 — Prune the Roots
This is the most critical and most feared step. Root pruning is safe and necessary — provided you follow a key rule: never remove more than one-third of the total root mass in a single repotting.
- Remove all dead, rotted, and diseased roots completely, cutting back to healthy tissue.
- Trim excessively long roots to encourage compact, fine root development closer to the trunk.
- Remove any circling or crossing roots that could damage the nebari (surface root structure).
- Trim the bottom of the root pad flat to sit cleanly in the new pot.
Use clean, sharp scissors for fine roots and concave cutters for thicker roots. Clean cuts heal faster and reduce the risk of disease.
If the tree was severely root-bound or is weak, be conservative. Remove only dead material and circling roots, and save more aggressive pruning for the next repotting cycle.
Choosing and Preparing the New Pot
Selecting the right pot is both an aesthetic and a horticultural decision.
Pot Size Guidelines
- For developing trees, a slightly larger pot (about 1–2 inches wider than the current pot) encourages faster growth and stronger root development.
- For refined or display trees, use a pot proportional to the tree — roughly two-thirds the height of the tree in length, and about as deep as the trunk diameter at the base.
Pot Material
- Unglazed ceramic (the traditional choice) breathes well and regulates soil temperature.
- Glazed ceramic retains moisture slightly longer — useful in dry climates.
- Plastic training pots are fine for trees in development and reduce weight.
Preparing the Pot
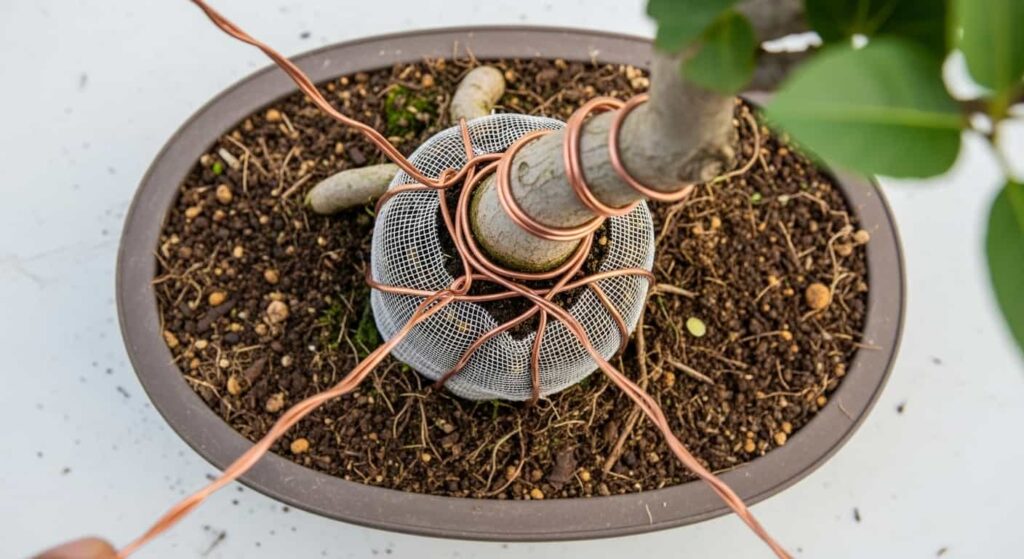
- Cover drainage holes with mesh screens secured with wire passed through the holes.
- Thread tie-down wires through the drainage holes (you will use these to anchor the tree in place after potting).
- Add a thin layer of coarse drainage material (large pumice or granite grit) to the bottom of the pot — about 1 cm deep.
- Add a base layer of your fresh bonsai substrate, mounded slightly in the center so the tree will sit at the correct height and angle.
Repotting: Placing the Tree
Step 1 — Position the Tree
Set the tree into the pot and adjust its position — front, angle, and height. The tree should sit with its nebari (surface roots) at or just above the soil surface. The trunk should lean or angle as intended for the composition.
Take your time here. Once you add soil and secure the wires, repositioning becomes much harder.
Step 2 — Secure the Tree
Thread the tie-down wires up through the drainage holes and twist them firmly over the root mass. A properly secured tree will not rock or shift. This is not optional — movement during the healing phase tears newly forming root hairs and dramatically slows recovery.
Step 3 — Add Fresh Substrate
Work fresh bonsai substrate into the root system using a chopstick, gently poking it down to fill all air pockets. Work methodically around the entire pot. Air pockets left in the soil prevent root-to-soil contact and allow rot to develop.
Bring the soil level to just below the pot rim, leaving space for water to pool during irrigation.
Step 4 — Surface Treatment
Optionally, top-dress the soil surface with fine akadama or moss. A thin layer of sphagnum moss helps retain surface moisture and reduces erosion during watering — useful in the first weeks after repotting when the root system is compromised.
Post-Repotting Care for Boxwood Bonsai
The weeks following repotting are the most critical period. Your boxwood is vulnerable — handle it with care.
Watering After Repotting
Water thoroughly immediately after repotting, until water flows freely from the drainage holes. This settles the soil and eliminates remaining air pockets.
For the first 2–4 weeks, keep the soil consistently moist but never waterlogged. The tree has fewer roots than before and cannot absorb as much water, but it still needs moisture to support the leaves and fuel root regeneration.
Check soil moisture daily by pressing a finger or chopstick into the soil. Water when the top centimeter feels barely dry.
Light and Placement
Place the repotted tree in a sheltered location with bright, indirect light for the first 2–4 weeks. Avoid:
- Full direct afternoon sun (causes leaf scorch on a stressed tree)
- Strong drying winds
- Frost or freezing temperatures
Once new growth appears and the tree shows signs of vigor, gradually move it back to its normal position.
Fertilizing After Repotting
Do not fertilize for at least 4–6 weeks after repotting. Fresh akadama-based substrate contains no nutrients by design, but the roots need time to recover before they can safely process fertilizer. Fertilizing too soon burns vulnerable new root tips.
After the recovery period, begin with a balanced, low-nitrogen fertilizer (such as a 10-10-10 or 5-5-5 formulation) applied at half strength. Gradually increase frequency and strength as the tree resumes normal growth.
Protecting from Late Frost
If you repotted in early spring and a frost is forecast, shelter the tree in a garage, greenhouse, or under frost fleece overnight. A newly repotted bonsai is far more vulnerable to freezing than an established tree.
Common Mistakes to Avoid
Repotting at the wrong time. Summer repotting — especially during a heat wave — puts extreme stress on a tree with a reduced root system. Always aim for early spring.
Removing too many roots. Even with a healthy tree, removing more than one-third of the root mass in a single session risks severe transplant shock. Be conservative, especially with older or stressed trees.
Using the wrong soil. Dense, peat-based potting mixes suffocate bonsai roots. Always use a fast-draining, coarse bonsai substrate.
Not securing the tree in its pot. An unsecured tree rocks in the wind, breaking new root hairs. Use a wire to anchor the tree firmly.
Fertilizing too soon. Fresh cuts on roots are open wounds. Fertilizer salts damage these wounds and delay recovery.
Skipping aftercare. The weeks after repotting define whether the operation succeeds. Attentive watering, appropriate shade, and protection from extremes are non-negotiable.
Frequently Asked Questions
Can I root wash an old or weak boxwood bonsai?
Proceed with extra caution. Limit root pruning to dead and rotted material only. Consider whether the tree is strong enough for full root washing — sometimes a partial soil refresh (removing the outer third of the root ball and replacing it with fresh substrate) is safer for weak trees.
My boxwood dropped some leaves after repotting. Is that normal?
Minor leaf drop immediately after repotting is normal and not cause for alarm. The tree is shedding some foliage to balance the reduced root capacity. As long as new buds are forming and remaining leaves are healthy, recovery is underway.
How do I know the repotting was successful?
Within 4–8 weeks, you should see new buds opening and fresh leaf growth emerging. Once new growth is actively extending, your boxwood has successfully established itself in its new pot.
Can I hard-prune the branches at the same time as repotting?
It is best to avoid heavy pruning at the same time as repotting. The combined stress of root reduction and branch pruning can overwhelm the tree. If both are needed, do the root work first, allow a full growing season for recovery, and perform heavy branch pruning the following year.
Final Thoughts
Root washing and repotting a boxwood bonsai is a deeply satisfying process once you understand the why and the how. You are not just changing soil — you are renewing the tree’s foundation, reading its health firsthand, and setting it up for years of refined development.
Respect the timing, work gently, choose quality substrate, and commit to attentive aftercare. Your boxwood will reward the effort with vigorous growth, beautiful fine ramification, and a long, healthy life as a bonsai.